
Pine cones are nature’s little treasures, offering endless possibilities for crafting, decorating, and gardening. But before you jump into using them, it’s essential to prepare them properly. One surprising yet effective method is baking them in the oven. This simple step not only enhances their usability but also ensures they are free of pests, moisture, and sap.
In this detailed guide, we’ll explore why baking pine cones is beneficial, step-by-step instructions on how to do it, and creative ways to use baked pine cones in your home and garden.
Why Bake Pine Cones?
Pine cones are abundant in nature, making them a versatile and eco-friendly resource. However, they often come with hidden hitchhikers like insects or sticky residues that can make them difficult to handle. Baking pine cones solves these issues and unlocks their full potential.
Benefits of Baking Pine Cones
- Pest Control: Baking eliminates insects, larvae, and other pests that may be hiding inside.
- De-Sapping: The heat removes sticky sap, making the pine cones cleaner to handle.
- Drying: Baking removes moisture, preventing mold or decay when used indoors.
- Enhanced Appearance: The heat opens up the scales, giving pine cones a fuller, more attractive look.
- Versatility: Clean, dry pine cones are perfect for crafts, decorations, and gardening projects.
Step-by-Step Guide to Baking Pine Cones
Follow these simple steps to prepare pine cones for any project.
Step 1: Gather Pine Cones
Collect pine cones from your yard, local park, or forest. Look for ones that are intact and free of visible damage or excessive dirt.
Pro Tip: Choose pine cones that are already dry and open for the best results.
Step 2: Clean the Pine Cones
- Rinse the pine cones under running water to remove dirt, dust, and loose debris.
- Soak them in a bucket of water mixed with a bit of vinegar for 20–30 minutes to help disinfect them.
- Shake off excess water and let them air dry for a few hours.
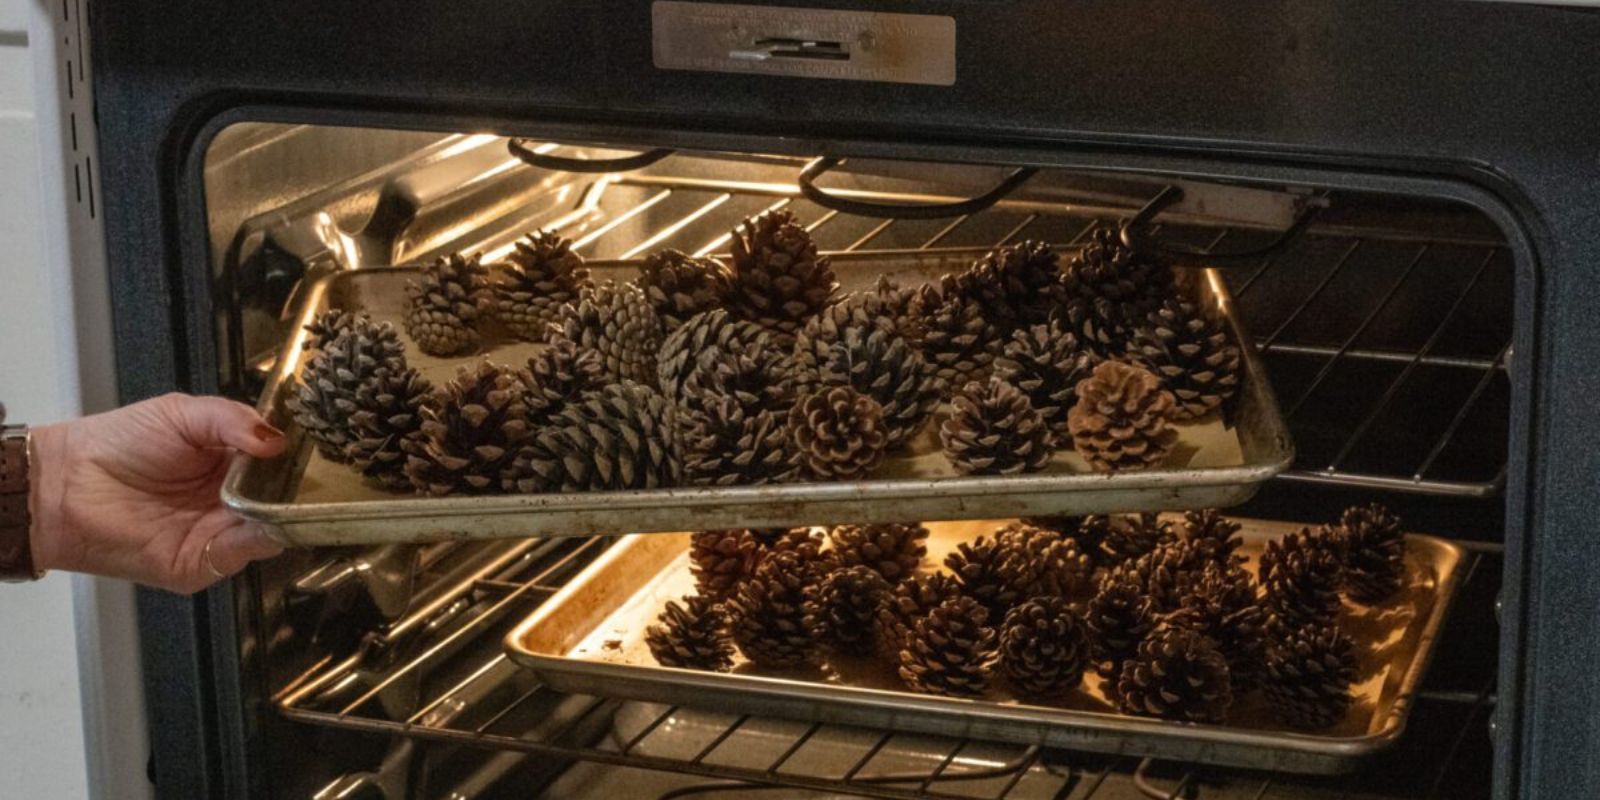
Step 3: Preheat the Oven
Set your oven to 200°F (93°C). This temperature is sufficient to kill pests and dry out the pine cones without burning them.
Step 4: Prepare the Baking Tray
- Line a baking sheet with aluminum foil or parchment paper to catch any sap that might drip.
- Arrange the pine cones in a single layer, ensuring they are not touching each other.
Step 5: Bake the Pine Cones
- Place the tray in the oven and bake for 20–30 minutes.
- Keep an eye on them to ensure they don’t scorch. If you notice any smoke, reduce the temperature.
Important: Never leave the oven unattended during this process, as pine cones are flammable.
Step 6: Cool the Pine Cones
Once baked, remove the pine cones from the oven and let them cool completely on the tray. This step allows them to harden and ensures they’re safe to handle.
Creative Uses for Baked Pine Cones
Now that your pine cones are clean and ready, here are some fantastic ways to use them:
1. Home Décor
- Centerpieces: Arrange pine cones in bowls, baskets, or on trays for a rustic, natural look.
- Holiday Decorations: Paint or glitter your pine cones to use as ornaments, wreath accents, or garlands.
- Fireplace Fillers: Add baked pine cones to your fireplace for a decorative touch (though not for burning).
2. Craft Projects
- DIY Crafts: Use pine cones to create unique crafts like animals, floral arrangements, or candle holders.
- Kids’ Activities: Let children paint or decorate pine cones for fun, hands-on projects.
3. Gardening Uses
- Mulch: Crushed pine cones make excellent mulch, helping to retain soil moisture and suppress weeds.
- Compost: Pine cones can be shredded and added to compost for organic gardening.
- Bird Feeders: Coat pine cones with peanut butter and birdseed to create eco-friendly bird feeders.
4. Aromatherapy
Infuse your baked pine cones with essential oils like cinnamon, clove, or eucalyptus for a natural, fragrant home freshener.
5. Fire Starters
If you have a fireplace or outdoor fire pit, pine cones can serve as natural fire starters. Ensure they are completely dry for best results.
Safety Tips
- Flammability: While baked pine cones are great for decoration, avoid placing them near open flames unless they’re specifically prepared as fire starters.
- Oven Monitoring: Always keep a close eye on the oven while baking pine cones to prevent accidents.
- Ventilation: Ensure good ventilation while baking to avoid any lingering odors from sap.
Why Choose Pine Cones for Gardening and Décor?
Pine cones are a sustainable and renewable resource, making them an excellent choice for eco-conscious individuals. They are readily available, free, and biodegradable, reducing your environmental impact while adding natural beauty and utility to your space.
Troubleshooting Common Issues
- Sticky Pine Cones: If sap remains after baking, use a mild solvent like rubbing alcohol to remove it.
- Smoke During Baking: Reduce the temperature to 175°F (79°C) and bake for a longer time to prevent burning.
- Insect Residue: Repeat the baking process if you notice any remaining pests.
Conclusion
Baking pine cones in the oven is a simple, effective way to prepare them for various uses. Whether you’re crafting, decorating, gardening, or simply looking for a unique project, this method ensures your pine cones are clean, safe, and ready to shine.
So, gather up some pine cones, stick them in the oven, and unlock their full potential!
Have you tried baking pine cones before? Share your favorite ways to use them in the comments below! Let’s spark some creative ideas.
#PineConeProjects #GardeningTips #EcoCrafts #RusticDecor #SustainableLiving #GardenHacks #HomeDIY #NaturalCrafts