
Introduction
Transforming discarded items into charming water features is a fantastic way to enhance your garden’s ambiance while embracing sustainability. Upcycled fountains not only serve as focal points in your outdoor space but also provide an eco-friendly solution for repurposing old or unused materials. In this guide, we’ll walk you through the process of creating your own DIY water feature using upcycled materials, offering practical tips and inspiration to help you get started.
1. Choose Your Materials
Selection
The first step in creating an upcycled fountain is selecting appropriate materials. Almost anything that can hold water and has some structural integrity can be transformed into a fountain. Here are some common items that work well:
- Old Pots and Planters: Ceramic or terracotta pots, metal or plastic planters, and even broken flower pots can be used as the base of your fountain.
- Birdbaths: Repurpose an old birdbath that has seen better days, or use it as a decorative piece in your new fountain design.
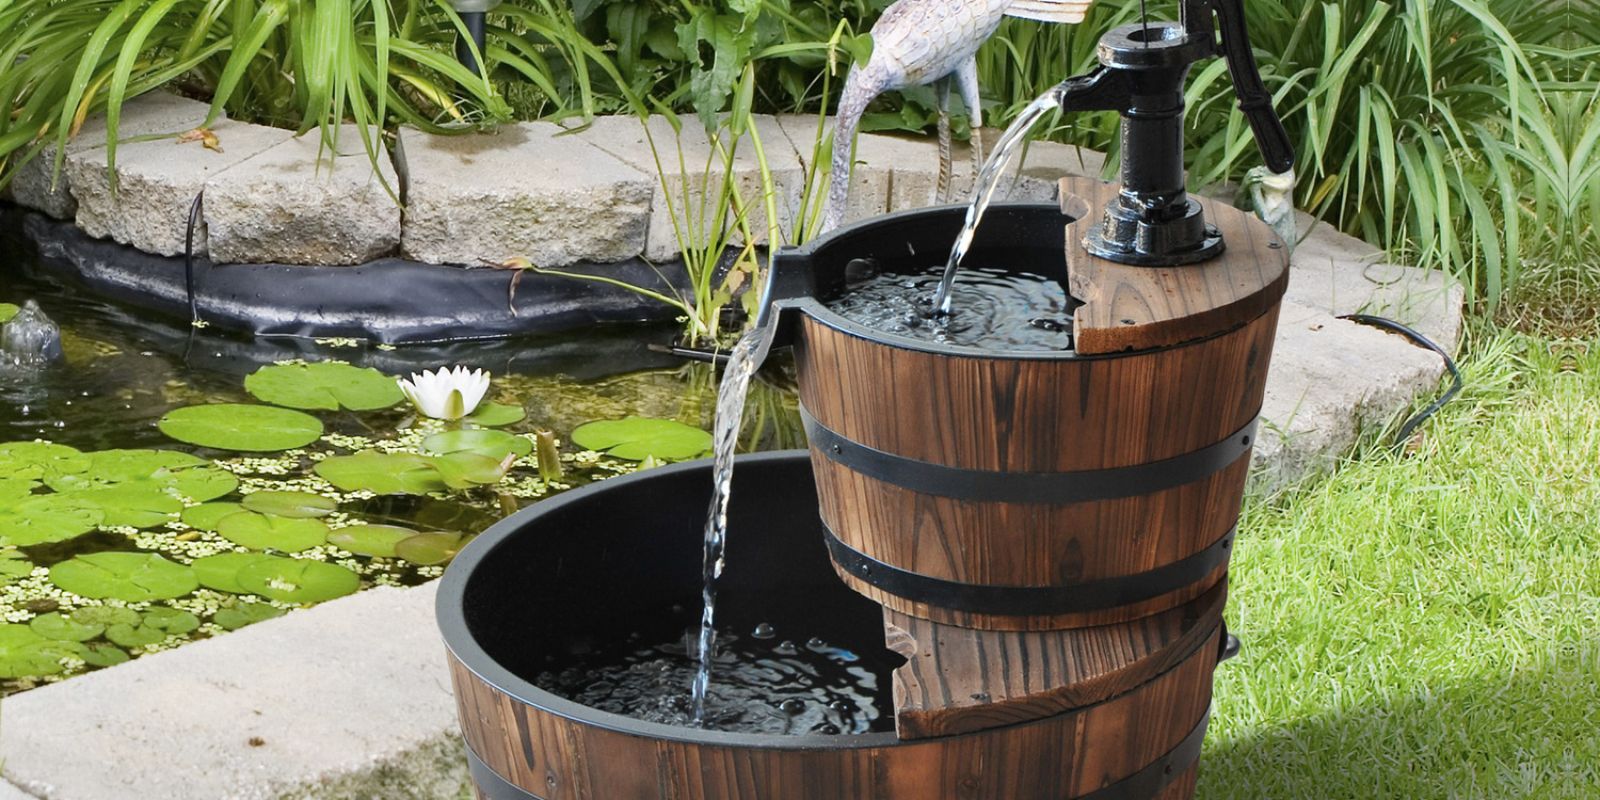
- Barrels and Buckets: Wooden barrels or metal buckets can be converted into beautiful, rustic water features.
- Plumbing Parts: Old pipes, faucets, and sinks can be creatively incorporated into your design for a unique, industrial look.
Preparation
Once you have selected your materials, clean them thoroughly to remove any dirt, debris, or remnants of their previous use. For items that need repair, such as cracks in pots or leaks in barrels, use waterproof sealants or adhesives to ensure they can hold water.
2. Design Your Fountain
Concept
Before you begin assembling your fountain, take some time to plan the design. Consider the following aspects:
- Size and Scale: Determine the size of your fountain based on the space available in your garden. Smaller features work well in compact spaces, while larger designs can become a central feature in more expansive areas.
- Water Flow: Decide how you want the water to flow. Will it cascade from one level to another, or will it bubble up from the center? Sketching out your design will help you visualize how the water will interact with the different components.
- Style: Choose a style that complements your garden’s aesthetic. Whether you prefer a rustic, modern, or whimsical look, your design should reflect your personal taste and blend seamlessly with your existing garden decor.
Components
Think about the additional components you’ll need:
- Pump: A submersible pump is essential for circulating water in your fountain. Choose a pump with the appropriate flow rate for the size of your fountain to ensure a steady and controlled water flow.
- Tubing: Flexible tubing connects the pump to the various levels of the fountain. Ensure that the tubing is long enough to reach from the pump to the top of your design.
- Decorative Features: Consider adding decorative elements like stones, pebbles, or plants to enhance the visual appeal of your fountain.
3. Assemble the Fountain
Base
Start by setting up the base of your fountain. This could be an old pot, barrel, or any container that will act as the reservoir for your water. If you’re using a pot or planter, make sure it has a drainage hole that can be sealed or modified to accommodate the pump.
Install Pump
Place the pump at the bottom of the reservoir. Secure it in place using waterproof adhesive or by creating a stable platform. Attach the tubing to the pump, ensuring it is connected tightly and directed towards the top of the fountain.
Secure Components
Assemble the various parts of your fountain according to your design. Position the top container or feature where the water will be dispensed. Ensure all components are securely attached and water-tight to prevent leaks.
4. Add Decorative Touches
Personalize
Add your personal touch to the fountain by incorporating decorative elements. For a natural look, use river stones, broken tiles, or driftwood. Arrange these items around the base or within the fountain to create visual interest.
Plants
Consider adding aquatic plants or small potted plants around the fountain to enhance its beauty and provide additional color and texture. Plants like water lilies or ferns can thrive in the moist environment around the fountain.
Test and Adjust
Fill the fountain with water and turn on the pump. Observe the water flow and make any necessary adjustments to the tubing or pump settings to achieve the desired effect. Ensure that there are no leaks and that the water is flowing smoothly.
5. Maintain Your Fountain
Cleaning
Regular maintenance is key to keeping your fountain looking its best. Clean the fountain periodically to remove algae, debris, and mineral deposits. Use a soft brush and mild soap to scrub the interior surfaces, and rinse thoroughly before refilling with fresh water.
Seasonal Care
Depending on your climate, you may need to take extra precautions to protect your fountain from harsh weather conditions. In colder climates, consider draining the fountain and storing it indoors during winter months to prevent damage from freezing temperatures.
Motivational Sentence
Embrace your creativity and turn forgotten objects into stunning water features with upcycled fountains—these DIY projects not only add beauty to your garden but also celebrate sustainability and resourcefulness in style.