
Gardening enthusiasts and environmentalists alike are always on the lookout for ways to combine creativity with sustainability. One easy, low-cost, and eco-friendly way to start a home garden is by reusing everyday items. One such item that can easily be repurposed into a functional and beautiful garden container is the old milk bottle. If you’re wondering how to transform these plastic or glass bottles into a thriving herb garden, you’re in the right place!
This article will guide you through the process of turning your old milk bottles into a unique herb garden that not only saves space but also promotes sustainability. Whether you’re a beginner or a seasoned gardener, this project is an exciting way to bring the beauty of fresh herbs into your home, while also giving a second life to waste materials.
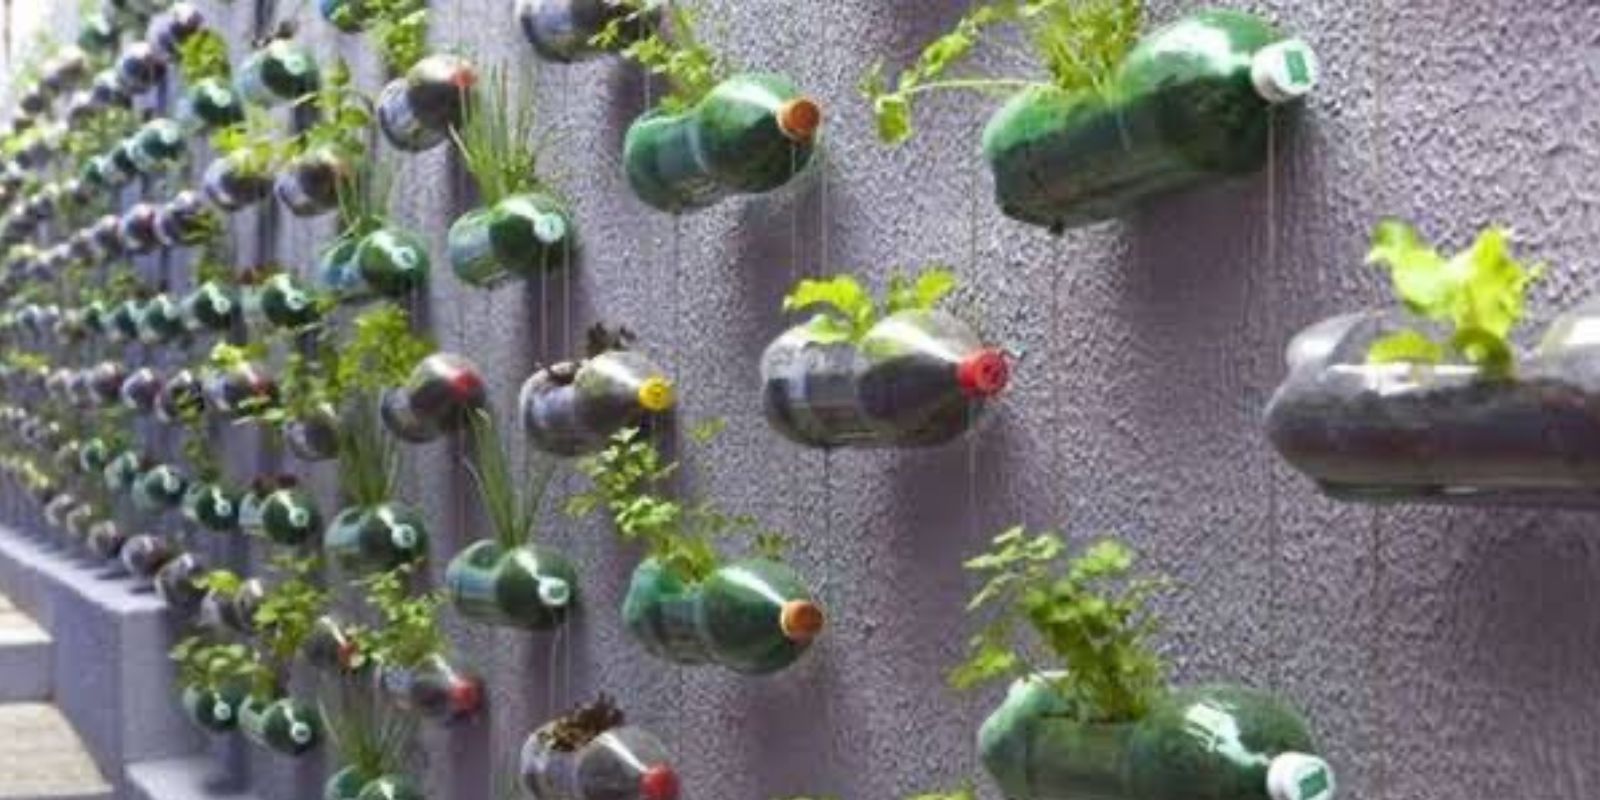
Why Use Old Milk Bottles for Gardening?
Before diving into the step-by-step process of creating your herb garden, let’s first explore why old milk bottles are an excellent choice for planting. Here are a few key benefits:
- Eco-Friendly Gardening: By reusing old milk bottles, you’re reducing plastic waste and giving these containers a second life. This is a great way to practice sustainability, a principle that is becoming increasingly important in today’s world.
- Space-Saving: If you live in a small apartment or have limited space, milk bottles can be transformed into compact planters that don’t take up too much room. You can hang them, line them along windowsills, or even group them together on a small patio or balcony.
- Cost-Effective: Instead of spending money on expensive planters, you can use what you already have at home. Old milk bottles are free to collect and can easily be found in most households.
- Customizable and Creative: Milk bottles come in various sizes and materials, from plastic to glass, allowing you to get creative with your designs. You can decorate them with paint, twine, or fabric to add a personal touch to your garden.
Choosing Your Herbs
The first step in creating your herb garden is choosing which herbs you’d like to grow. Herbs are generally easy to care for and are a perfect fit for this DIY project. Some of the most popular herbs to grow in small containers like milk bottles include:
- Basil: A favorite in many kitchens, basil is perfect for adding to pasta, salads, and sauces.
- Mint: Known for its refreshing taste, mint thrives in containers and can be used for teas, mojitos, and desserts.
- Thyme: A versatile herb that adds a fragrant flavor to many dishes, thyme does well in compact spaces.
- Rosemary: This hardy herb is perfect for adding flavor to meats, potatoes, and roasted vegetables.
- Parsley: A common garnish and versatile herb, parsley is easy to grow and perfect for a beginner’s garden.
- Cilantro: Also known as coriander, cilantro is great for adding flavor to Mexican, Indian, and Asian dishes.
- Chives: Mild in flavor, chives are a great addition to salads, dips, and egg dishes.
Once you’ve decided which herbs you’d like to grow, you can proceed with preparing your milk bottles.
Materials You’ll Need
Before you get started, gather the following materials:
- Old milk bottles (plastic or glass)
- Scissors or a utility knife
- Potting soil (preferably organic)
- Herb seedlings or seeds
- Gravel or small stones (for drainage)
- A drill or nail and hammer (for making drainage holes)
- Paint, twine, or fabric for decoration (optional)
Step-by-Step Guide to Creating Your Herb Garden
- Prepare the Milk Bottles:
Start by cleaning your milk bottles thoroughly. Remove any labels or adhesive residues from the bottles. If you’re using plastic milk bottles, ensure that they are strong enough to hold the soil and plants. If you’re using glass milk bottles, they are already sturdy, so no worries about that. - Cutting the Milk Bottles:
If you’re using large milk bottles, you may want to cut them in half to make smaller planters. Use a sharp pair of scissors or a utility knife to carefully cut the bottles. Alternatively, you can leave them whole if you prefer larger containers. Just make sure to leave enough height for the plant roots to grow. - Making Drainage Holes:
Herbs need good drainage to thrive, and milk bottles are not naturally designed with drainage holes. To solve this, use a nail and hammer or a drill to poke a few small holes at the bottom of the bottles. This will allow excess water to drain out, preventing your herbs from drowning. - Adding Gravel for Drainage:
To further promote good drainage, place a layer of small stones or gravel at the bottom of each milk bottle before adding soil. This helps prevent the drainage holes from getting clogged and ensures that water can flow freely. - Filling the Bottles with Soil:
Next, fill each milk bottle with potting soil. Be sure to use high-quality soil to give your herbs the best chance of thriving. Fill the bottles almost to the top, leaving a little room for watering. Press the soil gently to remove any air pockets. - Planting Your Herbs:
Now it’s time to plant your herbs! If you’re using seedlings, gently remove the plant from its container and place it in the soil. If you’re using seeds, sprinkle them over the soil and lightly cover them with more soil. Be sure to follow the specific instructions for each herb regarding planting depth and spacing. - Watering the Plants:
Water your newly planted herbs thoroughly, but avoid overwatering. Herbs generally prefer to dry out between waterings, so make sure the soil feels dry to the touch before watering again. Place the milk bottles in an area with good sunlight, as most herbs need about 6-8 hours of sunlight a day to grow well. - Maintaining the Herb Garden:
To ensure your herbs stay healthy, regularly check for pests and remove any weeds that may crop up. You can also prune your herbs as needed to encourage fresh growth and keep them looking tidy. As the herbs grow, you may need to transplant them into larger containers if they outgrow the milk bottles. - Decorating Your Milk Bottles (Optional):
If you’d like to add a personal touch to your herb garden, consider decorating the milk bottles. You can paint them in bright colors, wrap them in twine or fabric, or even add labels with the names of the herbs. This not only makes your garden more attractive but also helps you easily identify your plants.
Benefits of a Milk Bottle Herb Garden
Once your milk bottle herb garden is up and running, you’ll soon see the benefits:
- Fresh Herbs at Your Fingertips: Having a steady supply of fresh herbs on hand makes it easy to enhance your cooking. Whether you’re preparing a simple salad or a complex dish, you’ll always have flavorful ingredients available.
- Low Maintenance: Herbs are generally easy to care for, requiring minimal attention once established. This makes them perfect for beginners or busy individuals who want a garden without a lot of fuss.
- Cost-Effective: Growing your own herbs saves you money on store-bought herbs, which can often be expensive, especially if you use them regularly. Plus, you can harvest your herbs fresh whenever you need them.
- Sustainability: Repurposing old milk bottles as planters is a great way to practice sustainable gardening. By reusing plastic or glass, you reduce waste and contribute to a more eco-friendly lifestyle.
Conclusion
Creating a milk bottle herb garden is a fun, cost-effective, and sustainable way to grow fresh herbs in your home. Not only does it help you reduce waste and repurpose everyday materials, but it also gives you a space-saving way to enjoy homegrown herbs. Whether you’re a seasoned gardener or just starting out, this DIY project is a perfect opportunity to try something new while enjoying the benefits of fresh herbs in your kitchen.
So, gather your old milk bottles, get creative, and start growing your herb garden today! Happy gardening! 🌱