
Introduction
In the world of gardening, space constraints can often limit what and how much you can grow. However, vertical gardening offers an ingenious solution, especially for those with limited space or urban dwellers looking to bring a touch of greenery into their lives. DIY vertical planters are a fantastic way to maximize your gardening area by using vertical space to grow herbs and vegetables. This article will guide you through the process of creating your own vertical planters, from design to planting, helping you to enjoy a thriving garden no matter how small your space.
The Benefits of Vertical Gardening
Before diving into the construction of vertical planters, let’s explore why vertical gardening is beneficial:
- Space Efficiency: Vertical planters make use of wall and fence space, allowing you to grow more plants in a compact area.
- Improved Access: Raised planters and wall-mounted systems can make harvesting and maintenance easier, reducing the need to bend or kneel.
- Enhanced Airflow: Plants in vertical planters often benefit from better air circulation, reducing the risk of disease.
- Aesthetic Appeal: Vertical gardens can be visually stunning, adding a lush, green element to your home or garden.
Planning Your Vertical Planter
The first step in creating a vertical planter is to decide on a design that fits your space and needs. Here are a few popular options:
- Wall-Mounted Planters: Ideal for small spaces like balconies or patios, wall-mounted planters can be made from a variety of materials and attached directly to your wall.
- Hanging Pockets: These are versatile and can be hung from fences, railings, or walls. They are often made of fabric or plastic and are great for growing herbs and small veggies.
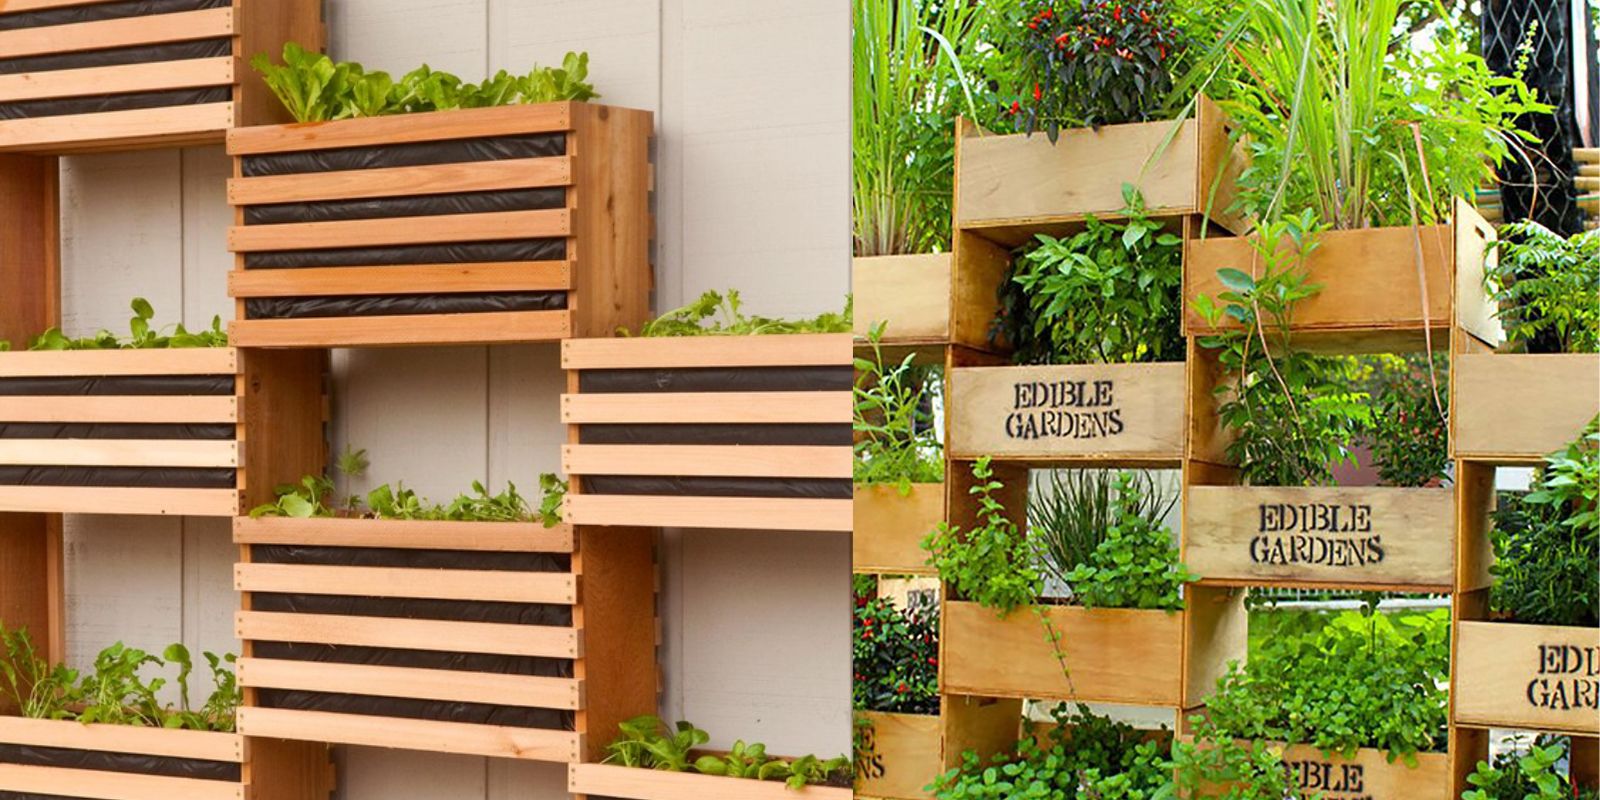
- Stacked Crates: Wooden or plastic crates stacked vertically offer a rustic and functional planting solution. They’re easy to assemble and can be customized to fit your space.
Materials and Tools Needed
Depending on your chosen design, gather the following materials and tools:
- Materials:
- Wooden pallets, plastic pots, old shoe organizers, or wooden crates
- Potting soil or compost
- Plants (herbs like basil, thyme, or veggies like cherry tomatoes, lettuce)
- Tools:
- Drill and screws (for wooden planters)
- Hooks or adhesive strips (for wall-mounted or hanging pockets)
- Measuring tape and saw (if customizing crates or wood)
Building Your Vertical Planter
Here’s a step-by-step guide to creating three popular types of vertical planters:
1. Wall-Mounted Planters
Step 1: Choose and Prepare the Planter
- Materials: Wooden boards, plastic pots, screws.
- Preparation: Cut the wooden boards to your desired size and attach the plastic pots to the boards using screws. Ensure that the pots are secure and spaced appropriately.
Step 2: Mount the Planter
- Mounting: Use a level to ensure your planter will hang straight. Drill holes into the wall and secure the planter with wall anchors or screws.
Step 3: Add Soil and Plants
- Soil: Fill the pots with a quality potting mix.
- Planting: Insert your chosen herbs or veggies into the soil. Water them thoroughly.
Step 4: Maintenance
- Watering: Monitor the soil moisture and water as needed. Ensure proper drainage to prevent waterlogging.
2. Hanging Pockets
Step 1: Choose and Prepare the Pockets
- Materials: Hanging pockets (fabric or plastic), hooks.
- Preparation: If using fabric pockets, ensure they have good drainage. Attach the pockets to a sturdy frame or wall using hooks or adhesive strips.
Step 2: Hang the Planter
- Hanging: Position the pockets where they will receive adequate sunlight. Ensure they are securely fastened.
Step 3: Add Soil and Plants
- Soil: Fill each pocket with potting mix or compost.
- Planting: Insert small herbs or veggies into each pocket. Water thoroughly.
Step 4: Maintenance
- Watering: Keep an eye on the moisture levels in each pocket and water as needed. Avoid overwatering to prevent mold.
3. Stacked Crates
Step 1: Prepare the Crates
- Materials: Wooden or plastic crates, screws, brackets.
- Preparation: Stack crates in the desired configuration. Secure them together using screws or brackets to ensure stability.
Step 2: Position the Planter
- Placement: Place the stacked crates in a location where they will receive ample sunlight.
Step 3: Add Soil and Plants
- Soil: Fill each crate with potting mix or compost.
- Planting: Plant your herbs or veggies in the soil. Water them well.
Step 4: Maintenance
- Watering: Regularly check soil moisture and water as needed. Ensure that each crate has adequate drainage.
Choosing the Right Plants
When selecting plants for your vertical planters, consider the following:
- Herbs: Basil, parsley, thyme, and cilantro are excellent choices for vertical gardens. They grow well in containers and require minimal space.
- Vegetables: Opt for compact varieties of veggies like cherry tomatoes, lettuce, spinach, and radishes. These plants thrive in vertical planters and are perfect for small spaces.
- Flowers: Add a touch of color with compact flowering plants like petunias, pansies, or marigolds.
Tips for Successful Vertical Gardening
- Sunlight: Ensure your vertical planters receive adequate sunlight. Most herbs and veggies need at least 4-6 hours of direct sunlight daily.
- Watering: Vertical planters can dry out faster than traditional garden beds, so monitor soil moisture regularly.
- Soil: Use a high-quality potting mix or compost to ensure good drainage and nutrient availability.
- Fertilizing: Feed your plants with a balanced, organic fertilizer to promote healthy growth.
Conclusion
Creating DIY vertical planters is a rewarding way to maximize your gardening space and enjoy fresh herbs and veggies right at home. Whether you choose wall-mounted planters, hanging pockets, or stacked crates, these vertical gardening solutions will transform your space and enhance your gardening experience. Embrace the beauty and practicality of vertical gardening and enjoy the benefits of a lush, green oasis even in the smallest of spaces.
Ready to start your vertical gardening adventure? Share your DIY vertical planters and gardening tips with the community using #VerticalGardening #DIYPlanters #UrbanGardening #GrowYourOwnFood and inspire others to create their own green haven! 🌿🌻🪴