
Introduction
A well-designed brick patio can elevate your outdoor space, creating a functional and beautiful area perfect for entertaining, relaxing, or simply enjoying your garden. Whether you’re a seasoned DIYer or a beginner looking for a rewarding project, building a brick patio is a fantastic way to enhance your home’s exterior. This comprehensive guide will walk you through each step of the process, from planning to finishing touches, ensuring you achieve a stunning result that you can enjoy for years to come.
1. Planning and Designing Your Patio
1.1. Define Your Purpose
Before diving into the project, consider the purpose of your patio. Are you planning a space for outdoor dining, a cozy lounge area, or perhaps a fire pit area? Defining the purpose will guide your design choices and help determine the size and shape of your patio.
1.2. Measure and Sketch
Use a tape measure to determine the dimensions of your patio. Sketch a rough layout on paper, including the shape, size, and placement of features like seating areas or garden beds. A well-thought-out design will make the construction process smoother and ensure your patio meets your needs.
1.3. Choose Your Brick Style
Select the type of brick that fits your style and budget. Options include traditional clay bricks, modern concrete pavers, and decorative stones. Consider color, texture, and pattern to complement your home’s exterior and landscaping.
2. Preparing the Site
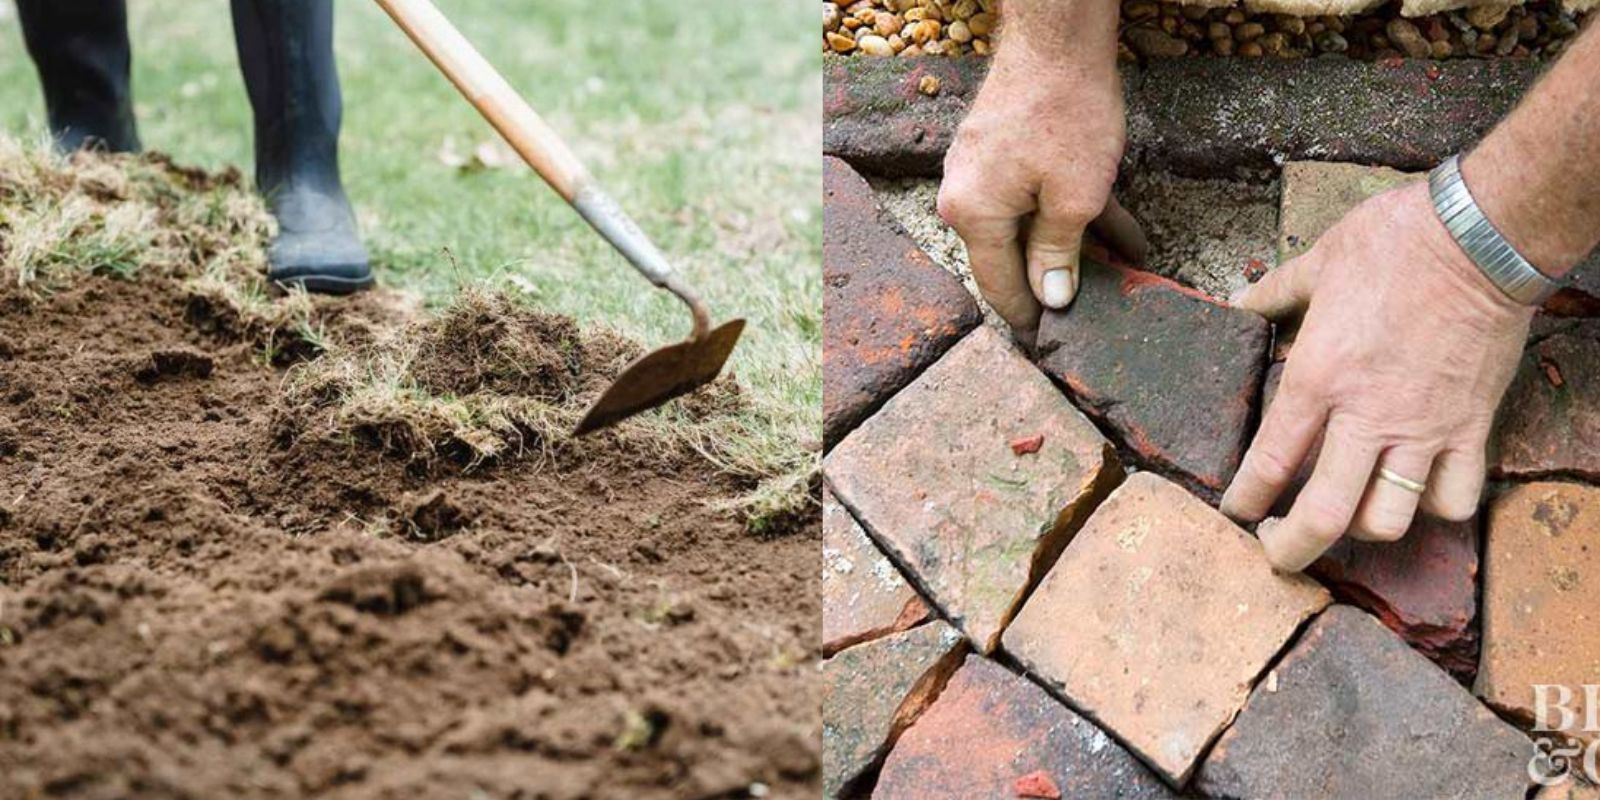
2.1. Clear the Area
Remove any grass, weeds, or debris from the area where the patio will be installed. Use a shovel or garden fork to dig up the top layer of soil and ensure the ground is clear and level.
2.2. Mark the Perimeter
Use stakes and string to outline the perimeter of your patio. This will help you visualize the space and ensure accurate excavation and brick placement. Make sure the edges are straight and the corners are square.
2.3. Excavate the Soil
Dig down to a depth of 6-8 inches within the marked area. This depth includes space for the base layers and the bricks themselves. Aim for a consistent depth throughout to ensure a level surface.
3. Installing the Base Layers
3.1. Add a Gravel Base
Spread a layer of gravel or crushed stone over the excavated area. This base layer provides drainage and stability for the patio. Use a rake to spread the gravel evenly and then compact it using a tamper or mechanical compactor.
3.2. Level the Surface
Ensure the gravel base is level and smooth. This step is crucial for preventing uneven settling of the bricks. Check the surface with a spirit level and adjust as needed.
3.3. Install Edging
Place edging materials, such as brick or metal, around the perimeter of the patio. Edging helps to keep the bricks in place and defines the shape of the patio. Secure the edging with stakes or stakes and mortar, depending on the material.
4. Laying the Bricks
4.1. Start Laying Bricks
Begin laying the bricks at one corner of the patio. Arrange them in your chosen pattern, such as herringbone, basketweave, or running bond. Leave small gaps between the bricks for joint material.
4.2. Use a Rubber Mallet
As you lay each brick, use a rubber mallet to tap it into place. This helps ensure that the bricks are level and properly seated in the base layer.
4.3. Check Alignment
Periodically check the alignment and level of the bricks using a spirit level and a straightedge. Adjust as necessary to maintain a consistent and even surface.
5. Filling the Joints
5.1. Apply Joint Material
Spread sand or polymeric sand over the surface of the patio, filling the gaps between the bricks. Use a broom to sweep the material into the joints, ensuring that all gaps are filled.
5.2. Compact the Sand
Compact the sand using a plate compactor or a hand tamper. This helps to settle the sand and lock the bricks in place. Be sure to follow the manufacturer’s instructions for the compactor.
5.3. Clean the Surface
After compacting, sweep off any excess sand from the surface of the bricks. This will give your patio a clean and polished appearance.
6. Finishing Touches
6.1. Water the Patio
Lightly water the patio to help the joint material set and settle. This step is particularly important if you used polymeric sand, as it activates the binding agents in the sand.
6.2. Maintain the Patio
Regular maintenance will keep your brick patio looking great. Remove debris, clean stains promptly, and check for any loose bricks or shifting. Refill joints with sand as needed to maintain stability.
6.3. Add Furnishings and Decor
Once the patio is complete, add outdoor furnishings and decor to enhance the space. Consider adding a dining table, chairs, outdoor rugs, or potted plants to make the patio a welcoming and functional area.
Conclusion
Building a brick patio is a rewarding DIY project that enhances the beauty and functionality of your outdoor space. By following these steps, you can create a stunning and durable patio that will be the centerpiece of your garden. With careful planning, proper preparation, and attention to detail, you’ll enjoy a beautifully crafted patio that adds charm and value to your home.
Motivational Sentence:
Ready to transform your outdoor space? Dive into this DIY brick patio project and create a stunning area that you’ll enjoy for years to come! 🧱✨ #BrickPatio #DIYProject #OutdoorLiving #GardenDesign #HomeImprovement #PatioGoals #BackyardMakeover