
Landscape timber edging is a functional and aesthetic addition to any garden. It defines garden beds, pathways, or patios while keeping soil, mulch, or gravel in place. Whether your space is flat or features a challenging slope, this guide will walk you through the steps to install durable and visually appealing timber edging that enhances your outdoor area.
Why Choose Landscape Timber Edging?
Timber edging is a popular choice among gardeners for several reasons:
- Aesthetic Appeal: It offers a natural, rustic charm that complements greenery and flowers.
- Versatility: Suitable for flat terrains and slopes, timber edging adapts to different garden layouts.
- Functionality: Keeps soil, mulch, and decorative stones neatly contained, reducing maintenance.
- Durability: When treated, landscape timbers resist decay, making them a long-lasting solution.
- Cost-Effective: Compared to other edging materials, timber is affordable and readily available.
Tools and Materials You’ll Need
Before starting, gather the following tools and materials:
- Landscape timbers
- Measuring tape
- Shovel
- Level
- Gravel or sand
- Stakes (wooden or rebar)
- Drill with wood bits
- Hammer or mallet
- Saw (if cutting timbers to size)
- Landscaping fabric (optional, for weed control)
Preparing for Installation
1. Measure and Mark the Area
- Use stakes or spray paint to outline where the timber edging will go.
- Measure the total length required and determine the number of timbers you’ll need.
2. Plan the Design
- For straight lines, ensure your outline is precise using a string tied between stakes.
- For curves, bend the string or use a garden hose to create a smooth arc.
3. Clear the Area
- Remove any grass, debris, or obstacles along the marked line.
- Level the ground as much as possible for a smoother installation.
Installing Landscape Timber Edging on Flat Surfaces
Step 1: Dig a Trench
- Dig a trench along the marked line that is slightly wider and deeper than the timbers.
- Ensure the trench is level by checking with a spirit level.
Step 2: Lay a Base Layer
- Add a layer of gravel or sand to the trench for drainage and stability.
- Tamp down the base layer until it’s firm and level.
Step 3: Place the Timbers
- Lay the timbers end-to-end in the trench.
- Use the level to ensure the timbers are even. Adjust the base layer as needed.
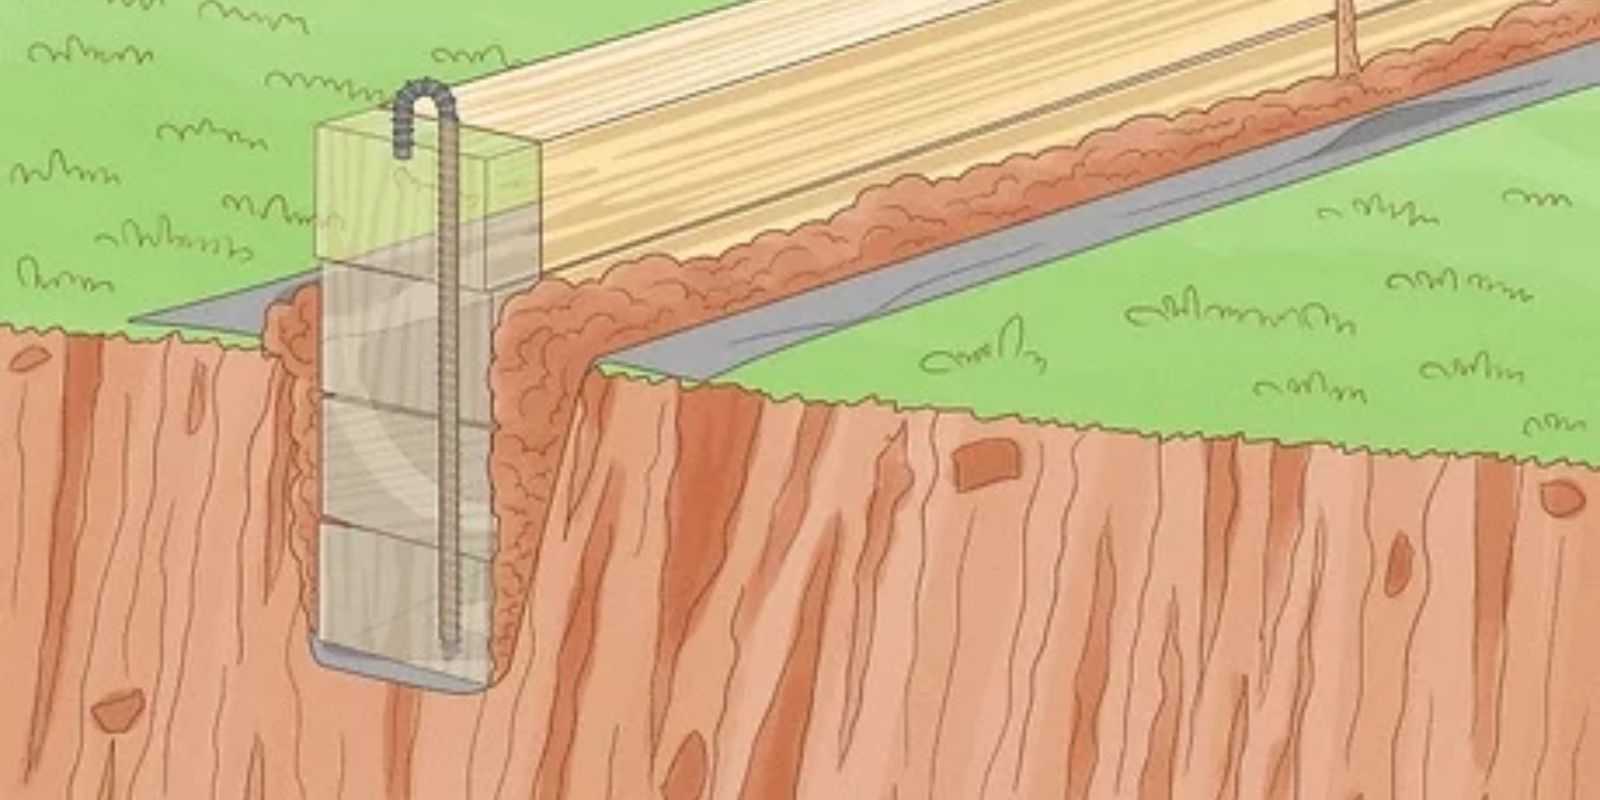
Step 4: Secure the Timbers
- Drill holes through the timbers at regular intervals.
- Drive stakes or rebar through the holes into the ground to anchor the timbers firmly.
Step 5: Backfill the Edges
- Fill the trench edges with soil, tamping it down to hold the timbers in place.
Installing Landscape Timber Edging on Slopes
Installing timber edging on slopes requires additional care to ensure stability and proper alignment.
Step 1: Plan the Slope Layout
- Divide the slope into steps, creating small terraces for the timbers to rest securely.
Step 2: Dig Stepped Trenches
- Dig trenches that step down the slope. Each section should be level and align with the one above it.
Step 3: Overlap Timbers
- Overlap timbers at corners or steps to create a sturdy, interlocked structure.
- Cut timbers at angles if necessary for a snug fit.
Step 4: Anchor with Stakes
- Secure each timber with stakes driven deep into the ground, especially at step transitions.
- Use extra stakes on steeper slopes to prevent shifting.
Step 5: Fill and Compact
- Backfill each step with soil or gravel, compacting it to provide additional stability.
Finishing Touches
- Add Landscaping Fabric (Optional)
- Lay landscaping fabric along the inside edge of the timbers to prevent weeds from creeping into your garden beds.
- Mulch or Gravel Fill
- Spread mulch, soil, or gravel within the bordered area to complete the look.
- Seal the Timbers
- Apply a wood sealant to the timbers for added protection against moisture and pests.
Maintenance Tips
- Inspect Regularly: Check for loose or damaged timbers and re-secure or replace as needed.
- Clean Edging: Remove debris and weeds around the timbers to keep the area neat.
- Reapply Sealant: Refresh the wood sealant every 1-2 years for prolonged durability.
Common Mistakes to Avoid
- Skipping the Base Layer: Without a stable base, timbers may shift or sink over time.
- Ignoring Slope Stability: On slopes, inadequate anchoring can lead to timber movement.
- Uneven Alignment: Failing to level the timbers results in an unprofessional appearance.
- Insufficient Anchoring: Always use stakes to keep the timbers securely in place.
Why Landscape Timber Edging?
Installing landscape timber edging is an excellent way to enhance the functionality and aesthetics of your garden. Whether on flat surfaces or slopes, the process is straightforward, cost-effective, and rewarding. The result? A clean, organized, and visually appealing outdoor space that stands the test of time.
Interact and Share!
Have you tried installing landscape timber edging? Share your experiences, tips, and photos below! Let’s inspire each other to create beautiful gardens. 🌿✨
#LandscapeEdging #GardeningTips #DIYProjects #BackyardDesign #TimberEdging #GardenMakeover #SustainableLandscaping #HomeGardenHacks #EcoFriendlyGardening #GardenGoals