
Dahlias are among the most beloved flowers in home gardens, cherished for their breathtaking blooms and diverse color palettes. Their stunning petals can elevate any landscape, making them a favorite for gardeners looking to add beauty and vibrancy to their spaces. However, to ensure that your dahlias return to grace your garden in the following growing season, proper care during the storage period is crucial. In this guide, we will delve into the importance of storing dahlia tubers and provide you with 12 easy steps to do it effectively, ensuring that your flowers thrive year after year.
Understanding Dahlia Tubers
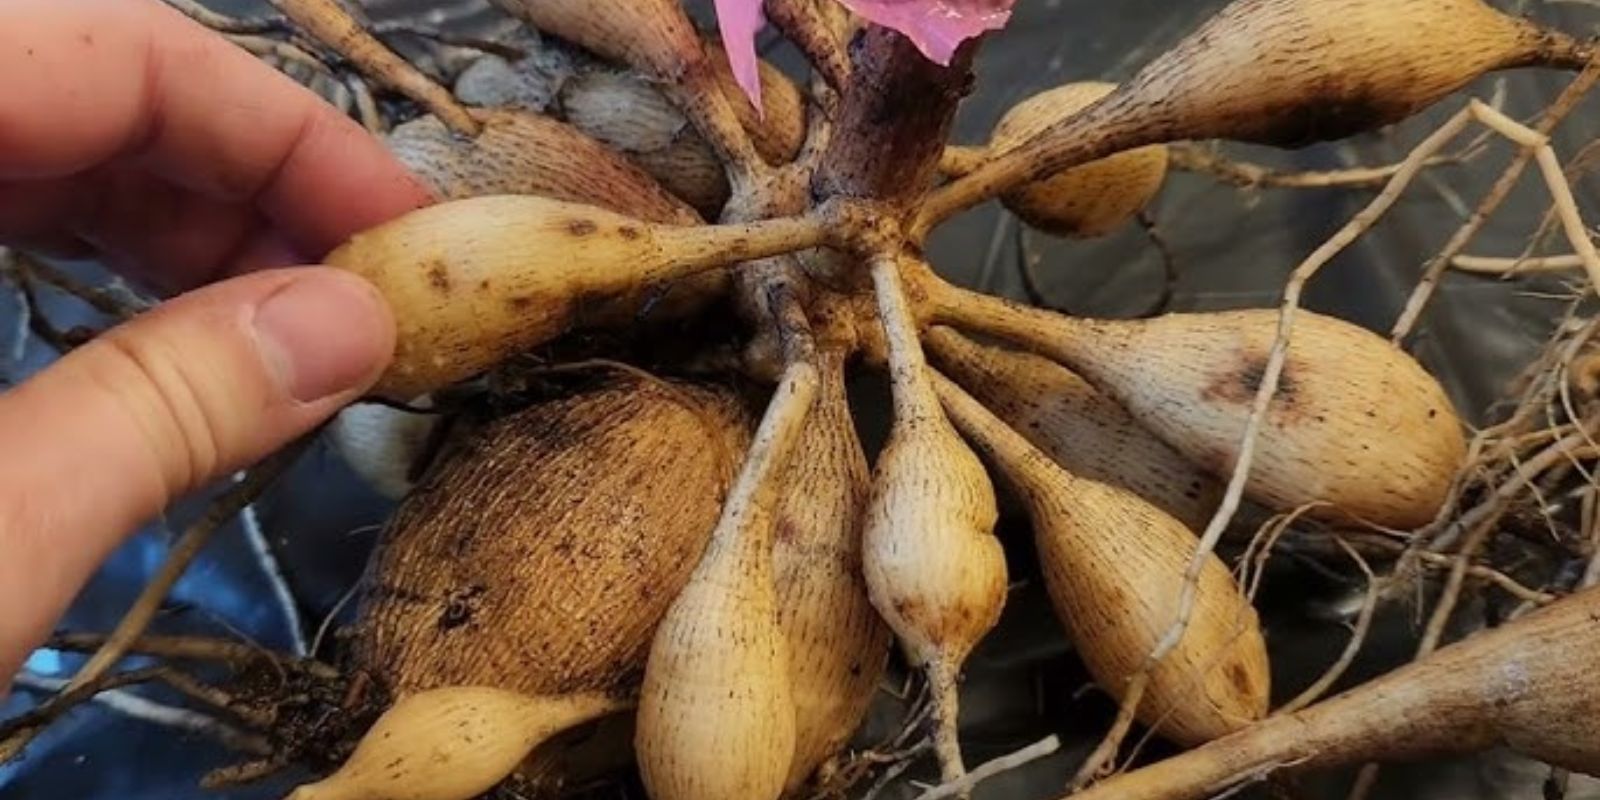
Dahlias grow from tubers, which are modified stems that store nutrients and energy for the plant. These tubers are essential for the plant’s growth and flowering in the next season. Unlike annual plants that die off after a single growing season, dahlias are perennials that can be stored and replanted. However, improper storage can lead to rot, dehydration, or even death of the tubers, making it vital to follow the right procedures.
Why Proper Storage is Important
Storing dahlia tubers correctly is essential for several reasons:
- Prevent Rot: Excess moisture can cause tubers to rot during storage, rendering them useless for the next planting season.
- Ensure Viability: Healthy tubers are crucial for vigorous growth in the next growing season. Proper storage helps maintain their viability.
- Minimize Disease: Storing tubers improperly can lead to disease, affecting not only the tubers but potentially spreading to other plants in your garden.
- Maximize Blooms: Storing tubers correctly ensures that they will produce beautiful blooms the following year, maintaining the aesthetic appeal of your garden.
Now that you understand the importance of proper storage, let’s look at the 12 easy steps you can follow to store your dahlia tubers effectively.
Step 1: Timing is Key
The first step in storing your dahlia tubers is to know when to dig them up. Wait until the first frost has killed the foliage. This is usually in late fall when temperatures start to drop consistently. The frost signals the plant that it is time to go dormant, allowing the tubers to concentrate their energy for storage.
Step 2: Cut the Stems
Once the foliage is dead, it’s time to prepare your dahlias for storage. Using clean garden shears, cut the stems back to about 6 inches above the ground. This helps reduce the risk of diseases and makes the tubers easier to handle.
Step 3: Dig Carefully
With the stems cut, it’s time to dig up the tubers. Use a garden fork to gently lift the tubers from the soil, being careful not to damage them. Start digging about 12 inches away from the base of the plant to avoid puncturing the tubers. Carefully lift the tubers and shake off any excess soil.
Step 4: Shake Off Excess Soil
Once you’ve dug up the tubers, gently shake them to remove as much soil as possible. Be careful not to wash them with water, as excess moisture can lead to rot during storage. Removing the soil allows the tubers to dry out properly.
Step 5: Inspect for Damage
After cleaning the tubers, inspect them for any signs of damage or rot. Discard any tubers that appear damaged or rotten, as these can spread disease to healthy tubers during storage. Healthy tubers should be firm to the touch and free from soft spots.
Step 6: Dry the Tubers
Place the tubers in a cool, dry, and shaded area for a few days. This allows them to cure and dry out completely, reducing the risk of rot during storage. Avoid placing them in direct sunlight, as this can cause damage.
Step 7: Wrap for Protection
Once the tubers are fully dried, it’s time to wrap them for protection. Using newspaper or tissue paper, wrap each tuber individually. This will protect them from light and moisture, both of which can lead to rot or sprouting.
Step 8: Choose the Right Container
Next, store the wrapped tubers in an appropriate container. Use a cardboard box, mesh bag, or wooden crate that allows for air circulation. Avoid plastic bags, as they can trap moisture and lead to rot.
Step 9: Maintain Optimal Temperature
The storage area is critical for the health of your tubers. Keep the container in a cool, dark place, ideally between 40°F and 50°F. A basement or a garage is often ideal for this purpose, but ensure it remains frost-free.
Step 10: Check Regularly
It’s essential to check your tubers every few weeks during the storage period. Look for any signs of rot or dehydration. If you notice any affected tubers, remove them immediately to prevent the spread of disease to healthy ones.
Step 11: Rehydrate as Needed
If the tubers seem to be drying out, lightly mist them with water to maintain moisture without soaking them. This step should be done cautiously, as too much moisture can lead to rot. You want to maintain a delicate balance of moisture.
Step 12: Label Your Tubers
If you have different varieties of dahlias, labeling each tuber or container is a great idea. This will help you keep track of your plants for the next season and ensure that you know which varieties you are storing.
Conclusion
Storing your dahlia tubers correctly is crucial for ensuring a thriving garden in the following season. By following these 12 easy steps, you can protect your investment and enjoy beautiful blooms year after year. Remember, proper care and attention during the storage period will pay off when you see your dahlias flourish in the spring.
Call to Action: Have you stored your dahlia tubers this season? Share your experiences, tips, or any challenges you’ve faced! Let’s inspire each other to create stunning gardens! 🌼🌿
Hashtags: #DahliaCare #GardeningTips #FlowerGardening #PlantStorage #GardenMaintenance #PerennialFlowers #GardeningCommunity #HomeGardening