
Creating the perfect garden involves more than just choosing the right plants. The layout, structure, and details like garden edgings can dramatically enhance the overall appearance and functionality of your outdoor space. One of the most eye-catching and practical ways to define the boundaries of your garden beds, lawns, and pathways is by using sawtooth edging. This distinctive design offers a stylish look while also providing benefits like preventing soil erosion and making maintenance easier.
In this article, we’ll take a deep dive into the world of sawtooth edging—what it is, why it’s so effective, and how you can create it in your own garden. Whether you’re a seasoned gardener or just getting started, this guide will walk you through everything you need to know to add this beautiful feature to your outdoor space.
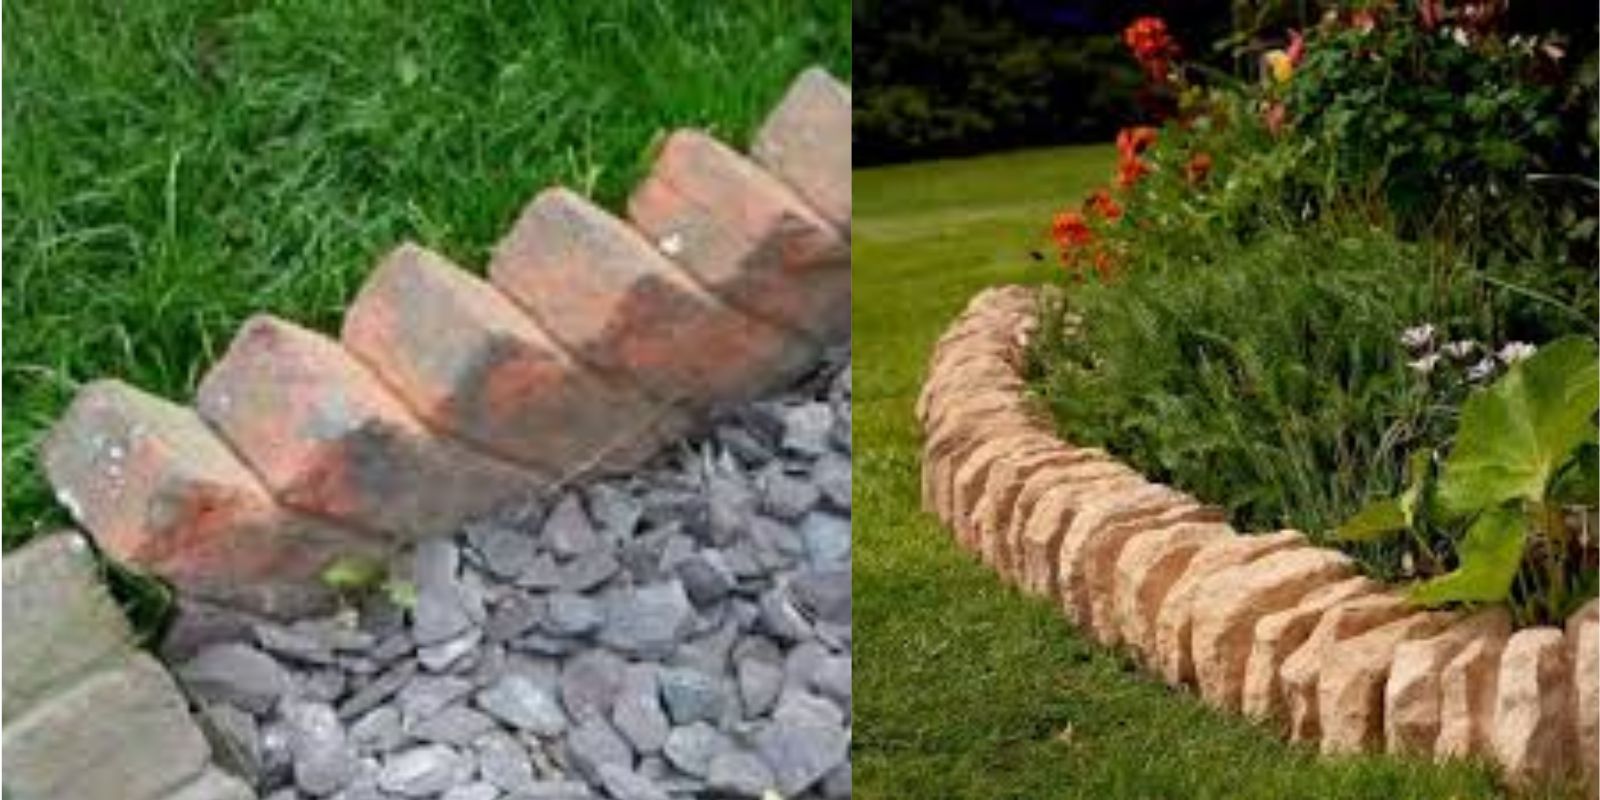
What is Sawtooth Edging?
Sawtooth edging refers to a type of landscaping border with a distinctive zigzag pattern, resembling the teeth of a saw. The design creates a visually appealing boundary that contrasts with the smooth curves of a traditional edging and adds texture and structure to your garden beds or lawns. The pattern can be made using a variety of materials, including stone, brick, timber, or metal, depending on your garden’s style and your budget.
Aside from its aesthetic value, sawtooth edging is highly functional. It helps to keep soil from spilling over into walkways or other areas of your yard. Additionally, the shape helps to discourage grass or weeds from creeping into garden beds, making maintenance easier.
Why Choose Sawtooth Edging?
- Aesthetic Appeal: The sawtooth pattern adds a distinctive, structured design that brings energy to your garden. Unlike traditional straight lines, this zigzag pattern creates interest and movement in the landscape, making your garden visually dynamic and eye-catching.
- Practical Functionality: Beyond the visual impact, sawtooth edging helps to keep garden beds neatly defined. It prevents soil erosion, keeps mulch in place, and serves as a physical barrier that can stop grass or weeds from growing into garden beds.
- Easy Maintenance: When you use sawtooth edging, you create a defined boundary that makes it easier to maintain your garden. The design keeps grass from invading your garden beds, reducing the need for constant weeding. Moreover, it can act as a containment measure for spreading plants like ground cover.
- Customization: Sawtooth edging can be tailored to fit any size or shape of garden bed or walkway. Whether you’re working with curved garden beds or straight paths, this edging can be adapted to suit your space perfectly.
- Durability: Many materials used for sawtooth edging, like stone, brick, or concrete, are incredibly durable and long-lasting. This means once you install your sawtooth edging, you won’t have to worry about replacing it for many years.
Materials for Sawtooth Edging
Choosing the right material for your sawtooth edging is crucial because it affects both the look and the functionality of the border. Here are some of the most popular materials used for sawtooth edging:
- Stone: Stone is a popular choice for creating natural, rustic edging. It comes in a variety of colors, sizes, and textures, allowing you to customize your sawtooth design to suit the look of your garden. Stone edging is durable, weather-resistant, and blends well with any landscape.
- Brick: For a more traditional and classic look, brick works beautifully. It adds a warm and timeless aesthetic to your garden and pairs well with a variety of garden styles. You can choose from different types of brick, including clay and concrete, for added versatility.
- Timber: If you’re aiming for a softer, more organic look, timber can be an excellent choice. It provides a natural and rustic appearance and can be easily worked into a sawtooth pattern. Pressure-treated timber is especially durable for outdoor use.
- Metal: Metal edging offers a sleek, modern, and minimalist design. Aluminum, steel, or copper can be used to create a sharp and clean sawtooth edge that gives your garden a contemporary feel. Metal is durable and can withstand the elements for years.
- Concrete: Concrete blocks or curbing can be used to create a solid and permanent sawtooth edge. Concrete edging is strong, easy to install, and requires minimal maintenance over time.
- Plastic or Rubber: For those looking for an affordable and lightweight option, plastic or rubber edging can work. These materials are easy to work with, but they may not be as durable or aesthetically pleasing as stone or timber.
How to Create Sawtooth Edging in Your Garden
Now that you know the materials available, it’s time to learn how to create sawtooth edging in your own garden. The process is relatively simple, and with some planning and effort, you can easily add this feature to your outdoor space.
Step 1: Plan and Mark the Layout
Before you start digging or installing your edging, it’s essential to plan and mark the layout of your sawtooth pattern. You can use a garden hose, string, or even spray paint to outline the shape of your garden bed or pathway. The sawtooth edges should be roughly 6 to 8 inches high for visual impact, but you can adjust the height depending on your preferences.
Step 2: Choose Your Materials
Once you’ve outlined the pattern, it’s time to choose the materials for your edging. As mentioned earlier, stone, brick, timber, metal, and concrete are all popular choices. Consider the style of your garden, the colors of your plants, and your budget when making your decision.
Step 3: Prepare the Ground
Next, prepare the ground where the edging will go. Remove any grass, weeds, or debris from the area. You can use a shovel or a garden hoe to clear the space. If you’re working with a lawn, you may want to edge the area with a spade to ensure that the border is clean and defined.
Step 4: Dig a Trench
Once the area is clear, dig a trench along the outlined path. The trench should be deep enough to hold the edging materials securely—usually around 3 to 6 inches deep. Ensure that the trench is level so that your edging materials will sit evenly.
Step 5: Install the Edging
Now it’s time to install your chosen material. For stone or brick, simply place the pieces in the trench, ensuring that the sawtooth pattern is even. If you’re using timber, metal, or concrete, follow the manufacturer’s instructions for installation.
For stone or brick, you may want to secure the pieces with a bit of mortar or landscape adhesive to ensure they stay in place. For wood, you can use spikes or nails to anchor the timber.
Step 6: Backfill and Finish
Once the edging is in place, backfill the trench with soil or gravel to hold everything in position. Press the soil down firmly to ensure that the edging is stable. You may also want to add a layer of mulch along the garden bed to keep it neat and tidy.
Step 7: Maintain Your Edging
After installation, take care to maintain your sawtooth edging. Trim any grass or weeds that grow close to the edging, and periodically check for any signs of erosion or shifting. If any of the materials move out of place, simply reposition them and secure them again.
Conclusion
Sawtooth edging is a fantastic way to define and enhance the look of your garden while providing practical benefits like preventing soil erosion and keeping plants contained. Whether you’re using stone, brick, timber, or metal, this unique pattern adds visual interest and structure to your outdoor space.
By following the steps outlined in this guide, you can create beautiful, functional edging that will last for years. Don’t be afraid to experiment with different materials and designs to make your garden truly one-of-a-kind. Happy gardening!
Call to Action
Ready to transform your garden with sawtooth edging? Start your project today and share your results with us! We’d love to see how you incorporate this stylish feature into your outdoor space. 🌿✨