
Introduction
Rose gardening is a beloved pastime for many, providing a vibrant array of colors and fragrances to enhance any landscape. One of the most satisfying aspects of rose gardening is propagating your own roses from cuttings. Not only is it a cost-effective way to expand your collection, but it also allows you to preserve and share your favorite varieties. This comprehensive guide will walk you through the step-by-step process of rooting rose cuttings quickly and easily, ensuring your success in creating beautiful new plants.
Understanding Rose Cuttings
Before diving into the process, it’s essential to understand what rose cuttings are and how they work. A cutting is a piece of the rose plant that is capable of developing roots and growing into a new plant. Roses can be propagated through softwood, hardwood, or semi-hardwood cuttings, depending on the time of year and the type of rose.
- Softwood Cuttings: Taken from new growth in late spring to early summer, softwood cuttings are tender and easy to root.
- Hardwood Cuttings: Collected during the dormant season (late fall to early spring), these cuttings are more rigid and typically require more time to root.
- Semi-Hardwood Cuttings: These are taken in late summer and are somewhat between softwood and hardwood cuttings.
Step-by-Step Process for Rooting Rose Cuttings
Step 1: Selecting the Right Cuttings
The success of rooting rose cuttings begins with selecting healthy, vigorous stems. Look for the following characteristics:
- Healthy Stems: Choose stems free from disease, pests, or damage.
- Timing: Take cuttings in late spring or early summer for the best results, when the stems are still green and soft.
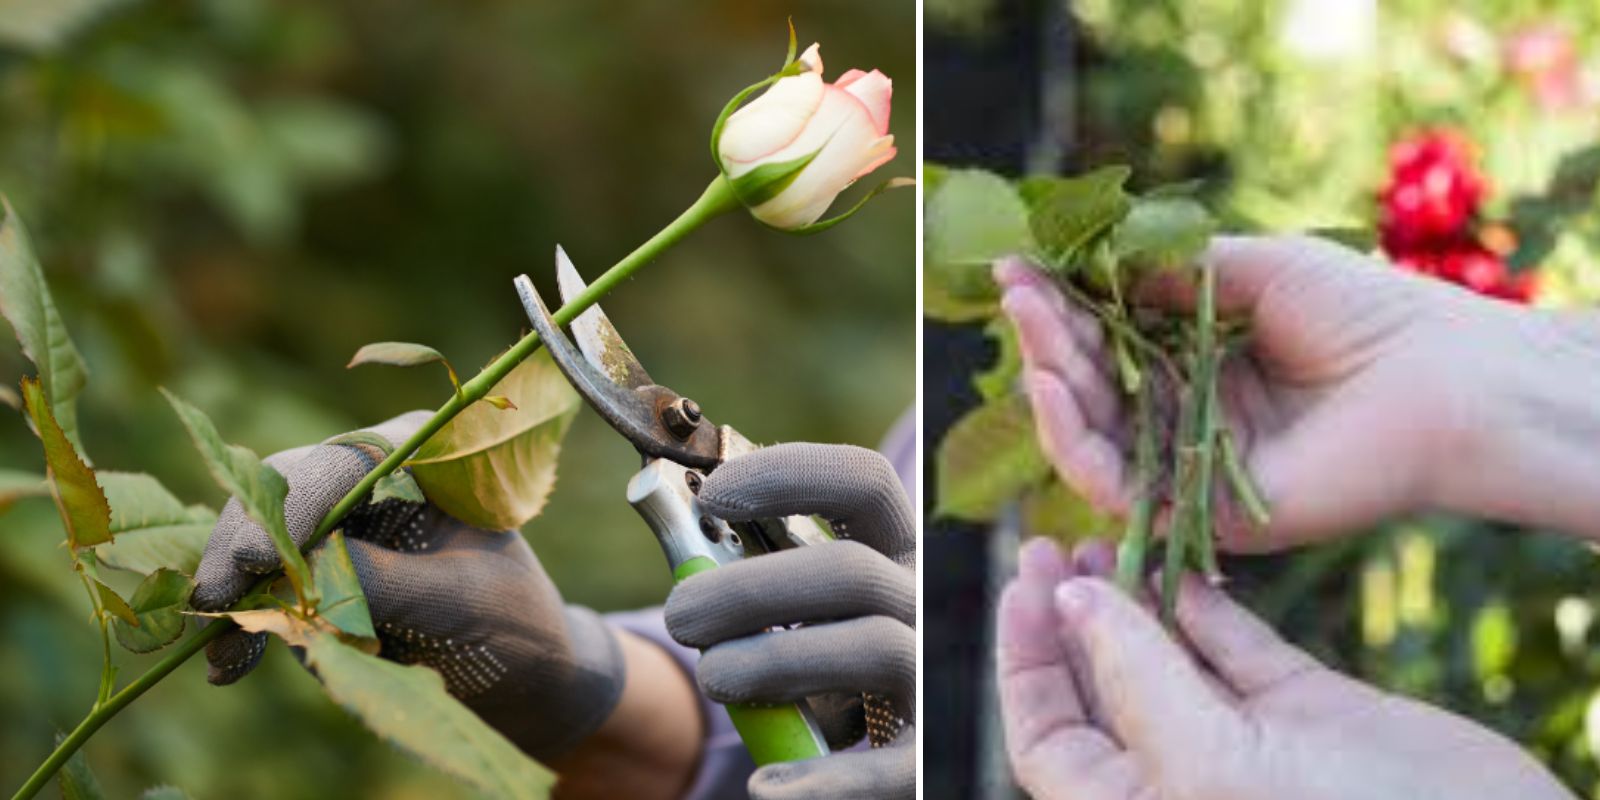
Step 2: Making the Cut
Using a sharp, sterilized knife or pruning shears, follow these guidelines to make your cut:
- Angle of the Cut: Cut the stem at a 45-degree angle just below a leaf node. This angle increases the surface area for water absorption and encourages root development.
- Length of the Cut: Aim for a cutting length of about 6-8 inches. This size is ideal for rooting and provides enough material for a healthy new plant.
Step 3: Preparing the Cuttings
Once you have your cuttings, it’s time to prepare them for planting:
- Remove Lower Leaves: Strip off the leaves from the lower half of the cutting, leaving two to three leaves at the top. This prevents rot and helps the cutting focus its energy on root development.
- Optional – Apply Rooting Hormone: Dip the cut end into rooting hormone powder. While this step is optional, it can significantly increase your chances of successful rooting by promoting faster root growth.
Step 4: Preparing the Potting Medium
Choosing the right potting medium is crucial for successful rooting:
- Use a Well-Draining Mix: A mixture of peat moss and perlite or vermiculite works well, as it retains moisture while providing excellent drainage.
- Moisten the Soil: Before planting the cuttings, ensure the potting mix is damp but not saturated.
Step 5: Planting the Cuttings
Follow these steps to plant your rose cuttings effectively:
- Create a Hole: Use your finger or a pencil to make a hole in the potting medium.
- Insert the Cutting: Gently place the cutting in the hole, burying it about 2-3 inches deep. Firm the soil around the base to eliminate air pockets, which can hinder rooting.
Step 6: Watering and Covering
Proper watering and covering create a suitable environment for rooting:
- Water Thoroughly: After planting, water the cuttings well to settle the soil around the roots.
- Cover to Maintain Humidity: Use a plastic bag or clear plastic dome to cover the pot. This creates a humid environment that is essential for root development.
Step 7: Providing Proper Light and Temperature
The right conditions are vital for successful rooting:
- Indirect Sunlight: Place the pot in a warm location with indirect sunlight. Avoid direct sunlight, as it can overheat the cuttings and hinder rooting.
- Temperature: Ideal temperatures for rooting are between 70°F and 75°F (21°C to 24°C).
Step 8: Monitoring Moisture Levels
Keeping the right moisture balance is key to preventing rot and encouraging growth:
- Check Regularly: Monitor the soil moisture frequently. It should be moist but not soggy.
- Air Circulation: Remove the plastic cover for a few hours each day to allow fresh air in, preventing mold and promoting healthy growth.
Step 9: Checking for Roots
After about 4-6 weeks, you can check if your cuttings have developed roots:
- Gentle Tug Test: Lightly tug on the cuttings; if you feel resistance, that’s a good sign that roots are forming.
- Visual Inspection: You can also gently remove the cutting from the soil to inspect the roots, but be cautious to avoid damaging them.
Step 10: Transplanting Your Cuttings
Once your cuttings have developed roots (typically 2-3 inches long), it’s time to transplant them:
- Choose a New Pot: Select a larger pot with fresh potting mix.
- Transplant with Care: Gently lift the rooted cutting and place it in the new pot, filling in around the roots with soil. Water well after transplanting.
Step 11: Caring for Your New Roses
After transplanting, it’s important to provide proper care to help your new roses thrive:
- Regular Watering: Water the newly potted plants regularly to keep the soil evenly moist.
- Sunlight: Place them in a spot that receives adequate sunlight, gradually acclimating them to full sun exposure over time.
- Fertilizing: After a few weeks, consider applying a diluted, balanced fertilizer to support growth.
Common Challenges and Solutions
While rooting rose cuttings is generally straightforward, you may encounter a few challenges. Here are some common issues and how to address them:
- Root Rot: If the cuttings appear wilted or blackened at the base, they may be suffering from root rot due to overwatering. Ensure proper drainage and adjust your watering schedule.
- Mold Growth: Excess humidity can lead to mold on the cuttings. Ensure good air circulation by removing the cover periodically and avoid overwatering.
- Slow Rooting: If the cuttings are not rooting as quickly as expected, check the light and temperature conditions. Sometimes, cuttings may take longer due to environmental factors.
Conclusion
Rooting rose cuttings can be a fulfilling endeavor, allowing you to propagate and enjoy your favorite blooms for years to come. By following these steps and maintaining proper care, you can successfully create new rose plants from cuttings. Whether you’re expanding your garden or sharing beautiful roses with friends and family, the joy of growing roses from cuttings is an experience every gardener should try.
Call to Action
Now that you have the knowledge to root rose cuttings, get started on your propagation journey today! Share your experiences and tips with fellow gardeners to inspire others to grow their own roses. Happy gardening! 🌹
Motivational Sentence
Embrace the beauty of gardening and watch your rose collection flourish! 🌿✨ #RosePropagation #GardenTips #PlantLovers #GreenThumb #GardeningJoy #FlowerPower #HomeGarden