
Elderberry (Sambucus spp.) is not only a stunning addition to any garden, but it also offers numerous health benefits thanks to its nutrient-rich berries and flowers. Whether you want to create a vibrant hedge, attract pollinators, or harvest berries for homemade jams and syrups, propagating elderberry through cuttings is a straightforward and rewarding process. This guide will take you through each step of rooting elderberry cuttings, ensuring you can grow your own elderberry plants successfully.
Understanding Elderberry
Before diving into the propagation process, it’s essential to understand what makes elderberry such a desirable plant. Elderberries are known for their medicinal properties, particularly in boosting the immune system and fighting colds. Additionally, the flowers can be used to make fragrant elderflower cordial or infused in desserts. The shrub itself can grow quite tall, providing privacy and habitat for various wildlife.
Elderberries thrive in well-drained soil and prefer full sun to partial shade. They are hardy in USDA zones 3-9, making them accessible to a wide range of gardeners. With the right care, your elderberry plants can yield generous harvests for years to come.
The Benefits of Propagating Elderberry Cuttings
Rooting elderberry cuttings offers several advantages:
- Cost-Effective: Growing your own plants saves money compared to purchasing mature plants from a nursery.
- Control Over Varieties: You can choose specific elderberry varieties suited to your tastes and gardening conditions.
- Plant Health: Starting from cuttings allows you to select healthy parent plants, reducing the risk of disease.
- Satisfaction of DIY Gardening: There’s immense satisfaction in nurturing a plant from cutting to harvest.
Step-by-Step Guide to Rooting Elderberry Cuttings
1. Selecting the Right Cuttings
The first step in propagating elderberry is to choose healthy cuttings. The best time to take cuttings is in late winter or early spring when the plant is still dormant. Look for strong, healthy stems that are about 6-8 inches long and free of disease or pests. Ideally, select stems from the previous season’s growth, as these tend to root better.
2. Preparing the Cuttings
Once you’ve selected your cuttings, prepare them for rooting:
- Trim the Cuttings: Using sharp, clean pruning shears, cut the stems at a 45-degree angle. This angle increases the surface area for rooting and reduces the risk of water pooling on the cut end.
- Remove Leaves: Strip off the lower leaves, leaving only a couple of leaves at the top. This helps reduce water loss and encourages energy to focus on root development.
3. Applying Rooting Hormone
While elderberry can root without hormone, using a rooting hormone can significantly improve your success rate:
- Choose the Right Hormone: You can find rooting hormone in powder, gel, or liquid form at garden centers.
- Dip the Cut Ends: Lightly dip the cut end of each cutting into the rooting hormone, tapping off any excess. This step stimulates root growth and increases the likelihood of successful propagation.
4. Planting the Cuttings
Now it’s time to plant your prepared cuttings:
- Choose the Right Medium: Use a well-draining potting mix or a blend of peat moss and perlite. This helps maintain moisture without suffocating the roots.
- Plant the Cuttings: Make a small hole in the soil with a pencil or your finger, insert the cutting, and gently firm the soil around it. Plant several cuttings in a single container to increase your chances of success.
5. Watering and Covering
Moisture is crucial for rooting:
- Water Thoroughly: After planting, water the cuttings until the soil is evenly moist. Avoid waterlogging, as this can lead to rot.
- Create a Humid Environment: Cover the container with a plastic bag or a clear plastic dome to retain humidity. Ensure it doesn’t touch the leaves to prevent mold growth.
6. Providing Light
Light conditions are vital for healthy rooting:
- Choose the Right Location: Place the container in a location with bright, indirect sunlight. Avoid direct sunlight, as it can cause overheating and excessive moisture loss.
- Monitor Temperature: Aim for a temperature between 65°F and 75°F (18°C to 24°C) for optimal root development.
7. Monitoring Growth
Patience is key during the rooting process:
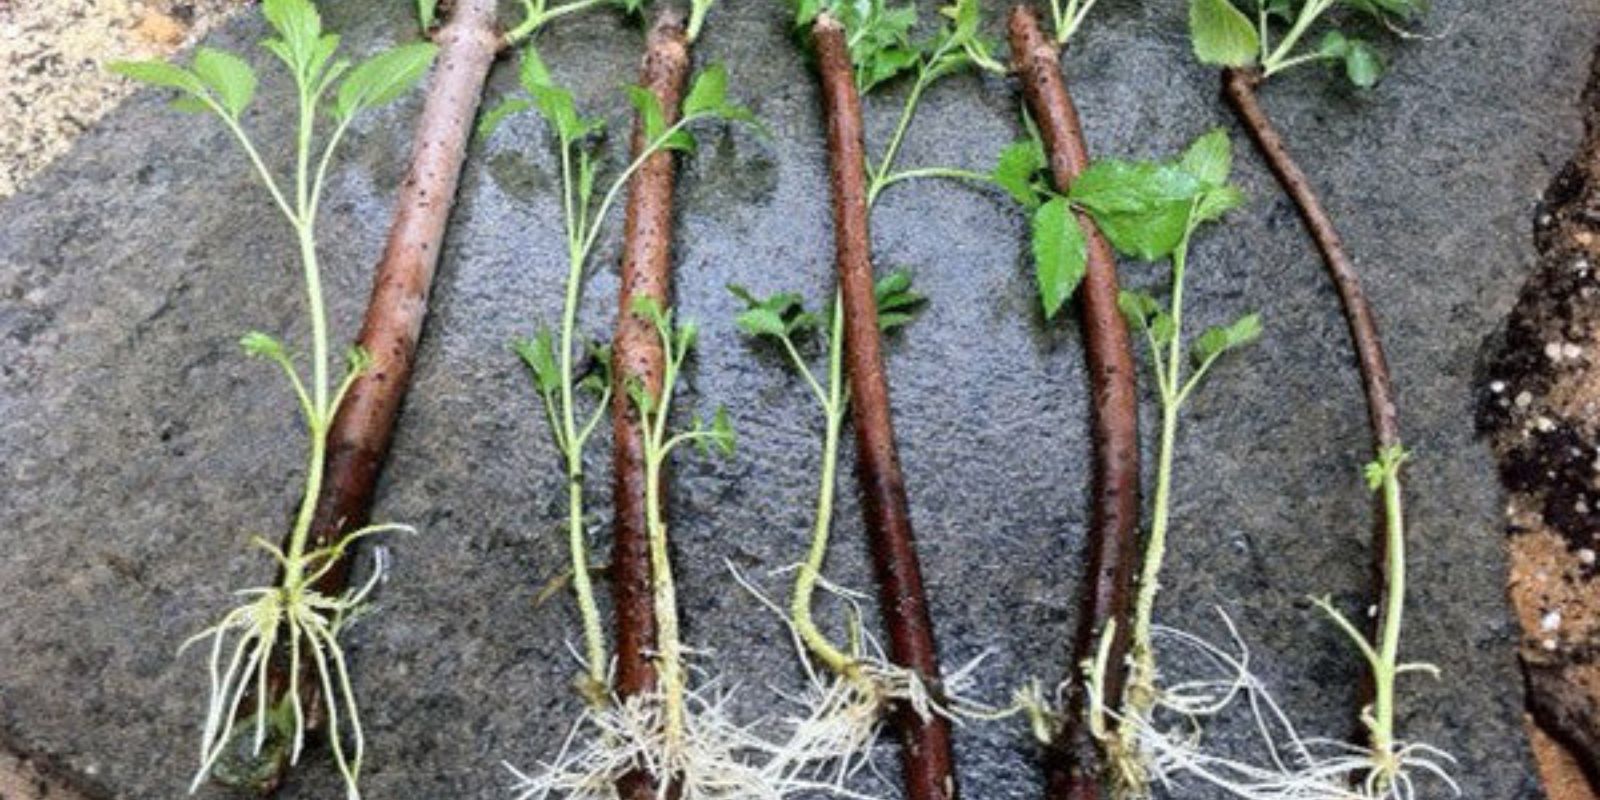
- Check for Roots: After about 4-6 weeks, gently tug on the cuttings to check for resistance, which indicates root development.
- Adjust Care as Needed: If the soil dries out, mist the cuttings or water them lightly. Avoid overwatering to prevent rot.
8. Transplanting
Once your cuttings have established roots:
- Prepare for Transplanting: When roots are visible at the bottom of the container, it’s time to transplant. Choose a larger pot or prepare a garden bed with rich, well-draining soil.
- Transplant Carefully: Gently remove the cuttings from their containers, taking care not to damage the roots. Plant them at the same depth as they were in the pot.
9. Ongoing Care
After transplanting, continued care is essential for your elderberry plants to thrive:
- Watering: Water regularly, especially during dry spells. Young plants may need more frequent watering until they establish themselves.
- Fertilizing: Apply a balanced fertilizer in spring to promote healthy growth. Follow package instructions for application rates.
- Pruning: As your plants grow, prune to maintain shape and encourage bushier growth.
Common Challenges and Solutions
While rooting elderberry cuttings is generally straightforward, you may encounter a few challenges:
- Mold Growth: If you notice mold, remove the plastic covering and ensure proper air circulation. You can also sprinkle cinnamon on the soil, which acts as a natural fungicide.
- Wilting: If cuttings wilt, they may be receiving too much direct sunlight or not enough water. Adjust their location and moisture accordingly.
Conclusion
Rooting elderberry cuttings is a fulfilling gardening project that allows you to cultivate your own berry-producing plants. By following these steps and providing the right conditions, you’ll be well on your way to enjoying the beauty and benefits of elderberries in your garden. Not only will you save money and gain control over your plants, but you’ll also experience the joy of nurturing life from a simple cutting.
So, grab your pruning shears and get started on your elderberry propagation journey today! With patience and care, you’ll soon have a thriving elderberry patch ready to yield delicious berries and attract pollinators to your garden. Happy gardening! 🌱✨
Feel free to share your elderberry rooting experiences and connect with fellow gardening enthusiasts! #ElderberryMagic #GardenPropagation #DIYGardening #NatureLovers #GrowYourOwnFood