
Gardening in raised beds offers many benefits, such as improved drainage, better soil control, and easier access to plants. However, one of the most common challenges gardeners face is ensuring their plants get consistent and efficient watering. While traditional watering methods, such as sprinklers and hoses, can be inefficient and wasteful, a raised bed drip irrigation system provides a much-needed solution.
This article will guide you step-by-step on how to install and maintain a raised bed drip irrigation system, ensuring that your plants thrive without excessive water waste.
Why Choose Drip Irrigation for Raised Beds?
Before diving into the setup process, it’s important to understand why drip irrigation is ideal for raised beds. Traditional watering methods, like sprinklers, can waste a lot of water because they often soak the entire surface, even the areas that don’t need watering. Drip irrigation, on the other hand, delivers water directly to the roots of the plants, minimizing evaporation and runoff.
Here are some key benefits of drip irrigation for raised beds:
- Water Conservation: Drip irrigation uses significantly less water compared to sprinklers. This helps reduce water usage, which is essential in areas facing droughts or water restrictions.
- Even Water Distribution: Drip systems provide consistent moisture directly to the root zone of each plant, preventing over-watering or under-watering.
- Prevention of Disease: By keeping foliage dry, drip irrigation reduces the risk of fungal diseases that thrive in wet conditions.
- Time and Energy Saving: Once set up, drip irrigation systems are low maintenance, saving you time on watering and allowing you to focus on other gardening tasks.
Materials Needed for Your Raised Bed Drip Irrigation System
To set up your raised bed drip irrigation system, you will need the following materials:
- Drip Tubing: Flexible tubing that carries water from the main water source to the plants. Choose tubing with appropriate emitter spacing for your plants.
- Emitters: These are small devices that release water slowly at a consistent rate to ensure each plant gets the right amount of moisture.
- Drip Tape: A more compact version of tubing, often used for rows of smaller plants like lettuce or herbs.
- Pressure Regulator: If you’re using a high-pressure water source, a pressure regulator ensures that the water pressure is reduced to a level safe for the drip system.
- Backflow Preventer: This prevents water from flowing back into your home’s water supply.
- Filter: A filter keeps debris from clogging your emitters and ensures smooth water flow.
- Connectors and Tees: These help you connect various sections of tubing to create a complete watering network.
- Hole Punch: This tool allows you to punch holes in the tubing where you’ll place your emitters.
Step-by-Step Guide to Setting Up Your Raised Bed Drip Irrigation System
Step 1: Measure Your Raised Bed and Plan Your Layout
Start by measuring the length and width of your raised bed. Knowing the dimensions will help you determine how much tubing and other materials you’ll need. Additionally, it will allow you to decide the best layout for the drip system, ensuring that every plant gets water at the right time.
If you’re using drip tubing with emitters spaced evenly, plan to place the tubing along the length of the bed. For smaller beds, you can use one line of tubing. Larger beds might require multiple lines to ensure even water distribution.
Step 2: Choose Your Drip Irrigation System
Select the right drip irrigation kit for your raised bed. There are many pre-packaged kits available online and at garden centers. These kits often include the necessary components, such as tubing, emitters, connectors, and a pressure regulator, making it easier to set up.
Consider the type of plants you’re growing. If you’re cultivating vegetables like tomatoes or peppers, choose a system with adjustable emitters to provide more water to larger plants. For smaller crops like lettuce or herbs, drip tape with closely spaced emitters works well.
Step 3: Install the Mainline Tubing
The mainline tubing is the backbone of your drip irrigation system. Connect it to your water source (a spigot, garden hose, or outdoor faucet). Make sure the water source has a pressure regulator to prevent damage to the system. Attach the backflow preventer to avoid contaminating your home’s water supply.
Once connected, lay the mainline tubing along the length of your raised bed, making sure it’s positioned where it won’t interfere with plant growth. If your bed is large, you might need to use a “T” connector to split the mainline into multiple rows.
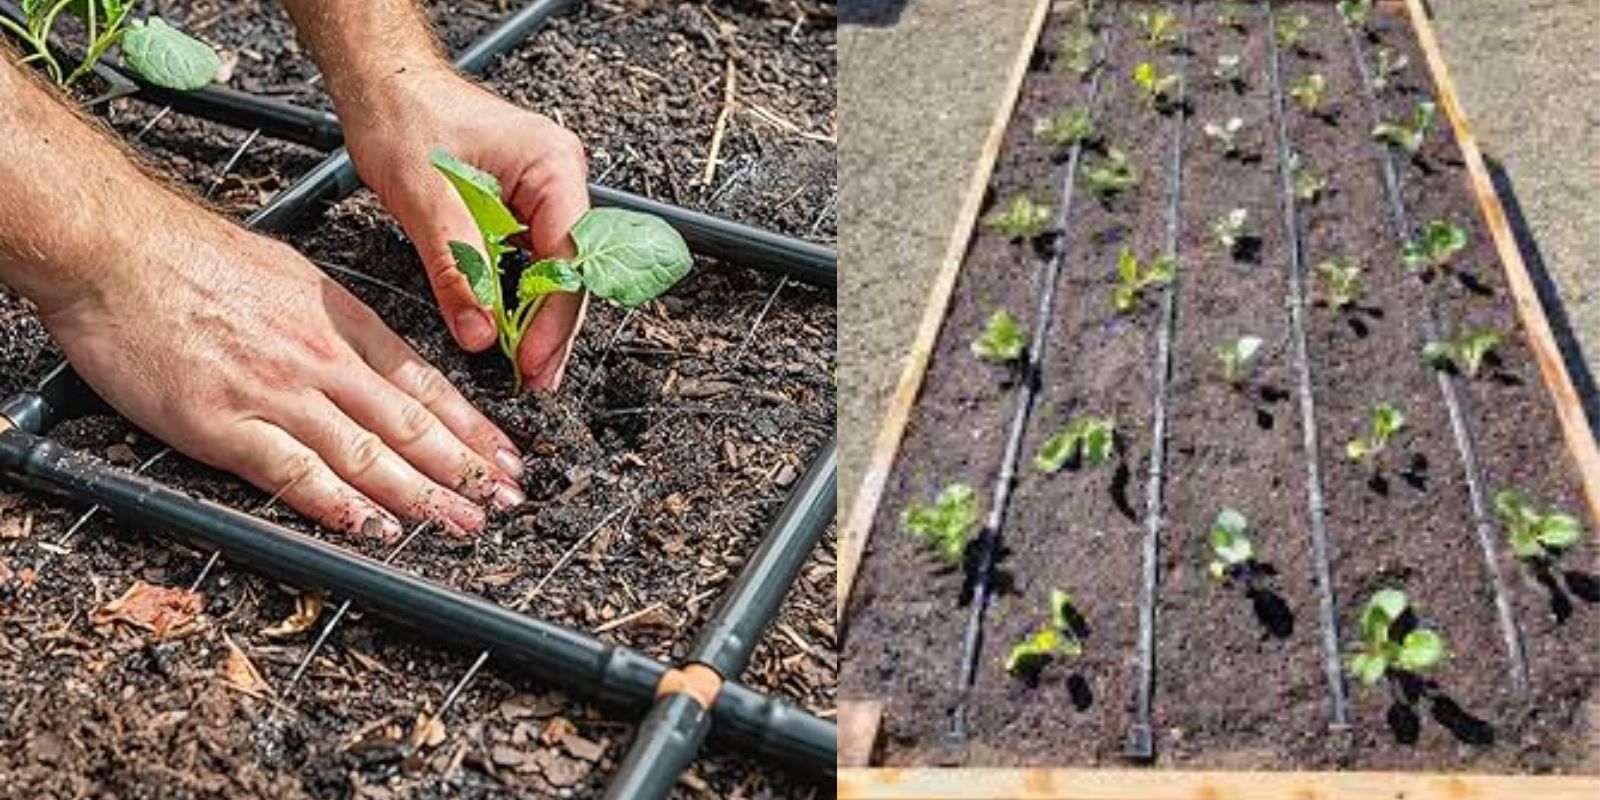
Step 4: Install the Emitters or Drip Tape
Now it’s time to install the drip emitters or drip tape along the row of plants. If using tubing, place the emitters every 6-12 inches, depending on the size of the plants and their water needs. Push the emitters into the holes you’ve made in the tubing. For drip tape, you’ll generally use the pre-punched holes.
Ensure that the emitters are positioned close enough to your plants so that the water reaches the root zone. Make sure the tubing and emitters are secured in place, either by burying them slightly in soil or anchoring them with garden staples.
Step 5: Test the System
Before covering up the tubing or drip tape, turn on the water and check for leaks, clogs, or uneven water distribution. Run the system for a few minutes and watch how the water flows. Adjust the emitters or drip tape as needed to ensure each plant is receiving the right amount of moisture.
Step 6: Cover the Tubing and Mulch
Once you’ve confirmed that everything is working properly, cover the tubing with soil or mulch to prevent it from getting exposed to the sun. Mulch also helps retain moisture in the soil and keeps the roots cool. It’s an essential step for maintaining soil health and reducing evaporation.
Step 7: Regular Maintenance and Adjustments
Your drip irrigation system is now set up, but it will require ongoing maintenance. Periodically check for clogs in the emitters and clean them if necessary. You can flush the system with clean water to remove any debris or mineral buildup.
Additionally, monitor your plants’ growth and adjust the watering schedule as needed. During periods of heavy rainfall, you might want to reduce watering to avoid over-watering.
Additional Tips for Efficient Watering
- Water Early in the Day: To avoid evaporation, it’s best to water your garden early in the morning, when temperatures are cooler.
- Monitor Soil Moisture: Use a moisture meter to ensure the soil is receiving adequate water. The soil should be moist but not waterlogged.
- Water Consistently: Regular, consistent watering is key to keeping your plants healthy. Drip irrigation systems help you avoid dry spots and ensure your plants get the right amount of water every time.
Conclusion
Setting up a raised bed drip irrigation system is one of the most effective ways to conserve water, reduce plant stress, and ensure that your garden flourishes. By following the simple steps outlined in this guide, you can create a system that delivers consistent and efficient water directly to your plants’ roots.
Once your system is installed, it’ll save you time and effort, making it easier to focus on other aspects of gardening. Plus, it’s a sustainable solution that helps preserve water and supports the long-term health of your plants.
So, whether you’re a seasoned gardener or a beginner, a drip irrigation system for your raised beds is a game-changer. Happy gardening!
Hashtags: #RaisedBedGardening #DripIrrigation #SustainableGardening #WaterSmart #HomeGardening #EcoFriendly #WaterConservation #GardenHacks #GardeningTips #EfficientWatering