
Watermelons are a favorite summer fruit, known for their refreshing sweetness and high water content. Growing your own watermelons at home is a rewarding experience, as nothing compares to the taste of a freshly picked, homegrown watermelon. Whether you have a spacious garden or a small balcony, you can grow watermelons with the right techniques.
This comprehensive guide will walk you through everything you need to know about growing watermelons at home, from choosing the right variety to harvesting big, juicy fruits.
1. Choosing the Right Watermelon Variety
Before you start, it’s important to pick the best variety for your growing conditions. Watermelons come in different sizes and shapes, and some varieties grow better in containers than others.
Popular Watermelon Varieties:
✔ Sugar Baby – A small, sweet variety perfect for container gardening.
✔ Crimson Sweet – Large and juicy with excellent disease resistance.
✔ Charleston Gray – A long, oval variety that thrives in warm climates.
✔ Jubilee – Produces huge watermelons, perfect for large garden spaces.
✔ Golden Midget – A unique yellow-skinned variety that matures early.
Tip: If you have limited space, choose dwarf or bush varieties that can grow in pots or small raised beds.
2. Preparing the Soil for Watermelon Plants
Watermelons need nutrient-rich, well-draining soil to grow strong and produce large fruits. Before planting, prepare the soil with the following:
✅ Loamy, well-drained soil – Watermelons hate soggy soil, so ensure good drainage.
✅ pH level between 6.0 and 6.8 – Slightly acidic soil helps them thrive.
✅ Organic matter – Add compost or aged manure to enrich the soil.
✅ Mulching – Helps retain moisture and suppresses weeds.
Tip: If planting in a container, use a large pot (at least 5 gallons) with holes for drainage.
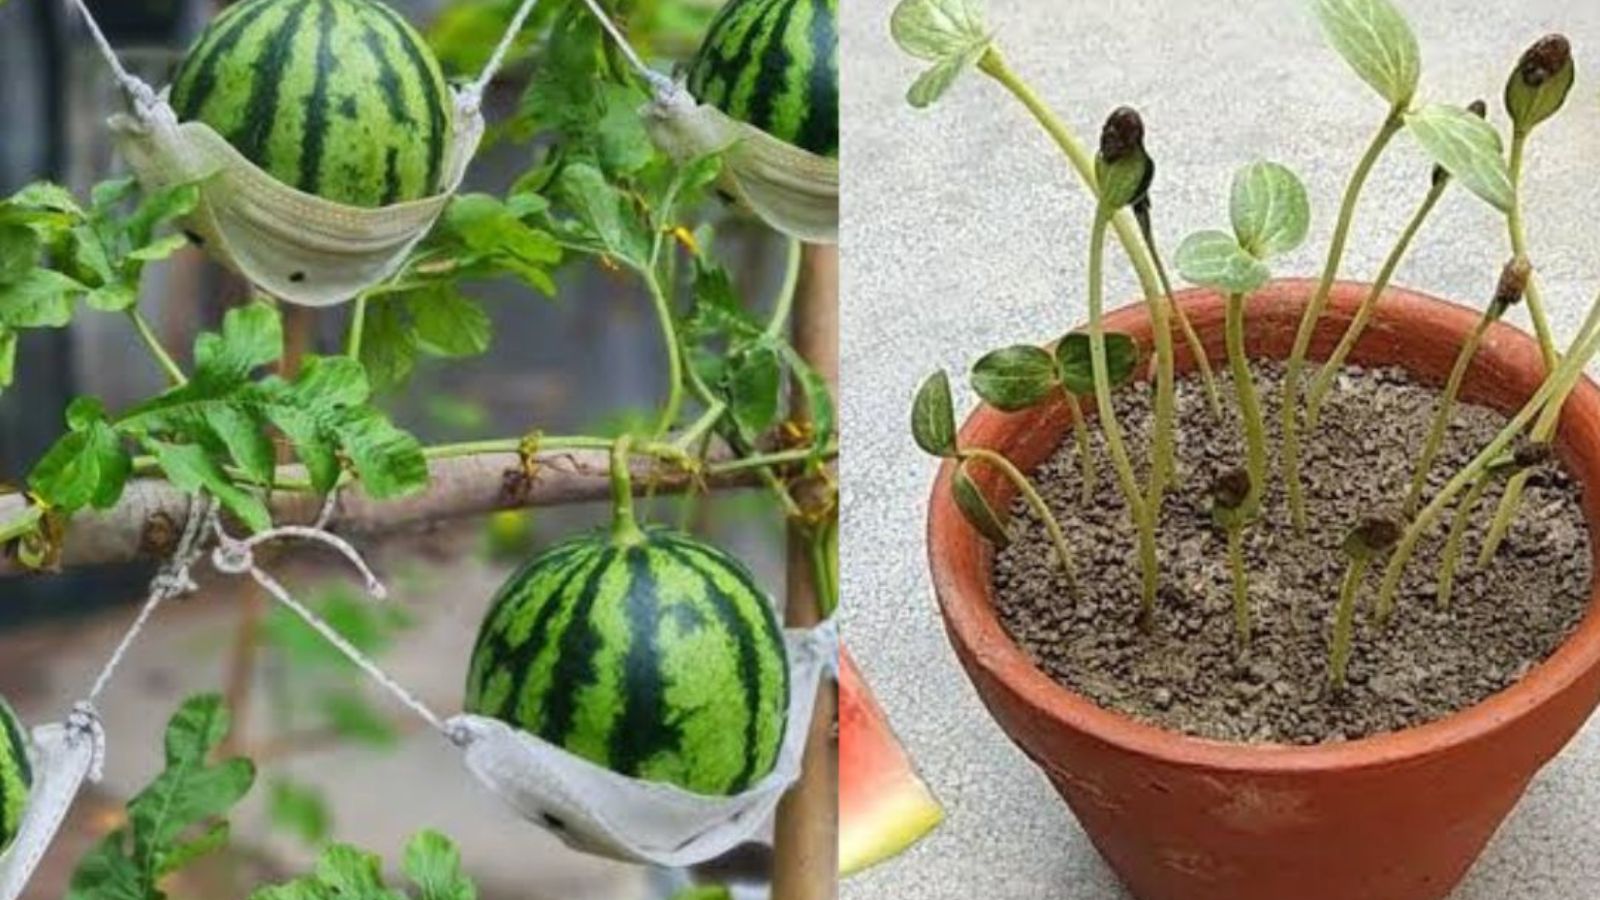
3. Planting Watermelon Seeds
You can start watermelons from seeds or seedlings, depending on your growing preference.
✔ Starting from Seeds:
- Soak the seeds overnight in warm water to speed up germination.
- Plant 1 inch deep in warm soil (above 70°F or 21°C).
- Space them 3-4 feet apart in the garden or one seed per large pot.
✔ Starting from Seedlings:
- If starting indoors, plant seeds in biodegradable pots 4 weeks before transplanting.
- Once outdoor temperatures are warm (above 65°F or 18°C), transplant carefully to avoid root disturbance.
Tip: Watermelons grow best in warm temperatures—plant after the last frost for the best results.
4. Providing Proper Sunlight and Water
Watermelons love the sun and need at least 6-8 hours of direct sunlight daily.
✅ Place them in the sunniest spot in your garden or balcony.
✅ Watermelons have deep roots—water deeply 2-3 times per week.
✅ Reduce watering when fruits begin to mature to improve sweetness.
Tip: Avoid overhead watering to prevent fungal diseases. Use a soaker hose or water at the base of the plant.
5. Fertilizing for Maximum Growth
Watermelons need a lot of nutrients to grow healthy vines and big, sweet fruits.
✔ Early Growth (Before Flowering): Use a nitrogen-rich fertilizer to encourage leafy growth.
✔ Flowering & Fruit Development: Switch to a phosphorus and potassium-rich fertilizer to support fruit formation.
✔ Organic Options: Compost tea, worm castings, and banana peel water are excellent natural fertilizers.
Tip: Avoid excessive nitrogen during flowering, as it can lead to too many leaves and fewer fruits.
6. Supporting Pollination for Better Fruit Set
Watermelon flowers need to be pollinated to develop into fruit. Bees usually do the job, but if you notice flowers but no fruits, you can hand-pollinate them.
✔ Identify male and female flowers – Male flowers have thin stems, while female flowers have tiny fruit at the base.
✔ Use a small brush to transfer pollen from the male flower to the female flower.
✔ Do this in the morning when flowers are open for better results.
Tip: Plant flowers like marigolds and lavender nearby to attract more pollinators.
7. Supporting and Training the Vines
Watermelons can spread up to 10 feet, so they need space to grow. If you’re growing in a small area, train them to climb a trellis.
✅ Use a sturdy trellis to support vines in small gardens.
✅ Provide hammocks for heavy fruits using cloth or netting.
✅ If growing on the ground, space vines apart to allow air circulation.
Tip: Prune excess vines to focus energy on fruit development.
8. Preventing Common Watermelon Pests and Diseases
Watermelons can be affected by pests and diseases, but proper care helps keep plants healthy.
Common Pests:
🐛 Aphids – Spray with neem oil or garlic water.
🐛 Spider Mites – Wash leaves with a mild soap solution.
🐛 Cucumber Beetles – Use floating row covers to protect young plants.
Common Diseases:
🍉 Powdery Mildew – Provide good air circulation and avoid overhead watering.
🍉 Blossom End Rot – Ensure soil has enough calcium (crushed eggshells help!).
🍉 Fusarium Wilt – Rotate crops yearly and use disease-resistant varieties.
Tip: Check leaves regularly and act fast if you spot pests or diseases.
9. Harvesting Watermelons at the Right Time
Watermelons take 70-100 days to mature. Knowing when to harvest is key to getting the sweetest fruit.
✔ Check the tendril – The small tendril near the fruit dries and turns brown.
✔ Look for a yellow spot – The part touching the ground changes from white to yellow.
✔ Tap test – A ripe watermelon sounds hollow when tapped.
Tip: Don’t pick watermelons too early—they stop ripening once off the vine!
10. Storing and Enjoying Your Homegrown Watermelon
Once harvested, you can store whole watermelons for 2-3 weeks in a cool place. Once cut, keep slices refrigerated and consume within 4-5 days.
Enjoy your homegrown watermelon fresh, in smoothies, or even as a refreshing salad with mint and feta! 🍉
Final Thoughts
Growing watermelons at home is easier than you think, and with these tips, you can harvest big, sweet, and juicy watermelons right in your backyard!
🌱 Ready to start growing your own watermelons? Let us know in the comments! 💬👇