
Introduction
Growing your own food has never been easier, even if you don’t have a large garden space. Potatoes, one of the most versatile and beloved vegetables, can be grown in a simple container right on your balcony, patio, or small garden. Growing potatoes in a bucket is not only a space-saving technique but also a rewarding and fun way to produce a bountiful harvest of spuds. In this guide, we’ll walk you through everything you need to know to successfully grow potatoes in a bucket, from selecting the right container to harvesting your delicious homegrown potatoes.
Why Grow Potatoes in a Bucket?
Growing potatoes in a bucket is a popular method for a variety of reasons:
- Space Efficiency: This method is ideal for those with limited gardening space, such as urban gardeners or those with small patios or balconies.
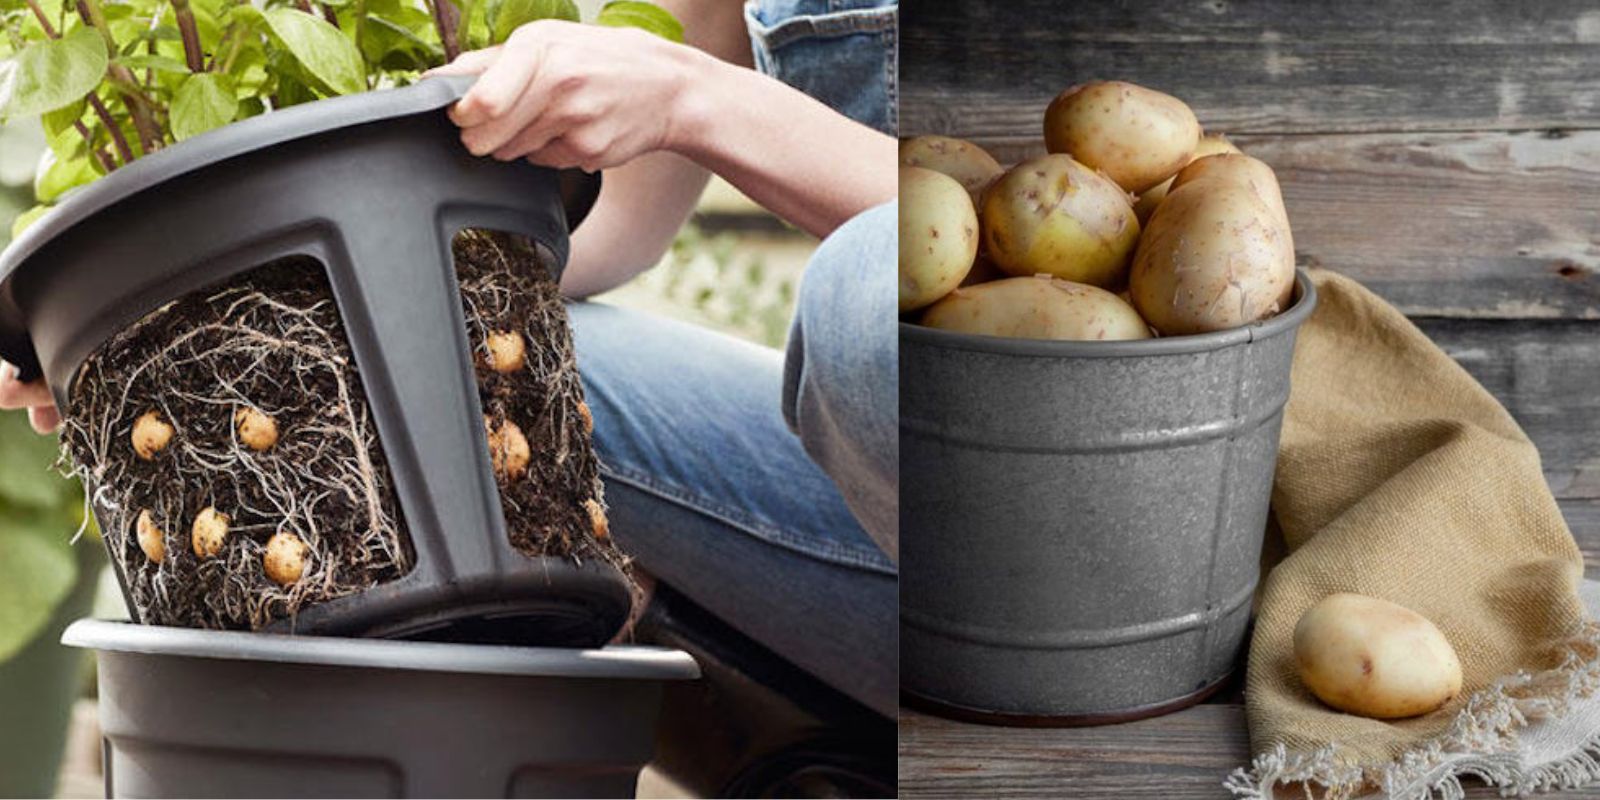
- Ease of Harvest: Harvesting potatoes from a bucket is much simpler and less labor-intensive than digging them out of the ground. You simply tip the bucket over, and your potatoes are ready to collect.
- Control Over Growing Conditions: Growing potatoes in a bucket allows you to control the soil composition, water levels, and sunlight exposure, ensuring optimal growth conditions.
- Mobility: Buckets are portable, allowing you to move your potato plants to catch the best sunlight or protect them from harsh weather conditions.
Step-by-Step Guide to Growing Potatoes in a Bucket
Step 1: Choosing the Right Bucket
The first step in growing potatoes in a bucket is selecting the right container. A bucket that is 10 to 15 gallons in size is ideal. This size provides enough space for the roots to develop and for the potatoes to grow without being overcrowded. Make sure your bucket has drainage holes at the bottom to prevent water from accumulating and causing root rot. If your bucket doesn’t have drainage holes, you can easily drill them yourself.
Step 2: Preparing the Soil
Potatoes thrive in loose, well-draining soil that is rich in organic matter. A mix of garden soil, compost, and sand works well. To prepare the soil, start by filling the bottom of the bucket with about 4-6 inches of your soil mix. This will serve as the base layer for your seed potatoes. Adding compost to the soil not only enriches it with essential nutrients but also improves its texture, ensuring good drainage.
Step 3: Selecting and Planting Seed Potatoes
Seed potatoes are small potato tubers that have sprouted “eyes,” which are the growth points where new plants will emerge. When selecting seed potatoes, choose those that are disease-free and have multiple eyes. You can purchase certified seed potatoes from a garden center or use small potatoes from your own kitchen, as long as they are free of disease.
Cut larger seed potatoes into smaller pieces, ensuring each piece has at least one or two eyes. Allow the cut pieces to dry for a day or two to form a protective layer over the cut surface, which helps prevent rot. Once your seed potatoes are ready, place them on the soil in the bucket with the eyes facing up. Space them evenly and cover them with an additional 4 inches of soil.
Step 4: Watering and Caring for Your Potato Plants
Potatoes need consistent moisture to grow well, but they don’t like to sit in soggy soil. Water your bucket regularly to keep the soil moist but not waterlogged. The goal is to maintain even moisture levels throughout the growing season. Overwatering can lead to rot, while underwatering can result in small, undeveloped tubers.
As the potato plants begin to grow, you’ll notice green shoots emerging from the soil. When these shoots reach about 6 inches in height, it’s time to add more soil. Gently cover the stems with soil, leaving only the top few leaves exposed. This process, known as “hilling,” encourages the development of more tubers along the buried stems. Continue hilling and adding soil as the plants grow, until the soil reaches the top of the bucket.
Step 5: Fertilizing for Optimal Growth
Potatoes are heavy feeders, meaning they require a good amount of nutrients to produce a healthy crop. To ensure your plants have everything they need, apply a balanced fertilizer or one that is specifically formulated for root vegetables. Follow the instructions on the fertilizer package for the correct application rates. You can also add a side dressing of compost midway through the growing season to provide an additional nutrient boost.
Step 6: Managing Pests and Diseases
Like all plants, potatoes can be susceptible to pests and diseases. Common pests include aphids, potato beetles, and slugs. To keep these pests at bay, inspect your plants regularly and remove any pests by hand. You can also use organic insecticidal soap or neem oil to treat infestations.
Diseases like blight can affect potato plants, especially in humid conditions. To prevent disease, ensure good air circulation around your plants by not overcrowding them, and avoid wetting the foliage when watering. If you notice any signs of disease, such as discolored leaves or spots, remove the affected parts immediately to prevent the spread.
Step 7: Harvesting Your Potatoes
After several weeks of growth, your potato plants will begin to flower. This is a sign that tuber formation has begun. You can start harvesting new potatoes (small, tender tubers) about two weeks after the plants flower. For a full harvest of mature potatoes, wait until the foliage turns yellow and begins to die back.
To harvest, simply tip the bucket over onto a tarp or in a large container, and gently sift through the soil to collect your potatoes. Be careful not to damage the tubers during the harvest. Once harvested, let the potatoes cure in a cool, dark place for a few days to toughen their skins, which will help them store better.
Tips for Success
- Sunlight: Potatoes need plenty of sunlight to grow, so place your bucket in a location that receives at least 6-8 hours of direct sunlight each day.
- Watering: Consistent watering is key, but avoid overwatering. Use your finger to check the soil moisture level regularly, and adjust your watering schedule accordingly.
- Mulching: Adding a layer of straw or mulch on top of the soil can help retain moisture, regulate soil temperature, and prevent weeds.
- Companion Planting: Consider planting companion plants like beans or marigolds nearby to deter pests and improve soil health.
The Benefits of Growing Potatoes in a Bucket
Growing potatoes in a bucket offers several advantages beyond space-saving:
- Convenience: The portability of a bucket allows you to move your potato plants to the best growing conditions as needed.
- Cleanliness: Harvesting from a bucket means your potatoes are less likely to be dirty or damaged compared to those grown directly in the ground.
- Control: You have full control over the soil quality, water, and nutrients, leading to a healthier and potentially more productive crop.
- Experimentation: Growing in a container is an excellent way to experiment with different potato varieties, soil mixes, and fertilizers.
Conclusion
Growing potatoes in a bucket is a practical and enjoyable way to cultivate your own fresh potatoes at home, regardless of your garden space. With the right container, soil, and care, you can produce a generous harvest of delicious potatoes with minimal effort. Whether you’re an experienced gardener or a novice looking to try something new, this method is a fantastic way to explore the joys of homegrown produce.
So why not give it a try? Start your potato bucket garden today and share your progress with fellow gardeners online! Use #PotatoGrowing #ContainerGardening #UrbanGardening #HomeGarden #GrowYourOwnFood to connect and inspire others on your gardening journey. Happy planting!