
Corn, a staple in diets worldwide, is one of the most rewarding crops to grow in your garden. Whether you’re cultivating sweet corn for fresh summer meals or growing popcorn for a fun fall treat, the process of growing corn from seed can be fulfilling and fruitful. This guide will walk you through every step of planting, nurturing, and harvesting corn, ensuring a successful crop with plenty of ears to enjoy.
Why Grow Corn at Home?
Homegrown corn tastes fresher and sweeter than store-bought varieties. Growing corn also gives you control over the use of chemicals, allowing you to cultivate an organic and eco-friendly crop. Additionally, growing your own food creates a sense of accomplishment, connecting you to the rhythm of nature. Corn is a versatile plant that can be eaten fresh, canned, frozen, or even dried for long-term storage.
Understanding Corn Varieties
Before diving into planting, it’s crucial to understand the types of corn you can grow:
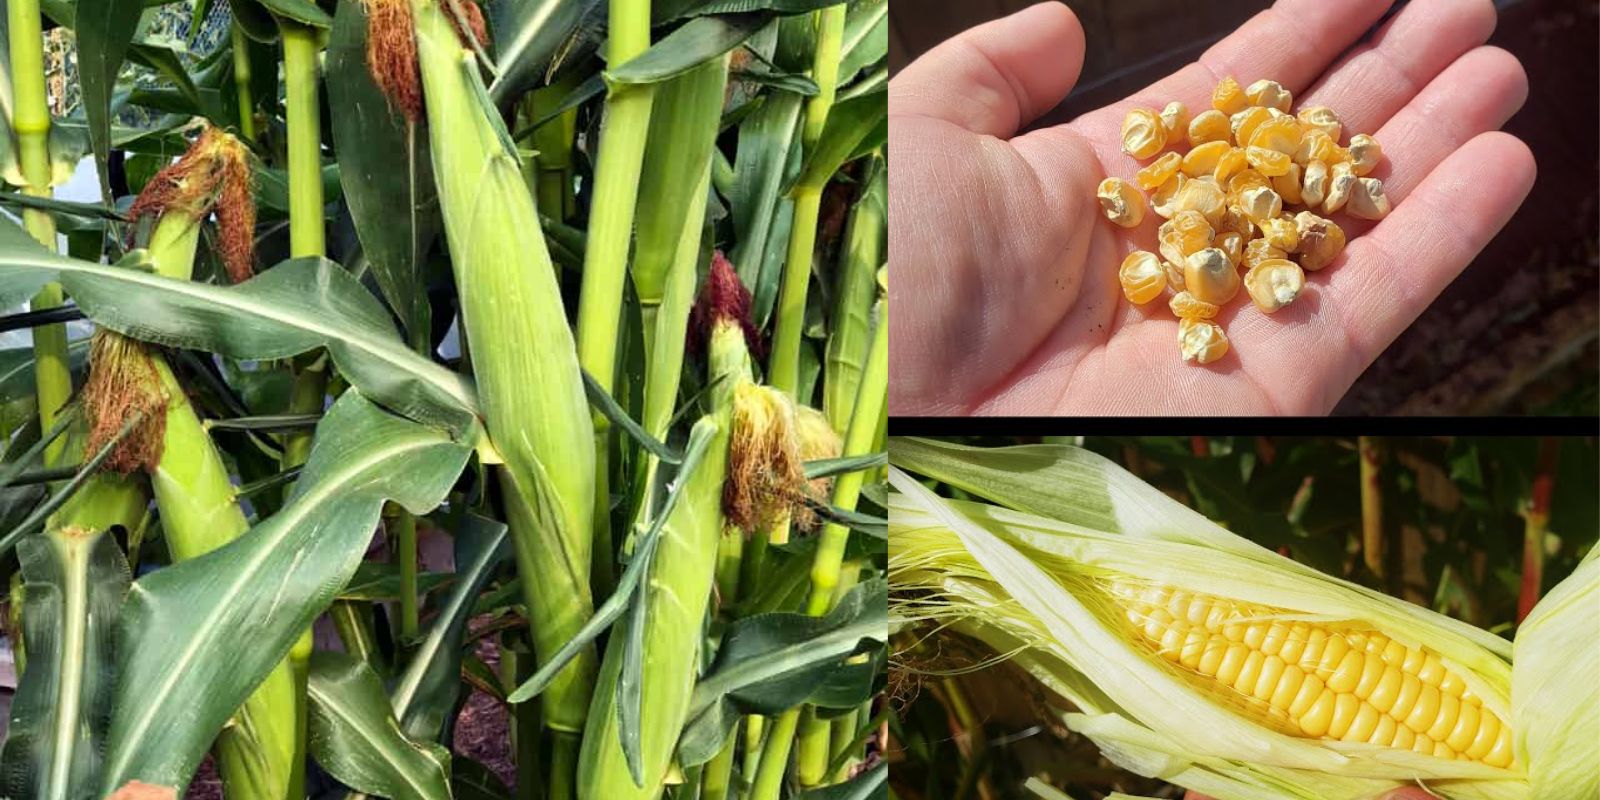
- Sweet Corn: Best for fresh eating, sweet corn is the most popular variety in home gardens. It has a high sugar content, which makes it perfect for grilling, boiling, or roasting.
- Popcorn: This type of corn has hard kernels that can be popped for a fun snack. It requires a bit longer growing season but offers a rewarding harvest.
- Field Corn: Grown mostly for animal feed or industrial purposes, field corn has a starchy texture and is often ground into cornmeal.
Choose a variety that fits your taste and growing conditions. Be mindful that different corn types should not be planted close to each other to avoid cross-pollination, which can affect kernel development and flavor.
Step-by-Step Guide to Growing Corn from Seed
1. Prepare the Soil
Corn is a heavy feeder and thrives in nutrient-rich soil. Before planting, ensure that your soil is loose, well-drained, and rich in organic matter. Start by mixing in compost or well-rotted manure a few weeks before planting. Corn prefers a soil pH of 6.0 to 6.8, so test your soil and amend it accordingly if needed.
Make sure to plant corn in full sun, as it needs at least 6 to 8 hours of direct sunlight per day.
2. Sow Corn Seeds in Blocks, Not Rows
Corn is wind-pollinated, meaning the pollen from the tassels needs to reach the silk on the ears for proper kernel formation. To ensure effective pollination, plant corn in short blocks (at least 4 rows wide) rather than in long rows. This creates a square-shaped planting area that promotes better wind distribution for pollination.
Plant corn seeds 1-2 inches deep and space them about 1-2 inches apart in the rows. Once the seedlings are 4-6 inches tall, thin them out to leave 12-18 inches of space between plants to give them room to grow.
3. Watering and Fertilizing
Corn has high water needs, especially during germination and the development of ears. Water your corn deeply once or twice a week, making sure the soil stays evenly moist. Aim to provide at least 1 inch of water per week, more in particularly hot or dry conditions.
In addition to regular watering, corn needs a steady supply of nutrients to grow tall and strong. Apply a balanced fertilizer or compost tea when the plants reach about 12 inches in height. Side-dress with additional nitrogen when they are knee-high, as this is when corn starts to demand more nutrients.
4. Mulching and Weed Control
Weeds can compete with corn for water and nutrients, so keeping them at bay is crucial. Mulch around your corn plants with straw, grass clippings, or wood chips to suppress weeds and conserve moisture in the soil. Mulching also helps maintain an even soil temperature, which is especially important for the shallow root system of corn.
Check for weeds regularly and remove them by hand to avoid disturbing the roots of your growing corn.
5. Pollination and Ear Development
Corn relies on good pollination to produce full ears with well-developed kernels. You can help nature along by shaking the stalks gently when the tassels (the male part) release pollen. This encourages the pollen to fall on the silks (the female part) of the corn, which ultimately develops into kernels.
Each silk is connected to an individual kernel, so proper pollination is essential for full ears. If you notice uneven pollination, hand-pollinating can help ensure that every ear develops completely.
6. Monitor for Pests and Diseases
Corn can be susceptible to pests such as corn earworms, aphids, and cutworms. Regularly inspect your plants for signs of infestation and treat them as needed. Organic methods like neem oil, insecticidal soap, or introducing beneficial insects such as ladybugs can help keep pests under control.
Common diseases include corn smut, rust, and leaf blight. Rotating your crops and ensuring proper air circulation between plants can minimize the risk of disease. Removing and destroying any infected plants can prevent the spread of these issues.
7. Harvesting Your Corn
Sweet corn is typically ready for harvest 60-100 days after planting, depending on the variety. The best indicator that your corn is ready to pick is when the silks turn brown and dry out, and the kernels produce a milky substance when pressed. If the liquid is clear, the corn isn’t fully mature yet.
Harvest early in the morning for the best flavor. Corn tastes best when it’s fresh, as the sugars in the kernels begin to convert to starch shortly after harvest. If you have a large crop, consider freezing or canning to preserve your corn for later use.
Benefits of Growing Corn from Seed
Growing corn from seed offers several benefits:
- Fresher Flavor: Homegrown corn is incredibly sweet and tender, often superior to what you can find at the store.
- Cost-Effective: A single packet of corn seeds can yield dozens of ears of corn, making it a cost-effective choice for your garden.
- Versatility: Corn is not just for fresh eating—use it in soups, salsas, or grind it for flour. You can also grow ornamental varieties for decoration.
Tips for a Successful Corn Harvest
- Choose the Right Timing: Corn needs warm soil to germinate, so wait until the soil temperature reaches at least 60°F (16°C) before planting.
- Plant in Succession: To extend your corn harvest, plant new seeds every two weeks for a continuous supply of fresh ears throughout the season.
- Companion Planting: Corn grows well alongside beans and squash—a trio known as the “Three Sisters.” The beans help fix nitrogen in the soil, and the squash provides ground cover to retain moisture.
Conclusion
Growing corn from seed is a fun and rewarding experience that can fill your garden with towering stalks and sweet, delicious corn. By choosing the right variety, properly preparing the soil, and providing the necessary care, you can enjoy a bountiful corn harvest in your backyard. Follow the steps outlined in this guide, and you’ll soon be harvesting ears of corn, ready to enjoy in a wide range of dishes.
🌽 Have you tried growing corn before? Share your tips, experiences, and questions in the comments! Let’s grow together!