
Bromeliads, with their striking colors and unique foliage, are the perfect way to bring a splash of tropical beauty into your home. These versatile plants are not only visually appealing but also easy to care for, making them an excellent choice for both novice and experienced gardeners. In this comprehensive guide, we’ll delve into the fascinating world of bromeliads, from selecting the right species to maintaining their beauty year-round.
Why Choose Bromeliads?
Bromeliads are ideal for indoor gardening due to their adaptability and minimal care requirements. Here’s why they stand out:
- Aesthetic Appeal: Bromeliads come in a range of vibrant colors and unique patterns, adding a touch of the exotic to any room.
- Space-Friendly: Their compact size makes them perfect for homes with limited space.
- Low Maintenance: Bromeliads thrive with minimal watering and don’t require frequent repotting.
- Air Purification: Like many houseplants, bromeliads improve air quality, making your living space healthier.
Popular Bromeliad Varieties for Pots
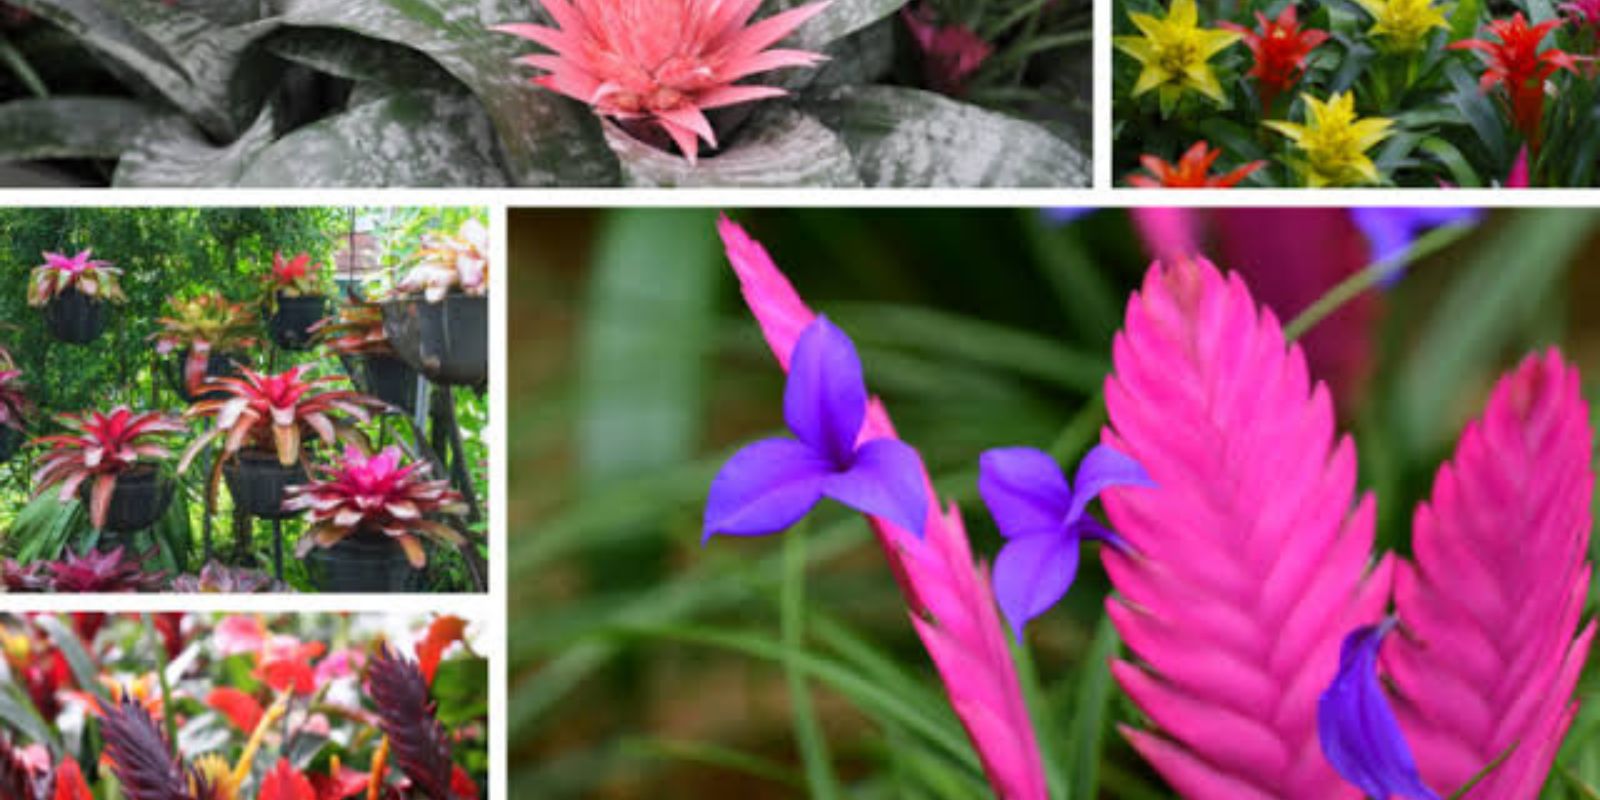
When choosing bromeliads, you’ll find several captivating species to suit your preferences:
- Aechmea: Known for its spiky rosette of leaves and long-lasting blooms.
- Tillandsia (Air Plants): These can grow without soil, making them highly versatile.
- Billbergia: Recognized for their elegant, tubular flowers.
- Neoregelia: Famous for their colorful foliage, often with bright red or pink centers.
- Ananas (Pineapple): A fun addition to any home, these bromeliads even produce mini pineapples.
- Guzmania: Popular for their smooth, green leaves and vibrant flower spikes.
How to Care for Potted Bromeliads
1. Choosing the Right Location
Bromeliads thrive in bright, indirect light. Too much direct sunlight can scorch their leaves, while insufficient light can dull their vibrant colors. Place them near a window that receives filtered sunlight or in a well-lit room.
2. Maintaining Optimal Temperature
These tropical plants prefer temperatures between 22–24°C (72–75°F). Keep them away from drafts, air conditioners, and heaters, as extreme conditions can stress the plant.
3. Watering Properly
Watering bromeliads is straightforward:
- Pour water into the central cup (rosette) of the plant. This is how bromeliads naturally absorb moisture in the wild.
- Empty the cup occasionally to prevent stagnant water, which can lead to rot.
- Water the soil lightly once a week to keep it slightly moist.
4. Fertilizing for Growth
During the growing season (spring and summer), apply a diluted liquid fertilizer every two weeks. Use a formula designed for flowering plants to promote vibrant blooms and healthy foliage.
5. Repotting and Soil
Bromeliads don’t need frequent repotting, but if the plant outgrows its pot or the soil becomes compacted, it’s time for a change. Use a well-draining mix, such as a blend of orchid bark, peat, and perlite.
6. Humidity and Airflow
Bromeliads prefer moderate to high humidity. To mimic their natural habitat:
- Mist the leaves occasionally.
- Place a tray of water with pebbles near the plant to increase humidity.
- Ensure good airflow to prevent fungal issues.
Propagating Bromeliads
Bromeliads propagate through offsets, also known as “pups,” which grow at the base of the parent plant. Here’s how to propagate them:
- Wait for the Pups to Grow: Allow the pups to reach about one-third the size of the parent plant before removing them.
- Separate the Pups: Gently cut the pup away from the parent plant using a sharp, clean knife.
- Plant in Fresh Soil: Use a small pot with well-draining soil to plant the pup.
- Create Humidity: Cover the pot with a plastic bag to create a greenhouse effect, encouraging root growth.
- Care for the Pup: Place it in a bright location and water sparingly until it establishes roots.
Common Problems and Solutions
1. Darkened Leaves
- Cause: Overheating or excessive sunlight.
- Solution: Move the plant to a spot with indirect light.
2. Root Rot
- Cause: Overwatering or poorly draining soil.
- Solution: Allow the soil to dry out between waterings and ensure the pot has proper drainage.
3. Pests
- Common Culprits: Mealybugs and scale insects.
- Solution: Remove pests manually with a cotton swab dipped in alcohol or use insecticidal soap.
Why Bromeliads Are Worth the Effort
Bromeliads are more than just decorative plants. They bring a sense of tranquility and a splash of nature into your home. Their exotic appearance, coupled with their easy care routine, makes them a favorite among indoor gardeners.
Tips for a Thriving Bromeliad
- Rotate the pot occasionally to ensure even growth.
- Avoid using hard water, which can leave deposits on the leaves.
- Clean the leaves regularly with a damp cloth to remove dust.
- Monitor for any signs of stress, such as discoloration or drooping leaves.
Conclusion: A Rewarding Indoor Planting Experience
Growing bromeliads in pots is a delightful way to add life and color to your indoor spaces. With their vibrant hues and minimal care requirements, these plants are a fantastic addition to any home. By following the steps outlined in this guide, you can enjoy the beauty of bromeliads year-round and even share their charm with friends and family through propagation.
Have you tried growing bromeliads at home? Share your tips and experiences below to inspire fellow plant lovers!