
Orchids are the epitome of grace and sophistication in the plant world. Their captivating blooms have enchanted gardeners and plant enthusiasts for centuries. While propagating orchids is often associated with division or stem cuttings, growing an orchid from a single leaf is a fascinating and less common method. This guide will walk you through the entire process, helping you nurture a stunning orchid plant from a single leaf.
Why Grow an Orchid from a Leaf?
Propagating orchids from a leaf is not just a unique challenge but also a deeply rewarding experience. It allows you to witness every stage of the plant’s development, from a humble leaf to a flowering masterpiece. Moreover, this method is a sustainable way to multiply your orchid collection without spending on new plants.
Getting Started: Understanding the Basics
Growing orchids from leaves requires patience, attention to detail, and the right conditions. Orchids are epiphytic plants, meaning they grow on other surfaces in their natural habitat. Replicating their ideal environment is crucial for successful propagation.
Step-by-Step Guide to Growing an Orchid from a Leaf
1. Selecting the Right Leaf
The foundation of your orchid-growing journey starts with choosing the right leaf. Here’s how:
- Pick a Healthy Leaf: Look for a leaf that is green, mature, and free from any damage or discoloration.
- Sterilize Tools: Use sterilized scissors or a blade to cut the leaf near its base, ensuring a clean and precise cut.
2. Preparing the Leaf for Propagation
After selecting and cutting the leaf, preparation is key:
- Clean the Cut Area: Gently rinse the leaf with water and allow it to dry.
- Apply Rooting Hormone: Dip the cut end into a rooting hormone. This step encourages the growth of roots, which is essential for the plant’s survival.
3. Choosing the Right Medium
Orchids thrive in a specialized growing medium that mimics their natural habitat:
- Orchid Potting Mix: Use a mix designed for orchids, which typically includes bark, charcoal, and perlite.
- Sphagnum Moss: Alternatively, you can use moist sphagnum moss, which retains moisture and promotes root development.
4. Planting the Leaf
Now that your leaf is ready, it’s time to plant:
- Prepare the Pot: Select a small, well-draining pot. Add the potting medium, ensuring it is slightly moist.
- Insert the Leaf: Gently place the cut end of the leaf into the medium. Make sure the leaf is stable and upright.
5. Creating the Perfect Environment
Orchids require specific environmental conditions to thrive:
- Maintain Humidity: Cover the pot with a clear plastic bag or place it in a propagator to retain moisture.
- Provide Indirect Light: Orchids prefer bright, indirect sunlight. Avoid placing the pot in direct sunlight, which can scorch the leaf.
- Optimal Temperature: Maintain a temperature between 65°F and 75°F (18°C to 24°C).
6. Watering and Care
Proper watering is critical to prevent rot and ensure healthy growth:
- Mist the Medium: Use a spray bottle to lightly mist the potting medium. Keep it moist but not waterlogged.
- Avoid Overwatering: Too much water can cause the leaf to rot before roots develop.
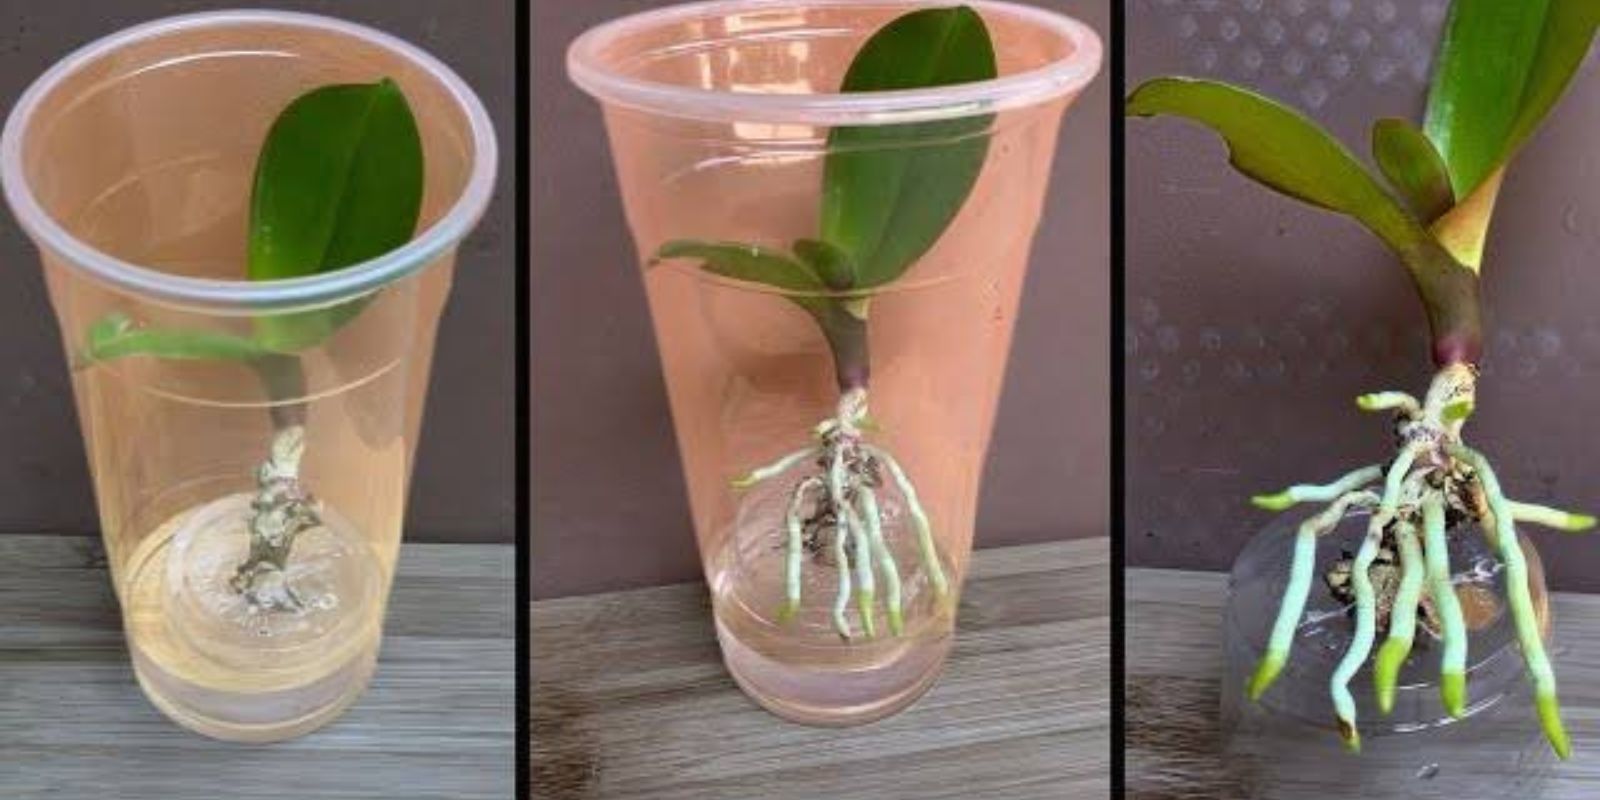
7. Monitoring Growth
Growing an orchid from a leaf takes time, so patience is key:
- Root Development: Roots may take several weeks or even months to appear. Look for small white or green roots emerging from the cut end.
- New Growth: Once roots are established, you may notice new leaves or shoots beginning to grow.
8. Transplanting
Once the plant has a healthy root system, it’s time to transplant:
- Choose a Larger Pot: Select a pot that allows room for growth but still provides good drainage.
- Use Fresh Medium: Repot the plant in fresh orchid potting mix to give it the nutrients it needs.
Common Challenges and Solutions
1. Leaf Rot
Cause: Excessive moisture or poor ventilation.
Solution: Ensure proper drainage and reduce watering frequency.
2. Slow Growth
Cause: Insufficient light or low humidity.
Solution: Adjust the plant’s location to provide bright, indirect light and increase humidity.
3. No Root Development
Cause: Lack of rooting hormone or unsuitable medium.
Solution: Reapply rooting hormone and ensure the medium is ideal for orchids.
Tips for Success
- Sterilize Everything: Always sterilize tools and pots to prevent infections.
- Be Patient: Orchids are slow growers, and progress may take months.
- Experiment with Mediums: If one medium doesn’t work, try another, such as sphagnum moss or coconut husk.
- Track Progress: Keep a journal to note changes and adjust care accordingly.
The Rewards of Propagating Orchids from Leaves
Growing an orchid from a single leaf is not only a testament to your gardening skills but also a sustainable way to expand your orchid collection. Each step, from selecting the leaf to nurturing new growth, deepens your connection with nature and enhances your understanding of this fascinating plant.
Imagine the joy of seeing your orchid bloom, knowing it all started from a single leaf. This process, though time-consuming, is a truly fulfilling experience that rewards you with beautiful flowers and a profound sense of accomplishment.
Engage with Us!
Have you ever propagated an orchid? Share your experiences and tips in the comments below! Let’s grow a community of orchid enthusiasts together. 🌸
📌 #OrchidPropagation #GardeningHacks #GrowYourOwnOrchid