
Orchids have long been a symbol of elegance, beauty, and grace. Among the various species, the Dendrobium orchid stands out for its striking blooms and versatility in the home garden. If you’re looking to add a splash of vibrant yellow to your indoor space, a Dendrobium orchid in a hanging pot is an excellent choice. This article will walk you through the process of cultivating a beautiful yellow Dendrobium orchid in a hanging pot, providing detailed steps, care tips, and insights to help your plant thrive.
Understanding the Dendrobium Orchid
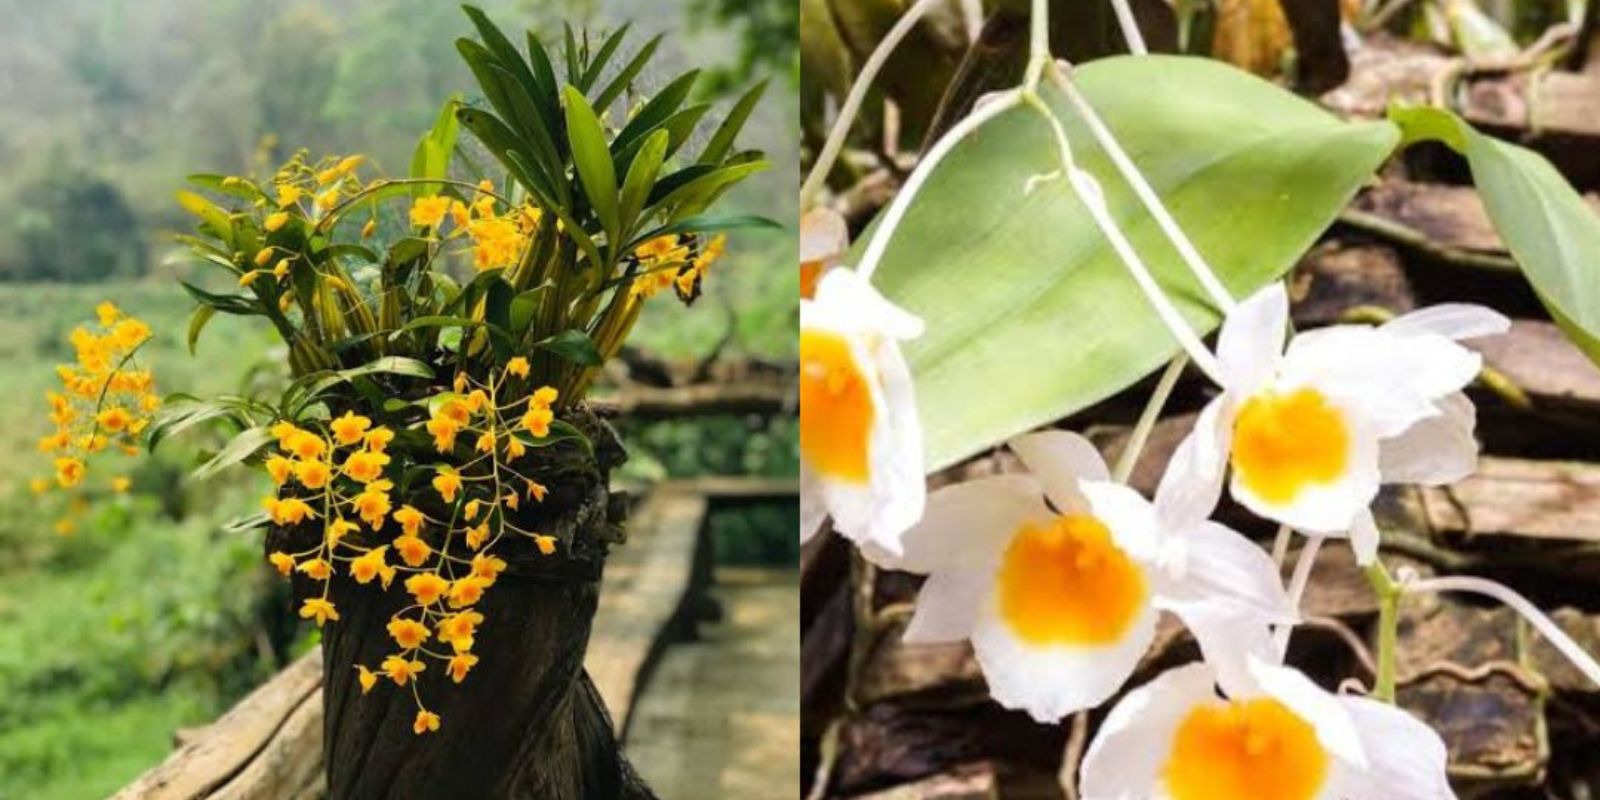
Dendrobium orchids are among the most popular and diverse types of orchids, with more than 1,800 species. Known for their elegant flowers and varied colors, Dendrobiums can be found in hues ranging from white and pink to purple and yellow. The yellow variety, in particular, is cherished for its vivid and long-lasting blossoms that brighten up any room.
Native to Southeast Asia, Dendrobium orchids thrive in a warm, humid environment with plenty of indirect light. Unlike some other orchids, they are relatively easy to care for, making them a great choice for both novice and experienced gardeners. With the right care, a Dendrobium orchid can bloom multiple times a year, filling your space with a burst of color and fragrance.
Step-by-Step Guide to Growing a Yellow Dendrobium Orchid in a Hanging Pot
To ensure your yellow Dendrobium orchid grows successfully in a hanging pot, follow these simple but important steps. Proper preparation, care, and attention to detail will allow your orchid to flourish and reward you with vibrant blooms year after year.
1. Selecting the Right Hanging Pot
The first step in growing a Dendrobium orchid in a hanging pot is selecting the appropriate container. A large hanging pot with drainage holes is essential to prevent root rot. Orchids, including Dendrobiums, do not like to sit in water, and proper drainage ensures that the roots have access to air and can breathe properly.
Opt for a hanging pot that is large enough to accommodate the orchid’s roots but not excessively large, as orchids prefer to be slightly root-bound. Hanging pots made from materials like plastic or clay are both excellent options, as long as they provide proper drainage.
2. Choosing the Right Potting Mix
The key to a healthy orchid is the right potting medium. Dendrobium orchids do not thrive in traditional soil, which can retain too much moisture. Instead, they require a well-draining potting mix designed specifically for orchids. Look for an orchid mix that contains a blend of bark, perlite, and sphagnum moss.
The bark in the mix provides aeration for the roots, while perlite ensures good drainage. The sphagnum moss helps retain a little moisture but does not keep the roots too wet, which is essential for orchids that prefer to dry out between waterings. You can also add some coconut coir to the mix for additional moisture retention.
3. Planting the Orchid
When planting your Dendrobium orchid, gently remove it from its nursery pot. Be careful not to damage the roots. If the orchid is root-bound (meaning the roots are tightly packed and circling the pot), carefully untangle them before placing the plant into its new hanging pot. Position the orchid so that the pseudobulbs (the swollen stem portions that store water and nutrients) are positioned above the potting mix, with the roots spreading out gently into the mix.
Fill in around the orchid with the potting mix, ensuring that the roots are securely covered but that the pseudobulbs are not buried too deep. Lightly firm the mix around the roots, but avoid compacting it too much.
4. Watering the Orchid
Watering is one of the most important aspects of orchid care, and it’s crucial not to overdo it. Dendrobium orchids prefer to dry out between waterings, so allow the top of the potting mix to dry out before adding more water. Water the orchid thoroughly, ensuring that the water runs out of the drainage holes at the bottom of the pot. This helps flush out any excess salts or fertilizer buildup from the potting mix.
Water your orchid once every 7 to 10 days, but this may vary depending on the humidity and temperature in your home. In a hanging pot, the mix may dry out more quickly due to the exposure to air, so monitor the moisture levels closely.
5. Providing Proper Light
Dendrobium orchids thrive in bright, indirect light. When placing your hanging pot, choose a location that receives plenty of filtered sunlight but is protected from the harsh midday sun, which can scorch the delicate leaves. East-facing windows are often ideal, as they provide gentle morning sunlight.
If you don’t have a window with sufficient natural light, you can supplement with artificial grow lights designed for orchids. These lights mimic the natural light spectrum and can help your orchid grow and bloom even if your home doesn’t have enough sunlight.
6. Maintaining Humidity
Orchids, including Dendrobiums, require a humid environment to thrive. The ideal humidity level for a Dendrobium orchid is between 50% and 70%. If you live in a dry climate or have low indoor humidity, consider using a humidity tray or placing a humidifier near the orchid to increase moisture in the air.
Alternatively, you can mist the leaves of the orchid with water once or twice a day, especially during the warmer months. However, be sure not to overdo it, as constant moisture on the leaves can encourage fungal growth. Avoid spraying directly onto the flowers, as this can cause them to deteriorate.
7. Fertilizing Your Orchid
To support your Dendrobium orchid’s growth and encourage blooming, use a balanced orchid fertilizer. Orchids benefit from regular feedings, especially during the growing season (spring and summer). Use a liquid fertilizer that is diluted to half strength to avoid over-fertilizing, which can harm the plant.
Fertilize your orchid once a month, and be sure to flush the potting mix with water once every few months to remove any excess fertilizer buildup. This helps keep the roots healthy and prevents salt accumulation in the soil.
8. Pruning and Maintenance
Dendrobium orchids benefit from occasional pruning to remove dead or damaged growth. After the flowers have faded, you can trim back the flower spikes to encourage the plant to produce new blooms. Be sure to use sterilized pruning shears to avoid spreading any potential disease.
If your orchid’s leaves or roots begin to show signs of damage or rot, trim them away carefully to keep the plant healthy. Always monitor the health of the roots, and if you notice any areas of rot, cut them off with clean scissors to prevent it from spreading.
Troubleshooting Common Issues
While Dendrobium orchids are relatively easy to care for, they can still encounter a few issues. Here are some common problems and their solutions:
- Yellowing Leaves: This can be a sign of overwatering, poor drainage, or a lack of nutrients. Make sure you’re following proper watering practices and using the right potting mix.
- No Blooms: If your orchid isn’t blooming, it may not be getting enough light, or it could be experiencing stress due to inconsistent watering. Ensure it’s getting the right amount of indirect light and that the environment is stable.
- Root Rot: This occurs when the roots are kept too wet for too long. Ensure the pot has proper drainage and that you’re not overwatering.
Conclusion
Growing a yellow Dendrobium orchid in a hanging pot is a rewarding and relatively easy process when done correctly. By providing the right conditions—adequate light, humidity, and proper watering—you can enjoy the stunning beauty of this plant for years to come. With its bright yellow flowers and elegant appearance, the Dendrobium orchid will add a touch of natural beauty to your home, creating a peaceful and vibrant atmosphere.
Start by following these steps, and with patience and care, you’ll be rewarded with a gorgeous, blooming orchid that will be the envy of your friends and family. Happy gardening!