
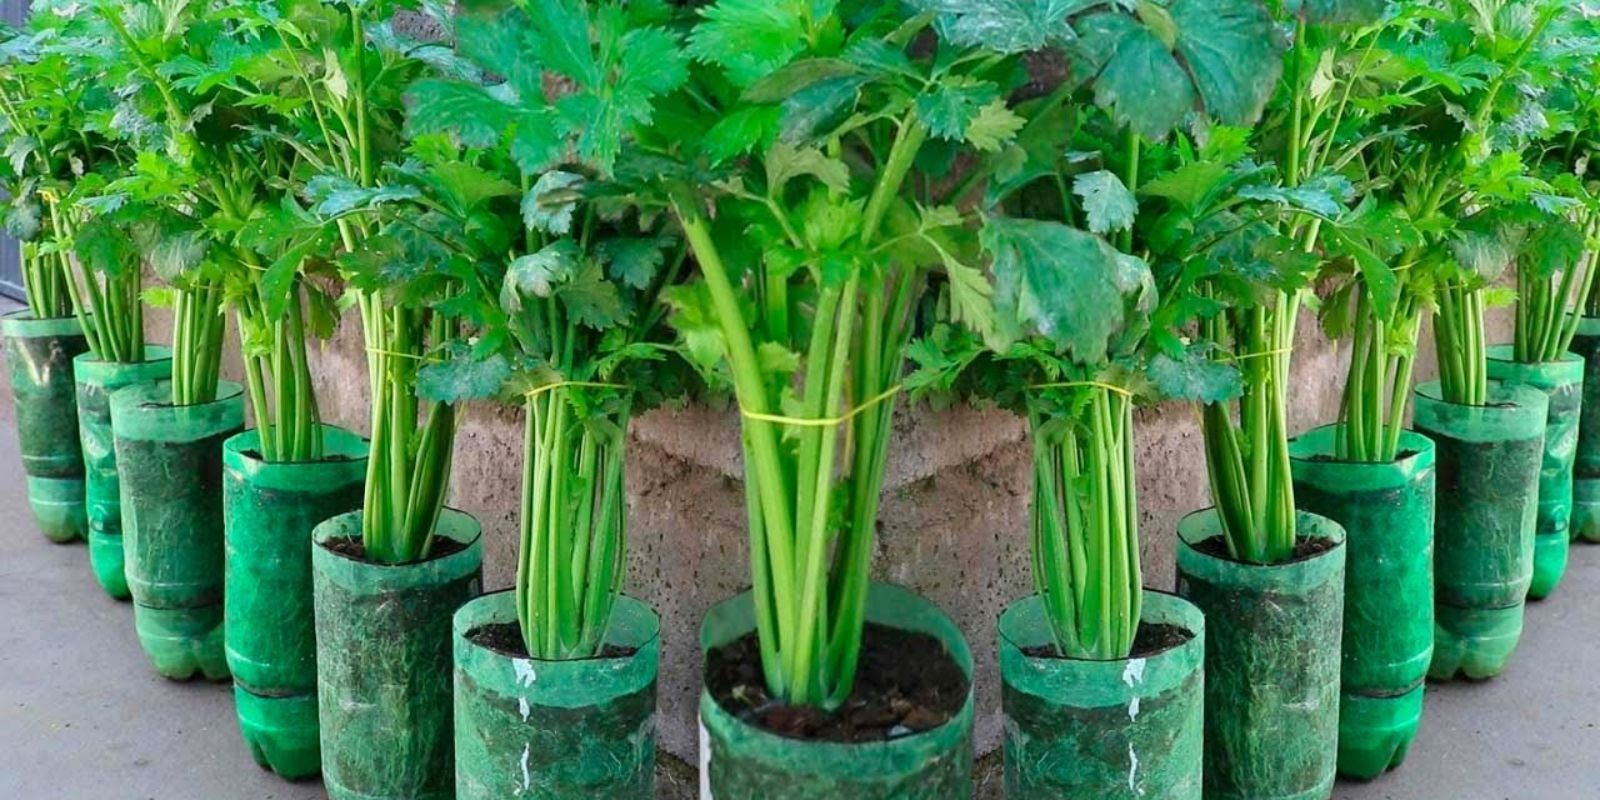
In a world increasingly focused on sustainability and eco-friendly practices, finding creative ways to reduce waste and grow your own food has become more important than ever. One such innovative method is growing celery in reused plastic bottles. This approach not only repurposes plastic waste but also provides a practical and space-saving way to enjoy fresh, homegrown celery. Whether you’re a seasoned gardener or a complete beginner, this guide will walk you through the process of cultivating celery in plastic bottles, offering tips and insights along the way.
The Benefits of Growing Celery in Reused Plastic Bottles
Before we dive into the step-by-step process, it’s worth exploring why this method is beneficial. Growing celery in plastic bottles is a fantastic way to reduce your environmental footprint. By reusing plastic bottles, you’re keeping them out of landfills and giving them a new purpose. Additionally, this method is ideal for those with limited space, such as apartment dwellers or urban gardeners. The compact nature of plastic bottles makes them perfect for balcony gardening, windowsills, or even indoor spaces with sufficient light.
Another advantage is the control you have over the growing environment. Using plastic bottles allows you to monitor soil quality, moisture levels, and light exposure more closely, leading to healthier plants and a more successful harvest.
Step 1: Prepare the Plastic Bottle
The first step in growing celery in a plastic bottle is to prepare the bottle itself. You’ll need a clean, empty plastic bottle, preferably one with a larger capacity, such as a 2-liter soda bottle. Here’s how to get started:
- Cut the Bottle: Using a sharp knife or scissors, carefully cut the top off the bottle. You’ll want to leave enough height to hold the soil and support the celery plant. Aim to remove the top third of the bottle, keeping the bottom two-thirds for planting.
- Create Drainage Holes: To prevent water from accumulating at the bottom and causing root rot, poke several small holes in the base of the bottle. These drainage holes will allow excess water to escape, ensuring your celery plant has the right balance of moisture.
- Optional: Create a Self-Watering System: If you want to make the process even easier, you can create a self-watering system. Simply leave the cap on the bottle, cut the bottle in half, and place the top half upside down into the bottom half. The top half, filled with soil, acts as the planting container, while the bottom half holds water. A piece of cloth or string can be used as a wick to draw water from the bottom reservoir to the soil.
Step 2: Fill the Bottle with Soil
Once your bottle is ready, it’s time to fill it with soil. The key to growing healthy celery is using nutrient-rich, well-draining soil. A mixture of potting soil and compost is ideal, as it provides the nutrients celery needs to thrive. Here’s what to do:
- Fill the Bottle: Pour the potting soil and compost mixture into the bottle, filling it about three-quarters of the way. Gently press down the soil to remove any air pockets and ensure it’s evenly distributed.
- Add Fertilizer (Optional): If you want to give your celery an extra boost, consider adding a slow-release organic fertilizer to the soil. This will provide a steady supply of nutrients as the plant grows.
Step 3: Plant the Celery Stalk
Now that your bottle is prepared and filled with soil, it’s time to plant the celery. You can use the base of a celery stalk that you’ve already used in your kitchen, making this a great way to reduce food waste. Here’s how to plant your celery:
- Prepare the Stalk: Cut the base of the celery stalk, leaving about 2-3 inches of the base intact. This is the part that will grow into a new plant.
- Plant the Stalk: Place the celery base in the soil, pressing it down gently. The base should be about halfway buried in the soil, with the top exposed. This allows the new growth to emerge from the center of the base.
- Water Thoroughly: After planting the celery base, water the soil thoroughly. The soil should be moist but not waterlogged. The drainage holes you created earlier will help prevent excess water from accumulating.
Step 4: Place the Bottle in a Sunny Spot
Celery requires plenty of light to grow, so it’s important to place your plastic bottle in a spot where it will receive sufficient sunlight. Ideally, your celery plant should get at least 6 hours of sunlight each day. If you’re growing indoors, a sunny windowsill is a perfect location. If you’re growing on a balcony or outdoors, choose a spot that receives ample light throughout the day.
If your home doesn’t have a sunny enough spot, you can supplement natural light with a grow light. Position the light about 6-12 inches above the plant, and keep it on for 12-16 hours a day to mimic natural sunlight.
Step 5: Water and Care for Your Celery
As your celery begins to grow, it’s essential to keep the soil consistently moist. Celery is a water-loving plant, and it needs regular watering to stay healthy. Here’s how to care for your growing celery:
- Watering: Check the soil regularly, and water whenever it feels dry to the touch. Be careful not to overwater, as this can lead to root rot. The goal is to keep the soil moist but not soggy.
- Fertilizing: If you didn’t add fertilizer when planting, you could feed your celery with a liquid fertilizer every two weeks during the growing season. This will provide the nutrients needed for robust growth.
- Pruning: As the celery grows, you may notice some of the outer leaves turning yellow or wilting. Remove these leaves to encourage new growth and prevent the plant from expending energy on unhealthy parts.
Step 6: Harvesting Your Celery
After a few weeks, you’ll start to see new celery stalks emerging from the center of the plant. Depending on the conditions and care, your celery should be ready for harvest in 3-4 months. Here’s how to harvest your celery:
- Harvest Individual Stalks: You can harvest individual stalks as needed by cutting them off at the base with a sharp knife. This method allows the plant to continue growing and producing new stalks.
- Harvest the Whole Plant: If you prefer, you can harvest the entire plant by cutting it off at the soil level. However, keep in mind that this will stop the plant from producing new growth.
Conclusion: Sustainable Gardening for a Greener Future
Growing celery in reused plastic bottles is not only an eco-friendly way to enjoy fresh produce, but it’s also a rewarding and accessible gardening project for anyone, regardless of space or experience. By following these simple steps, you can reduce waste, save money, and contribute to a more sustainable lifestyle.
Ready to give it a try? Start your sustainable gardening journey today and experience the satisfaction of growing your own food in a way that benefits both you and the planet. Don’t forget to share your progress and tips with us—we’d love to hear how your celery is growing! 🌱