
Introduction
Ginger (Zingiber officinale) is a versatile and flavorful spice widely used in cooking, medicine, and home remedies. It’s packed with powerful anti-inflammatory and antioxidant properties, making it an essential ingredient in many households. But instead of buying ginger from the store every time you need it, why not grow your own endless supply right at home?
Growing ginger is surprisingly easy, even if you have limited space. Whether you have a garden, a balcony, or just a sunny windowsill, you can cultivate fresh ginger with minimal effort. This guide will walk you through everything you need to know—from selecting the right ginger root to harvesting and replanting for a continuous supply.
Why Grow Your Own Ginger?
Before diving into the step-by-step process, here are a few reasons why growing ginger at home is a fantastic idea:
- Cost-Effective – A single ginger root can produce multiple harvests, saving you money in the long run.
- Chemical-Free – Store-bought ginger is often treated with pesticides and growth inhibitors. Growing your own ensures a pure, organic supply.
- Freshness & Flavor – Homegrown ginger is more aromatic and flavorful than what you buy at the store.
- Sustainability – Reduce food waste by regrowing ginger from kitchen scraps.
- Easy to Grow – Ginger thrives in pots or garden beds with minimal maintenance.
Now that you know the benefits, let’s get started on your journey to an endless supply of ginger!
Step 1: Selecting the Right Ginger Root
The first step in growing ginger is choosing a healthy root (rhizome). Here’s what to look for:
✔️ Buy Organic Ginger – Non-organic ginger is often treated with growth inhibitors that prevent sprouting. Organic ginger ensures a higher success rate.
✔️ Look for “Eyes” – Ginger grows from small nodes or “eyes” on the rhizome. Choose a root with multiple healthy buds.
✔️ Firm & Plump – Avoid shriveled, dry, or moldy ginger. A fresh, firm root will sprout faster.
Once you have your ginger root, you’re ready to prepare it for planting!
Step 2: Preparing the Ginger for Planting
To give your ginger the best start, follow these preparation steps:
1️⃣ Soak the Root – Soak the ginger in water for 8–12 hours to remove any chemicals and speed up sprouting.
2️⃣ Cut into Sections – If your ginger is large, cut it into 1–2 inch pieces, ensuring each section has at least one bud.
3️⃣ Let it Dry – Allow the cut sections to dry for a day to prevent rot when planted.
Step 3: Choosing the Best Growing Location
Ginger is a tropical plant that thrives in warm, humid conditions. Here’s how to create the perfect environment:
🌡️ Temperature – Ideal growing temperatures range from 70–90°F (21–32°C).
☀️ Light Requirements – Ginger prefers indirect sunlight or partial shade rather than full sun.
🌱 Soil Type – Use loose, well-draining soil rich in organic matter. A mix of potting soil, compost, and sand works well.
If you live in a cold climate, growing ginger in pots indoors is the best option.
Step 4: Planting Ginger
Now that your ginger is prepped and your growing space is ready, it’s time to plant!
In Pots
1️⃣ Choose a wide, shallow pot (at least 12 inches wide) to allow rhizomes to spread.
2️⃣ Fill with rich, well-draining soil, leaving about 2 inches of space at the top.
3️⃣ Place the ginger with the buds facing up about 1–2 inches deep.
4️⃣ Lightly cover with soil and water gently.
In the Garden
1️⃣ Select a partially shaded area with well-draining soil.
2️⃣ Dig small holes about 1–2 inches deep and space each ginger section 6–8 inches apart.
3️⃣ Cover with soil and water thoroughly.
Step 5: Caring for Your Ginger Plant
Ginger is low-maintenance, but proper care ensures a healthy harvest.
💧 Watering – Keep the soil moist but not soggy. Water when the top inch of soil feels dry.
🌿 Mulching – Apply a layer of organic mulch (leaves, straw, or coconut husk) to retain moisture and prevent weeds.
🌞 Light – If growing indoors, place the pot in a bright, indirect sunlight location (near a window).
🌱 Fertilizing – Every 4–6 weeks, apply organic compost or a balanced liquid fertilizer for better growth.
Ginger grows slowly. Expect to see shoots in 2–4 weeks, but patience is key!
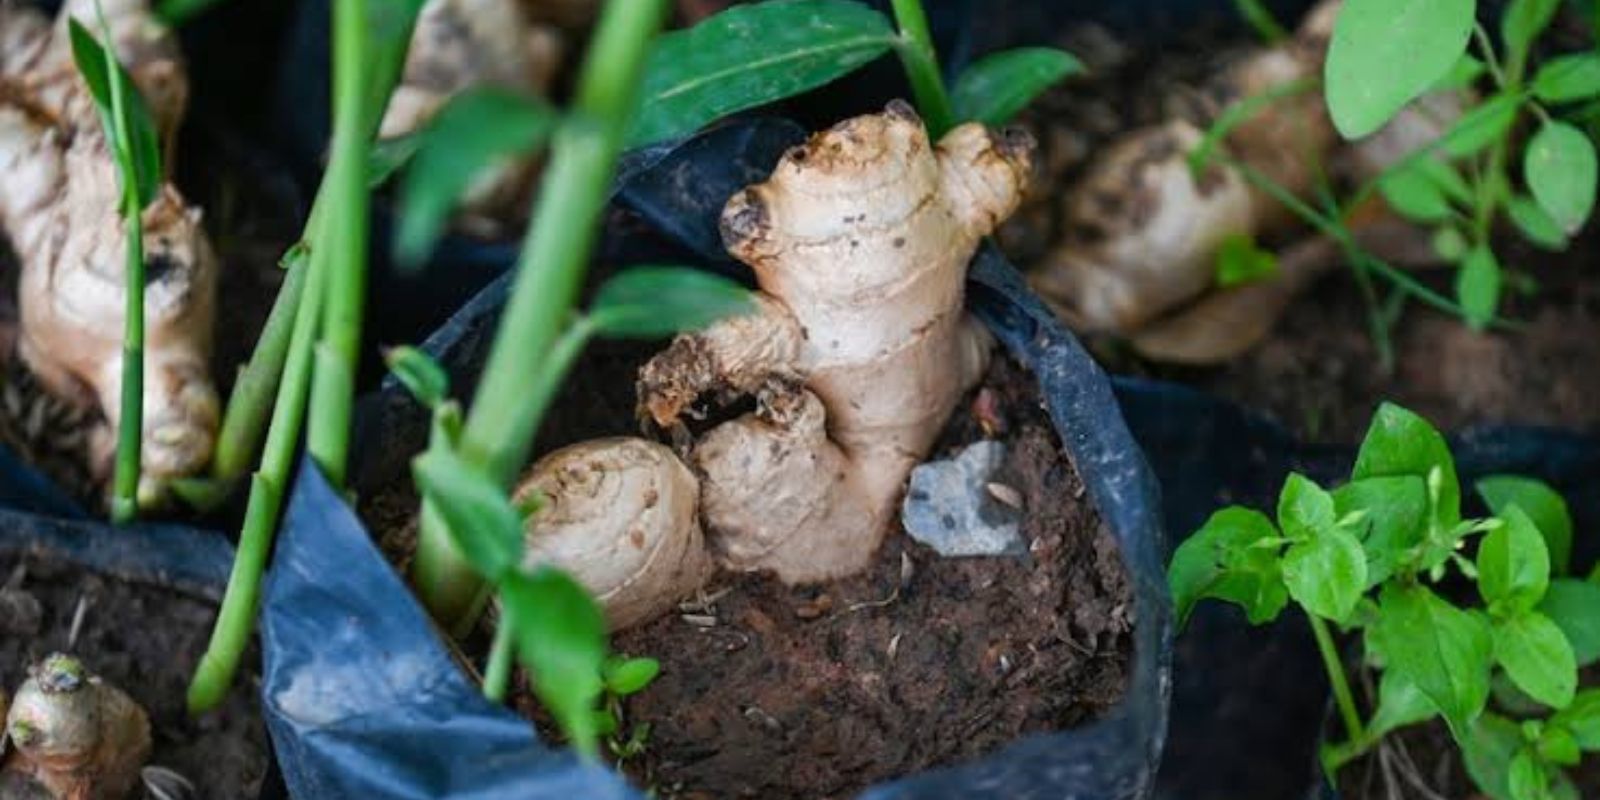
Step 6: Harvesting Ginger
Your ginger plant will be ready to harvest in 8–10 months, but you can also do an early harvest:
🥢 Young Ginger (Baby Ginger) – After 4–5 months, you can carefully dig up a small piece while keeping the rest growing.
🧑🌾 Mature Ginger – After 8–10 months, the leaves will turn yellow and start to die back. This is the best time to harvest fully mature ginger with the richest flavor.
To harvest:
1️⃣ Gently dig around the plant and lift the rhizomes.
2️⃣ Break off the sections you need.
3️⃣ Replant a portion of the rhizome to keep growing an endless supply!
Step 7: Regrowing for a Continuous Harvest
To maintain an infinite ginger supply, simply:
🔁 Replant a piece of harvested ginger immediately.
💧 Continue caring for the plant as before.
📅 Stagger planting (every 2–3 months) for a year-round supply!
Common Problems & Solutions
Even though ginger is easy to grow, you might encounter some issues:
🟡 Yellowing Leaves – Overwatering or poor drainage. Reduce watering and improve soil aeration.
🛑 No Sprouts – Cold temperatures or treated ginger. Keep in a warm spot and ensure you use organic ginger.
🍂 Dry, Wilting Plants – Not enough water or humidity. Increase watering and mist occasionally.
🐛 Pests (Aphids, Spider Mites) – Spray with neem oil or insecticidal soap to keep them away.
Conclusion
Growing an endless supply of ginger at home is not only easy but also incredibly rewarding. With just a small effort, you can enjoy fresh, organic ginger all year round while saving money and reducing waste.
So, are you ready to start your ginger-growing journey? 🌱 Comment below if you’ve ever grown ginger or if you’re excited to try! 👇