
Bell peppers are a favorite in home gardens, known for their vibrant colors, crisp texture, and versatile culinary uses. While the traditional method of planting them in soil beds or containers is tried and true, growing bell peppers upside down is a unique, space-saving approach that offers numerous benefits. Whether you’re short on garden space, dealing with pesky pests, or simply looking for a fun gardening project, this method might be just what you need.
In this article, we’ll dive deep into the reasons for growing bell peppers upside down, how to set up your inverted garden, and the key care tips to ensure a bountiful harvest.
Why Grow Bell Peppers Upside Down?
1. Saves Space
Growing bell peppers upside down is perfect for those with limited space. Whether you have a small balcony or a compact backyard, hanging plants utilize vertical space effectively, leaving ground space for other crops.
2. Reduces Pests and Diseases
Growing plants off the ground minimizes exposure to soil-borne pests and diseases. Insects like slugs and snails, which often attack pepper plants, are less likely to climb a hanging planter.
3. Improves Air Circulation
Inverted gardening enhances airflow around the plant, reducing the risk of fungal diseases like powdery mildew and promoting healthy growth.
4. Prevents Weeds
When plants are grown in hanging containers, weeds are virtually nonexistent, saving you the trouble of constant weeding.
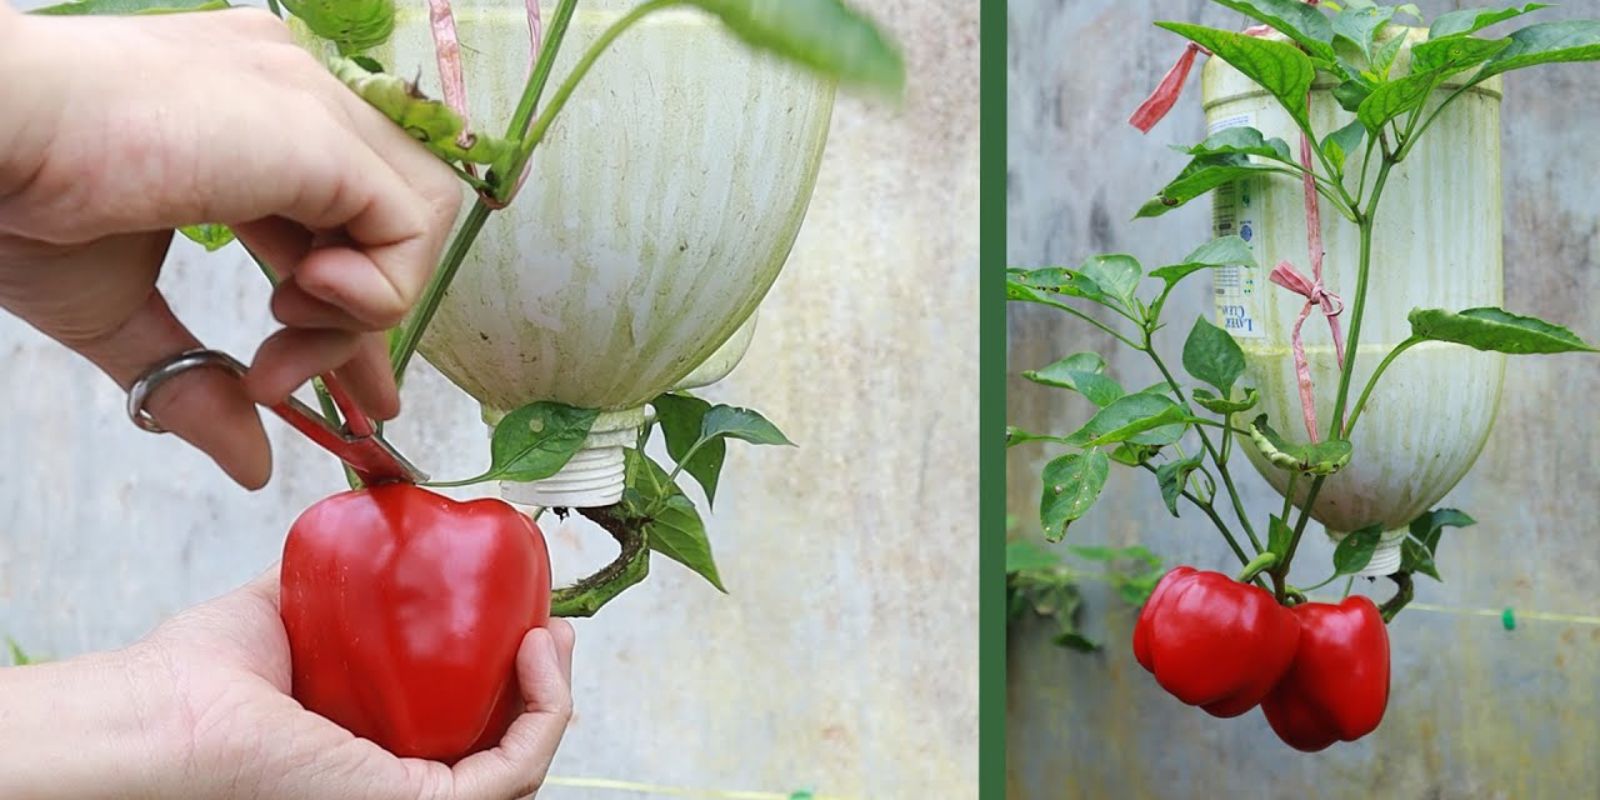
5. Easy Harvesting
With peppers hanging down, picking ripe fruit becomes much easier, eliminating the need to bend or kneel.
6. Aesthetic Appeal
Upside-down plants create a unique and eye-catching display, adding a decorative touch to your garden space.
How to Grow Bell Peppers Upside Down: Step-by-Step Guide
Step 1: Gather Your Supplies
- A sturdy container (e.g., a 5-gallon bucket or a specialized upside-down planter)
- A young bell pepper plant (seedling or transplant)
- Potting soil mixed with compost or organic fertilizer
- A drill or knife (for creating a hole in the container)
- Hooks or a strong support system for hanging the planter
Step 2: Prepare the Container
- Create the Hole: Drill or cut a 2-inch hole at the bottom of the container. This will allow the stem of the pepper plant to pass through.
- Add Drainage Holes: Drill a few smaller holes around the base to ensure proper water drainage.
Step 3: Insert the Pepper Plant
- Gently remove the young bell pepper plant from its nursery pot.
- Carefully thread the plant’s stem through the hole, with the leaves hanging outside and the roots inside the container.
- Use a coffee filter or mesh around the stem to secure it and prevent soil from spilling out.
Step 4: Fill with Soil
- Add nutrient-rich potting soil to the container, surrounding the plant’s roots.
- Ensure the soil is packed firmly but not too tight, allowing space for roots to breathe.
Step 5: Hang the Planter
- Use a sturdy hook or support to hang the container in a sunny spot. Bell peppers need at least 6-8 hours of sunlight daily to thrive.
- Ensure the hook or support can bear the weight of the container, soil, and plant.
Step 6: Care for Your Upside-Down Bell Pepper Plant
- Watering:
- Water the plant regularly, ensuring the soil stays moist but not waterlogged.
- Keep an eye on drainage to avoid root rot.
- Fertilizing:
- Feed the plant every 2-3 weeks with a balanced liquid fertilizer to support growth and fruit production.
- Pruning:
- Trim any yellowing or dead leaves to maintain plant health and encourage airflow.
- Pollination:
- If you’re growing peppers indoors or in a low-wind area, gently shake the plant to assist with pollination.
- Monitoring for Pests:
- While upside-down planting reduces pest issues, keep an eye out for aphids or spider mites on the leaves.
Challenges and Solutions
Challenge 1: Container Weight
The container can become heavy, especially after watering.
Solution: Use a strong hook or chain, and ensure the hanging location is secure.
Challenge 2: Watering Needs
Hanging plants may dry out faster due to increased exposure to air.
Solution: Check soil moisture frequently and consider adding a layer of mulch to retain moisture.
Challenge 3: Limited Root Space
Container-grown plants have limited space for root growth.
Solution: Use a large container and enrich the soil with compost to provide ample nutrients.
Best Bell Pepper Varieties for Upside-Down Gardening
While most bell pepper varieties adapt well to upside-down gardening, these compact and high-yield types are especially suitable:
- California Wonder: A classic choice with large, sweet fruits.
- Mini Bell: Small, colorful peppers ideal for small containers.
- Purple Beauty: Adds a pop of color with its deep purple hue.
- Gypsy: A productive variety with sweet, crisp fruits.
Tips for Maximizing Yield
- Rotate the Planter: If your planter receives uneven sunlight, rotate it every few days to ensure all sides get adequate exposure.
- Companion Planting: Grow herbs like basil or marigolds in separate containers nearby to deter pests.
- Harvest Regularly: Pick peppers as they ripen to encourage the plant to produce more fruit.
Environmental Benefits of Upside-Down Gardening
Growing bell peppers upside down not only saves space but also promotes sustainable gardening practices. By using repurposed containers like buckets or old planters, you reduce waste and give new life to everyday items. Additionally, this method allows urban gardeners to grow their food in unconventional spaces, reducing reliance on store-bought produce.
Conclusion
Growing bell peppers upside down is an innovative, efficient, and visually appealing gardening technique that’s perfect for beginners and seasoned gardeners alike. With minimal effort and a bit of creativity, you can enjoy a bountiful harvest while saving space and reducing pests.
So, why not give it a try? Transform your gardening space into a vertical paradise and experience the joy of harvesting homegrown bell peppers in a whole new way!
🌱 Have you tried upside-down gardening? Share your tips or ask questions in the comments below!
#UpsideDownGardening #BellPepperHacks #UrbanGardening #GrowYourOwnFood #SustainableLiving #GardenGoals