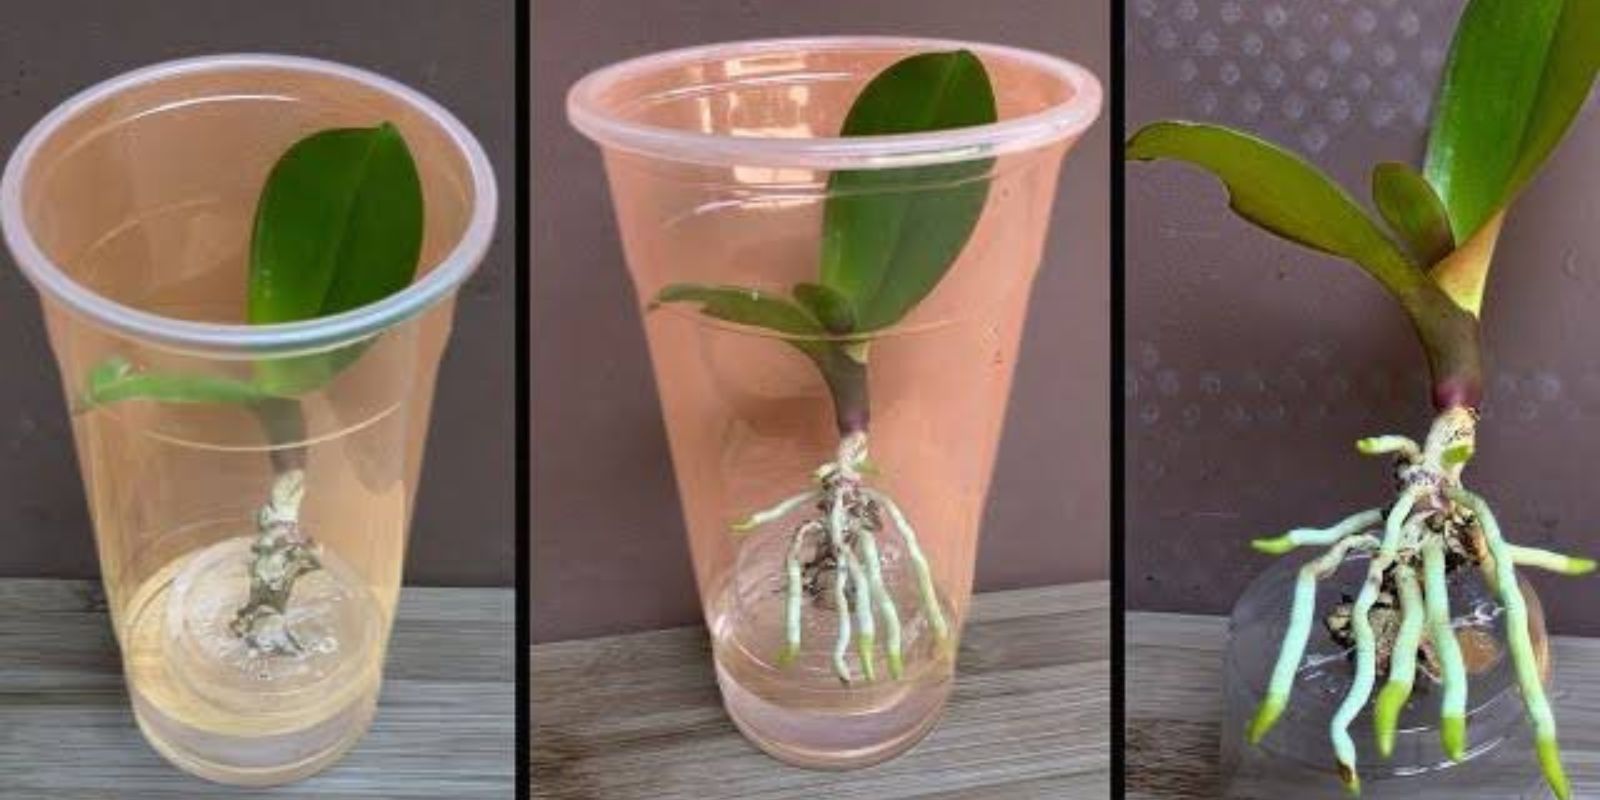
Orchids are known for their beauty, elegance, and sometimes, their reputation as “difficult” plants. But what happens when your orchid loses its roots? Instead of discarding it, you can revive it using a simple and effective water propagation method. This technique is not only easy but also gives your orchid a fresh start. Here’s how to bring your rootless orchid back to life and help it thrive again.
Understanding Root Loss in Orchids
Root loss in orchids can occur due to overwatering, poor drainage, fungal infections, or neglect. Without roots, orchids cannot absorb water and nutrients, which is essential for their survival. But don’t worry—orchids are resilient plants. By mimicking a humid, supportive environment, you can encourage them to grow new roots and regain their health.
Step-by-Step Guide: Growing Orchids Without Roots in Water
1. Assess the Orchid’s Condition
Before starting, carefully examine your orchid:
- Remove dead roots and leaves: Trim away any brown, mushy, or rotting parts using sterilized scissors or pruning shears. This will prevent further decay.
- Sterilize the orchid: Apply an antifungal or antibacterial solution to the cuts and exposed areas to protect the plant. A natural option is cinnamon powder, which acts as a disinfectant.
2. Prepare the Container and Water
The right setup is crucial for successful water propagation.
- Choose a clear glass container: A transparent container allows you to monitor water levels and root growth easily.
- Use distilled or filtered water: Tap water often contains salts and chemicals that may harm delicate orchids.
- Fill the container appropriately: Add just enough water to reach slightly below the orchid’s base. The plant should not sit directly in the water to avoid rotting.
3. Position the Orchid
Proper placement ensures the plant can begin its recovery.
- Suspend the orchid: Position the base of the orchid just above the water surface. You can use a support, such as a toothpick or cotton, to keep the plant in place.
- Encourage humidity: Cover the container loosely with a plastic bag or place it in a mini greenhouse to create a humid environment.
4. Provide the Right Environment
Creating ideal conditions will help your orchid grow new roots.
- Light: Place the container in a bright spot with indirect sunlight. Avoid direct sunlight, as it can scorch the plant.
- Temperature: Maintain a warm environment between 68–75°F (20–24°C). Orchids thrive in stable, moderate temperatures.
- Air circulation: While maintaining humidity, ensure the plant has access to fresh air to prevent mold or mildew.
5. Maintain the Water
Clean water is essential for root growth.
- Change water regularly: Replace the water every 2–3 days to keep it fresh and free of algae or bacteria.
- Monitor for signs of growth: Check the plant regularly for new root growth. Orchids often start developing roots within 2–6 weeks, depending on the conditions.
6. Transition to Potting
Once your orchid develops roots, it’s time to move it to a more stable growing medium.
- Choose the right potting mix: Orchids thrive in a bark-based or sphagnum moss mix, which provides aeration and mimics their natural environment.
- Plant gently: Place the new roots into the potting mix without damaging them. Avoid packing the medium too tightly.
- Water sparingly: Initially, water the plant lightly to help it adjust to its new environment.
Tips for Success with Water Propagation
- Be patient: Orchids can take time to recover. Focus on providing consistent care and monitoring growth.
- Avoid submerging the base: The orchid’s base should remain above the water to prevent rot.
- Supplement humidity: If the air in your home is dry, consider using a humidifier to support the plant’s recovery.
Why Water Propagation Works for Orchids
Water propagation provides an environment that encourages new root growth by mimicking the orchid’s natural habitat. Orchids are epiphytes, meaning they often grow on trees in humid environments. This method gives them the moisture and support they need to restart their growth cycle.
Common Mistakes to Avoid
- Overwatering: While water propagation uses water, the orchid should never be submerged entirely.
- Inconsistent care: Changing water irregularly or exposing the plant to sudden temperature changes can delay root growth.
- Skipping sterilization: Failing to disinfect tools or the orchid itself may introduce harmful bacteria or fungi.
Benefits of Reviving Orchids with Water Propagation
- Cost-effective: You save your orchid instead of buying a new one.
- Satisfying: Watching your orchid recover and thrive is deeply rewarding.
- Eco-friendly: Propagating plants reduces waste and promotes sustainability.
Signs of a Successful Recovery
- New root growth: Look for white or green roots emerging from the base.
- Healthy leaves: Leaves may appear firmer and more vibrant as the plant recovers.
- Increased stability: Once new roots establish, the orchid will anchor itself more firmly.
Conclusion
Reviving orchids without roots using the water propagation method is not only possible but also incredibly fulfilling. By following these simple steps and providing the right environment, you can nurse your orchid back to health and enjoy its stunning blooms once again.
🌱 Have you tried this method? Share your orchid recovery story or tips below!
#OrchidCare #WaterPropagation #GardeningTips #PlantRescue #GardeningHacks #OrchidLove

