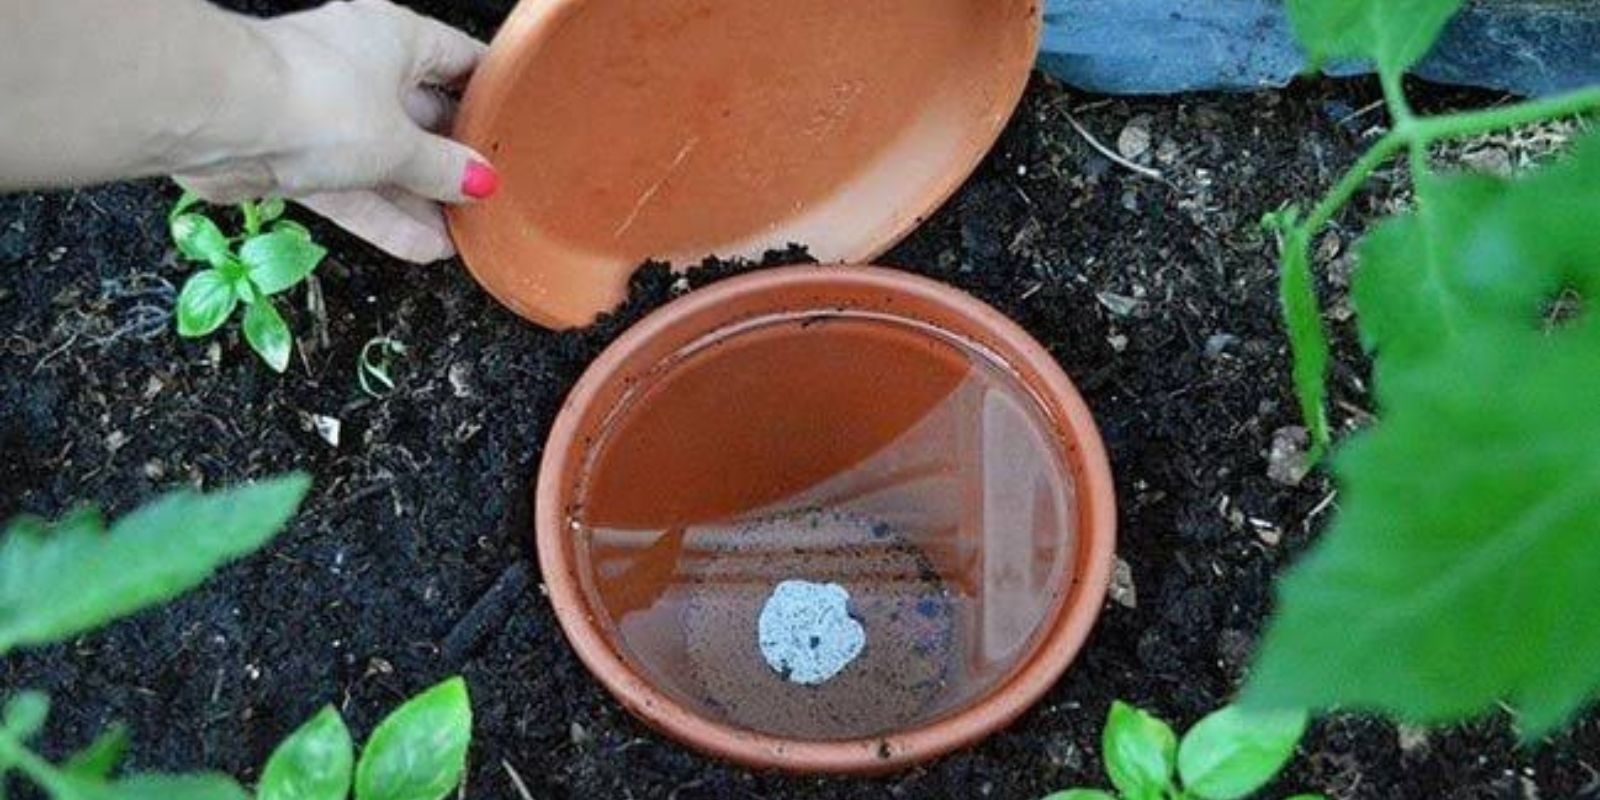
Watering your plants efficiently is a cornerstone of successful gardening, especially in areas prone to drought or where water conservation is a priority. One of the simplest, most effective solutions to this challenge comes from ancient agricultural practices: the olla (pronounced “oy-ya”). This ingenious irrigation method involves using a porous clay pot to deliver water directly to plant roots, reducing water waste and ensuring your plants thrive. Let’s explore the history, benefits, and step-by-step guide to making and using an olla in your garden.
The History of the Olla
The olla irrigation system traces its roots back thousands of years to arid regions of the world, including China, India, and parts of the Americas. Farmers in these areas developed the technique as a way to maximize water usage in challenging climates. The porous nature of unglazed clay pots allowed water to seep slowly into the soil, providing consistent moisture to crops without the need for constant watering. Today, this ancient wisdom is making a comeback among gardeners seeking sustainable solutions.
Why Use an Olla?
Using an olla offers numerous advantages for both gardeners and the environment:
- Water Conservation: Ollas drastically reduce water evaporation and runoff by delivering water directly to the roots.
- Efficient Root Hydration: Plants take up water as needed, promoting healthier growth and reducing the risk of overwatering.
- Time-Saving: With an olla, you don’t need to water your plants as frequently. A single fill can last several days.
- Soil Health: The slow release of water prevents soil erosion and maintains its structure.
- Eco-Friendly: It’s a low-tech, sustainable solution with no need for electricity or advanced irrigation systems.
How Does an Olla Work?
An olla is made from unglazed terracotta, a material that is both durable and porous. When buried in the soil near plants, the olla acts as a water reservoir. The pot releases water gradually, responding to the moisture needs of the surrounding soil. As plant roots grow, they naturally gravitate toward the olla, forming a symbiotic relationship that minimizes water waste.
How to Make Your Own Olla
Creating an olla at home is simple and cost-effective. Here’s a step-by-step guide to making one yourself:
Materials You’ll Need
- Two unglazed terracotta pots of the same size
- Waterproof silicone or epoxy
- A small saucer or lid to cover the top
- Optional: clay paint (if you want to personalize your olla)
Steps to Create Your Olla
- Seal the Drainage Hole:
- Take one of the terracotta pots and seal its drainage hole with waterproof silicone or epoxy. This will serve as the base that holds water.
- Stack the Pots:
- Place the second pot upside down on top of the first pot, aligning their rims.
- Seal the Pots Together:
- Apply a generous layer of silicone or epoxy around the rims to join the two pots securely. Allow the adhesive to dry completely, following the manufacturer’s instructions.
- Add a Lid:
- Cover the top hole of the upside-down pot with a saucer or lid. This prevents debris and insects from entering the olla and reduces evaporation.
- Optional Decoration:
- If you want, paint your olla with non-toxic, breathable clay paint to add a touch of personality.
How to Use Your Olla in the Garden
- Choose the Right Spot:
- Ollas are most effective in vegetable gardens, flower beds, or around thirsty plants. Select a central spot where the olla can reach multiple plants.
- Bury the Olla:
- Dig a hole and bury the olla so that its neck (top hole) is just above the soil surface. Ensure it’s stable and surrounded by compact soil.
- Fill with Water:
- Pour water into the olla until it’s full. Cover the top with a saucer or lid.
- Monitor and Refill:
- Check the olla every few days and refill as needed, especially during hot weather or dry spells.
Tips for Using Ollas Effectively
- Spacing: Place ollas strategically so their water reaches the roots of multiple plants. One olla can usually hydrate plants within a 12-18-inch radius.
- Soil Type: Ollas work best in loamy or clay soils. In sandy soil, water may disperse too quickly.
- Plant Types: Use ollas for plants that require consistent moisture, such as tomatoes, peppers, and leafy greens.
Olla Maintenance
Ollas are durable but require some basic upkeep:
- Clean your olla occasionally to prevent mineral buildup from hard water.
- Check for cracks or leaks, and repair them with silicone or epoxy if needed.
- Empty and store your olla during freezing temperatures to prevent cracking.
Why the Olla Method is Genius
The brilliance of the olla lies in its simplicity and adaptability. It’s a low-cost, low-effort solution that mimics natural watering patterns, ensuring your plants thrive without constant intervention. Plus, it aligns with modern goals of sustainable gardening, making it an excellent choice for eco-conscious gardeners.
Modern Applications of the Olla
While ollas were traditionally used in agriculture, they’ve found a place in modern urban and container gardening. Here’s how you can incorporate them:
- Raised Beds: Use ollas to keep your raised garden beds evenly hydrated.
- Container Gardening: Miniature ollas can be placed in large pots to reduce watering frequency.
- Decorative Gardens: Hide an olla among flowers or shrubs to keep them lush without visible irrigation systems.
Conclusion: Embrace Ancient Wisdom in Your Garden
The olla is more than just a gardening tool; it’s a testament to the ingenuity of ancient agricultural practices. By incorporating this timeless technique into your garden, you’ll save water, time, and effort while promoting healthier plants and soil.
So, why not give it a try? Gather your materials, make your own olla, and experience the magic of sustainable irrigation. Your garden—and the planet—will thank you for it.
💬 Have you ever tried using an olla? Share your experiences and tips in the comments below!
🌱 #SustainableGardening #DIYProjects #WaterConservation #GardeningHacks #EcoFriendlyLiving

