
Orchids, with their delicate beauty and exotic allure, are beloved by many gardeners. However, caring for orchids can be challenging, and sometimes orchids may appear to be beyond saving. The good news is that with a bit of knowledge and care, it’s possible to revive a seemingly dead orchid and bring it back to life. This article will guide you through the steps to resurrect your orchid with just a pinch of effort, providing hope and practical advice for orchid enthusiasts.
Introduction: The Challenge of Orchid Care
Orchids are known for their sensitivity to environmental changes, requiring specific conditions to thrive. Factors such as light, humidity, temperature, and watering can greatly impact their health. When an orchid starts to decline and appears to be dead, it often means it has entered a state of dormancy or severe stress rather than actual death. Understanding this distinction is crucial before attempting to revive your orchid.
Assessing the Condition of Your Orchid
Before attempting to revive your orchid, it’s essential to assess its current condition:
- Check for Signs of Life: Look closely at the orchid for any green leaves, roots, or shoots. Even a seemingly dead orchid may have viable parts that can be revived.
- Inspect the Roots: Carefully examine the roots of the orchid. Healthy roots should be firm and white or greenish. Black, mushy, or dry roots indicate a problem.
- Assess the Leaves and Stems: Check the leaves and stems for discoloration, wilting, or signs of pests. Healthy leaves should be firm and green, while unhealthy leaves may be yellowed or withered.
Steps to Revive a Dead Orchid
If your orchid shows signs of life, follow these steps to revive it:
1. Trim Dead Parts
- Use Sterile Tools: Sterilize a pair of scissors or pruning shears with rubbing alcohol or a flame.
- Remove Dead Roots and Stems: Carefully trim away any dead or mushy roots and stems. Cut back to healthy tissue to prevent further decay and encourage new growth.
- Clean Cuts: Ensure your cuts are clean and smooth to minimize stress on the orchid.
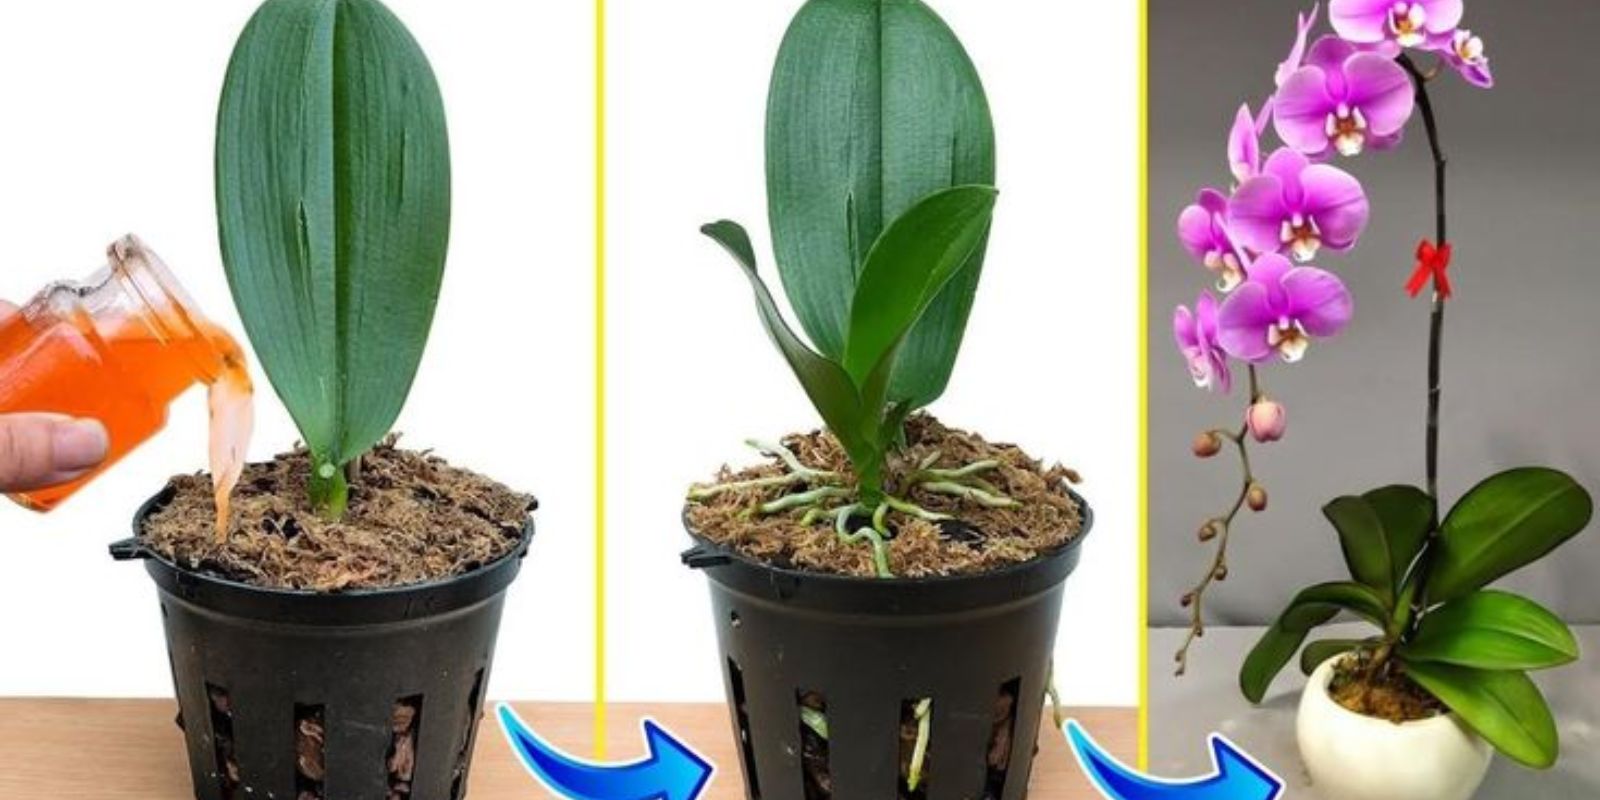
2. Repotting the Orchid
- Choose the Right Potting Mix: Select a well-draining orchid potting mix suitable for your orchid type (e.g., bark-based mix for epiphytic orchids).
- Inspect the Pot: Choose a clean pot with drainage holes to prevent waterlogging.
- Place Orchid in New Pot: Position the orchid in the center of the pot and gently fill in around the roots with the potting mix. Avoid burying the orchid too deeply.
3. Watering Carefully
- Water Sparingly: Orchids prefer to dry out slightly between waterings. Use tepid water and allow excess water to drain completely from the pot.
- Adjust Watering Frequency: Monitor the orchid closely and adjust watering frequency based on its specific needs and environmental conditions.
4. Provide Indirect Light
- Ideal Light Conditions: Place the orchid in a location with bright, indirect sunlight. Avoid direct sunlight, which can scorch the leaves.
- Consistent Temperature: Orchids thrive in stable temperatures, ideally between 60-80°F (15-27°C) during the day and slightly cooler at night.
5. Maintain Humidity and Air Circulation
- Humidity Needs: Orchids prefer high humidity levels. Use a humidity tray filled with water and pebbles, or a room humidifier, to maintain adequate humidity around the plant.
- Air Circulation: Good air circulation is essential to prevent fungal infections and ensure proper nutrient absorption through the leaves.
Additional Tips for Orchid Care
- Fertilize Sparingly: Use a balanced orchid fertilizer diluted to half strength during the growing season to provide essential nutrients without overwhelming the plant.
- Prune Regularly: Remove spent flowers and yellowing leaves to redirect the orchid’s energy towards new growth.
- Monitor for Pests: Keep an eye out for pests such as aphids or spider mites. Treat infestations promptly with organic insecticides or horticultural oils.
Common Issues and Solutions
Understanding common orchid issues can help you address problems promptly:
- Yellowing Leaves: Can indicate overwatering, underwatering, or nutrient deficiencies. Adjust your care routine accordingly.
- Root Rot: Often caused by overwatering or poor drainage. Ensure the potting mix is well-draining and allow it to dry out between waterings.
- No New Growth: Lack of new growth may indicate insufficient light, inadequate nutrients, or stress. Evaluate the orchid’s environment and make necessary adjustments.
- Wilting: Could result from underwatering, overwatering, or improper temperature. Check the orchid’s soil moisture and environmental conditions.
Conclusion: Bringing Your Orchid Back to Life
Reviving a seemingly dead orchid requires patience, careful observation, and targeted care. By assessing the orchid’s condition, trimming dead parts, repotting with proper care, and providing optimal growing conditions, you can give your orchid a second chance at life. Remember, orchids are resilient plants that can often bounce back with the right care and attention.
Embark on this journey to revive your orchid and share your experiences with fellow gardeners. Together, we can celebrate the beauty and resilience of these exquisite plants. Happy gardening and may your orchid bloom beautifully once again!