
Gardening is not only a rewarding hobby but also an opportunity to connect with nature and grow your own food. However, for those of us who may not have large plots of land or want to maximize the potential of small spaces, container gardening is a great solution. But did you know that you can turn an everyday household item, such as an old rotisserie chicken container, into a useful tool for gardening? That’s right! Repurposing these containers as mini greenhouses is a brilliant and sustainable way to nurture seedlings, protect delicate plants, and promote faster growth. In this guide, we will explore the step-by-step process of transforming rotisserie chicken containers into functional and effective little greenhouses that will help your garden flourish.
The Benefits of Using Rotisserie Chicken Containers for Mini Greenhouses
Before we dive into the how-to, let’s talk about why you should even consider using these containers in your garden.
- Eco-Friendly: Repurposing plastic containers helps reduce waste and gives new life to something that would otherwise end up in the trash. By using rotisserie chicken containers, you’re taking a small yet meaningful step toward reducing plastic waste.
- Perfect for Small Spaces: Whether you have a tiny apartment, a small balcony, or limited yard space, mini greenhouses are a game-changer. Rotisserie chicken containers are the ideal size for creating small greenhouses that don’t take up much space but offer plenty of benefits.
- Warmth and Humidity: One of the key benefits of using rotisserie chicken containers as greenhouses is their ability to trap heat and moisture. These containers have lids that fit snugly, which creates a humid, warm environment inside—perfect for starting seedlings or keeping young plants thriving.
- Protecting Delicate Plants: Mini greenhouses made from these containers can provide an extra layer of protection for fragile plants. They act as a barrier against pests, harsh weather, and fluctuating temperatures, giving your plants the best chance for healthy growth.
- Cost-Effective: Instead of purchasing expensive garden equipment, this method allows you to reuse something you already have. It’s a budget-friendly gardening solution that works wonders.
What You Need to Create a Mini Greenhouse from a Rotisserie Chicken Container
Before you start, gather the following materials to ensure a smooth process:
- Old Rotisserie Chicken Container: The size of the container will determine how many seedlings or small plants you can grow. A standard rotisserie chicken container works well for small-scale gardening.
- Potting Soil: Choose a high-quality, well-draining potting mix that will help your seeds or seedlings thrive.
- Seeds or Seedlings: Decide what you want to grow. Small vegetables, herbs, and flowers are all excellent choices for mini greenhouses.
- Watering Can or Spray Bottle: You’ll need to gently water your plants, ensuring the soil stays moist but not overly saturated.
- Optional Tools: A small trowel or hand spade can be helpful for planting seeds or transplanting seedlings into the containers.
Once you have all the materials, you’re ready to get started.
Step-by-Step Guide to Creating Your Mini Greenhouse
Step 1: Clean the Rotisserie Chicken Container
The first thing you need to do is thoroughly clean the rotisserie chicken container. Wash it with warm water and mild soap to remove any grease, residue, or leftover food. It’s important to ensure the container is completely clean to prevent any bacterial or fungal growth that could harm your plants.
Step 2: Add Potting Soil
Once the container is clean and dry, add a layer of potting soil to the bottom. Fill the container about halfway or a little more, depending on the size of your seeds or seedlings. The soil should be light, well-draining, and nutrient-rich to give your plants the best start.
If you’re starting seeds, make sure the soil is evenly distributed, and if you’re planting seedlings, make sure there’s enough space for the roots to expand as they grow. You can lightly press the soil down to remove any large air pockets, but avoid compacting it too much, as this will affect drainage.
Step 3: Plant Your Seeds or Seedlings
Now comes the fun part—planting your seeds or seedlings! If you’re starting from seeds, follow the recommended planting depth listed on the seed packet. Generally, small seeds should be sown just below the surface, while larger seeds can be planted deeper.
For seedlings, create a hole in the soil large enough to fit the root ball, and carefully place the plant in the hole. Gently firm the soil around the base of the plant to secure it in place. Be sure not to damage the delicate roots during the planting process.
If you are using multiple containers, you can plant different types of plants in each container, creating a small, diverse greenhouse.
Step 4: Water Your Plants
Once your seeds or seedlings are planted, it’s time to water them. Use a gentle watering can or spray bottle to moisten the soil. Be sure not to overwater, as this can lead to root rot. The goal is to keep the soil damp, not soggy.
If you’re using multiple containers, make sure each container has a light but consistent watering schedule to keep the environment humid but not waterlogged.
Step 5: Close the Container and Place It in the Right Spot
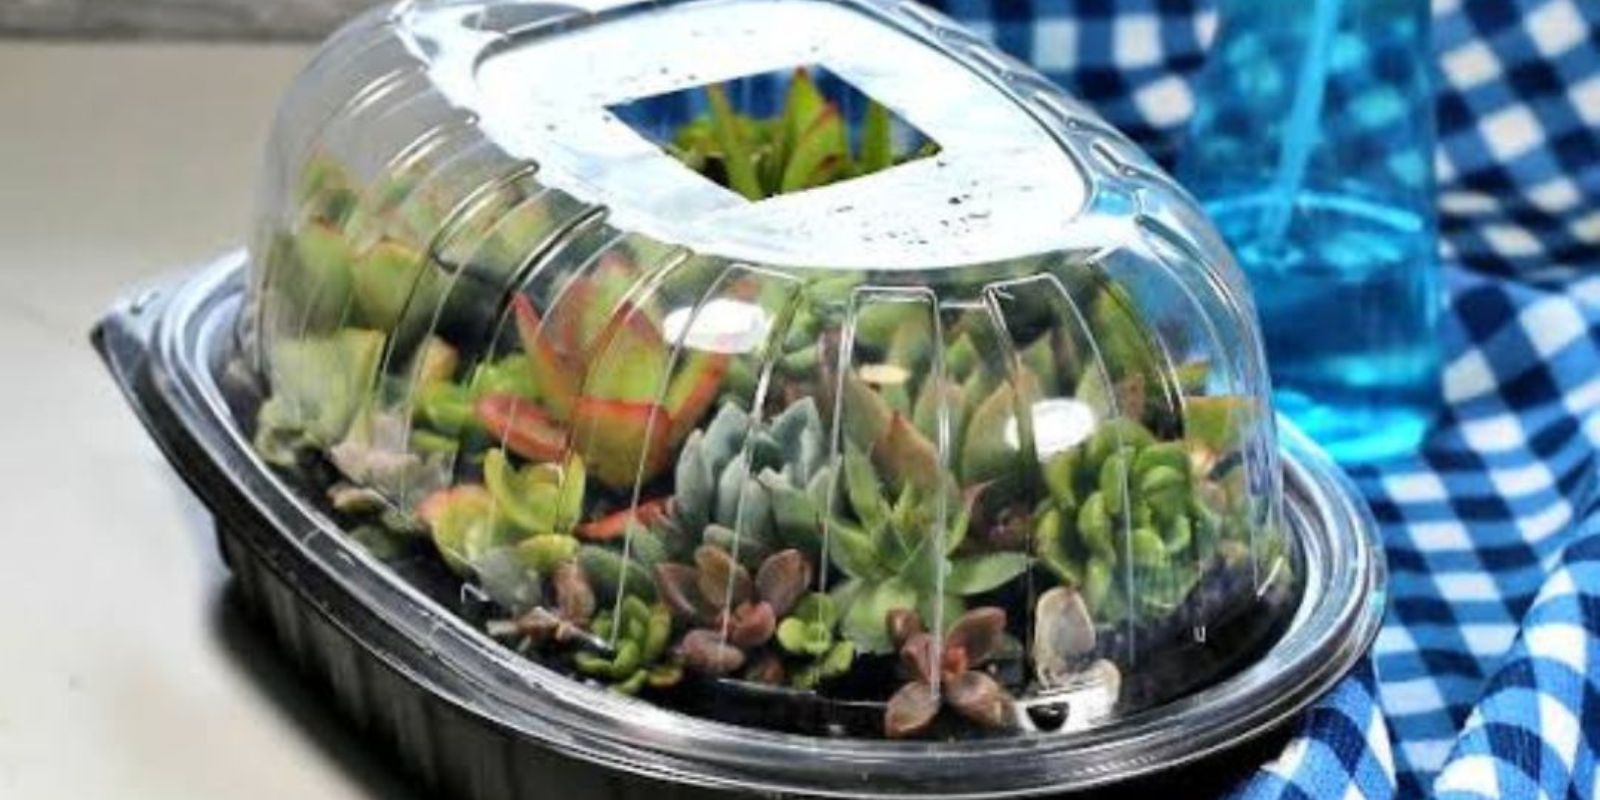
After planting and watering, put the lid on the rotisserie chicken container. The lid will trap moisture and heat inside, mimicking the warm and humid conditions of a greenhouse. This is especially beneficial during cooler months when starting seeds or nurturing delicate plants.
Place the container in a location with plenty of indirect sunlight. A windowsill, a balcony, or any space where the container can get a few hours of natural light each day works well. Be sure to avoid direct sunlight, as it can overheat the container, causing the plants to burn.
Step 6: Monitor and Maintain
Now that your mini greenhouse is set up, you’ll need to monitor the conditions regularly. Check the humidity inside the container to ensure it doesn’t get too dry. If you notice condensation forming on the lid, this is a good sign that the humidity is high enough.
If you see excess moisture or water pooling at the bottom, open the lid for a few hours to allow the container to dry out slightly. On the other hand, if it looks too dry, you can add a bit of water to the soil.
Once your plants begin to grow, you may need to start removing the lid for a few hours each day to allow for airflow. This will prevent mold and mildew from forming and encourage stronger plant growth.
When to Transplant Your Plants
Once your plants outgrow the container or the weather warms up, you can transplant them into larger pots or directly into your garden. Simply remove the plants from the container, taking care to preserve the root system, and transfer them to their new home. By this point, they should be well-established and ready to thrive.
Additional Tips for Success
- Ventilation: If you notice condensation building up too quickly inside the container, you can punch a few small holes in the lid to allow air circulation.
- Temperature: Keep an eye on the temperature inside the container, as it can fluctuate. If it gets too hot, remove the lid for a few hours to let the heat escape.
- Reusing Containers: You can reuse these containers throughout the season to start new seeds or nurture different plants. Just make sure to clean them thoroughly each time.
Conclusion
Repurposing old rotisserie chicken containers as mini greenhouses is a simple, cost-effective, and eco-friendly way to promote healthy plant growth. Not only do these containers provide a perfect environment for seedlings, but they also offer protection from pests and harsh weather. By following the steps outlined in this guide, you can create your own little garden oasis, even in small spaces.
So, next time you finish a rotisserie chicken, don’t throw the container away—turn it into a mini greenhouse and watch your plants thrive! Whether you’re growing herbs, flowers, or vegetables, this simple technique can help your garden flourish in no time.
Happy gardening!