Introduction
Imagine transforming the humble base of a store-bought celery stalk into a thriving plant, providing you with a continuous supply of fresh produce. Regrowing celery from kitchen scraps is an easy, eco-friendly gardening project that requires minimal effort, space, or gardening experience. Whether you live in a small apartment or have a large backyard, this simple method offers a rewarding way to save money, reduce food waste, and embrace sustainability.
In this article, we’ll explore the step-by-step process of regenerating celery at home, along with tips for ensuring a healthy, productive plant. Let’s dive into the world of regenerative gardening!
Why Regrow Celery?
Regrowing celery has multiple benefits:
- Cost-Effective: Instead of buying new stalks every week, you can grow a nearly endless supply from one base.
- Eco-Friendly: This practice reduces food waste by reusing scraps that would otherwise be discarded.
- Educational and Fun: A perfect project for kids or anyone new to gardening, as the results are quick and satisfying.
- Space-Saving: No need for a large garden—celery grows beautifully in small pots, making it ideal for indoor or balcony gardening.
Step-by-Step Guide to Regrow Celery
Step 1: Save the Celery Base
When preparing celery, cut off the bottom 2–3 inches of the stalk base. Ensure the base is intact and not overly damaged or dried out.
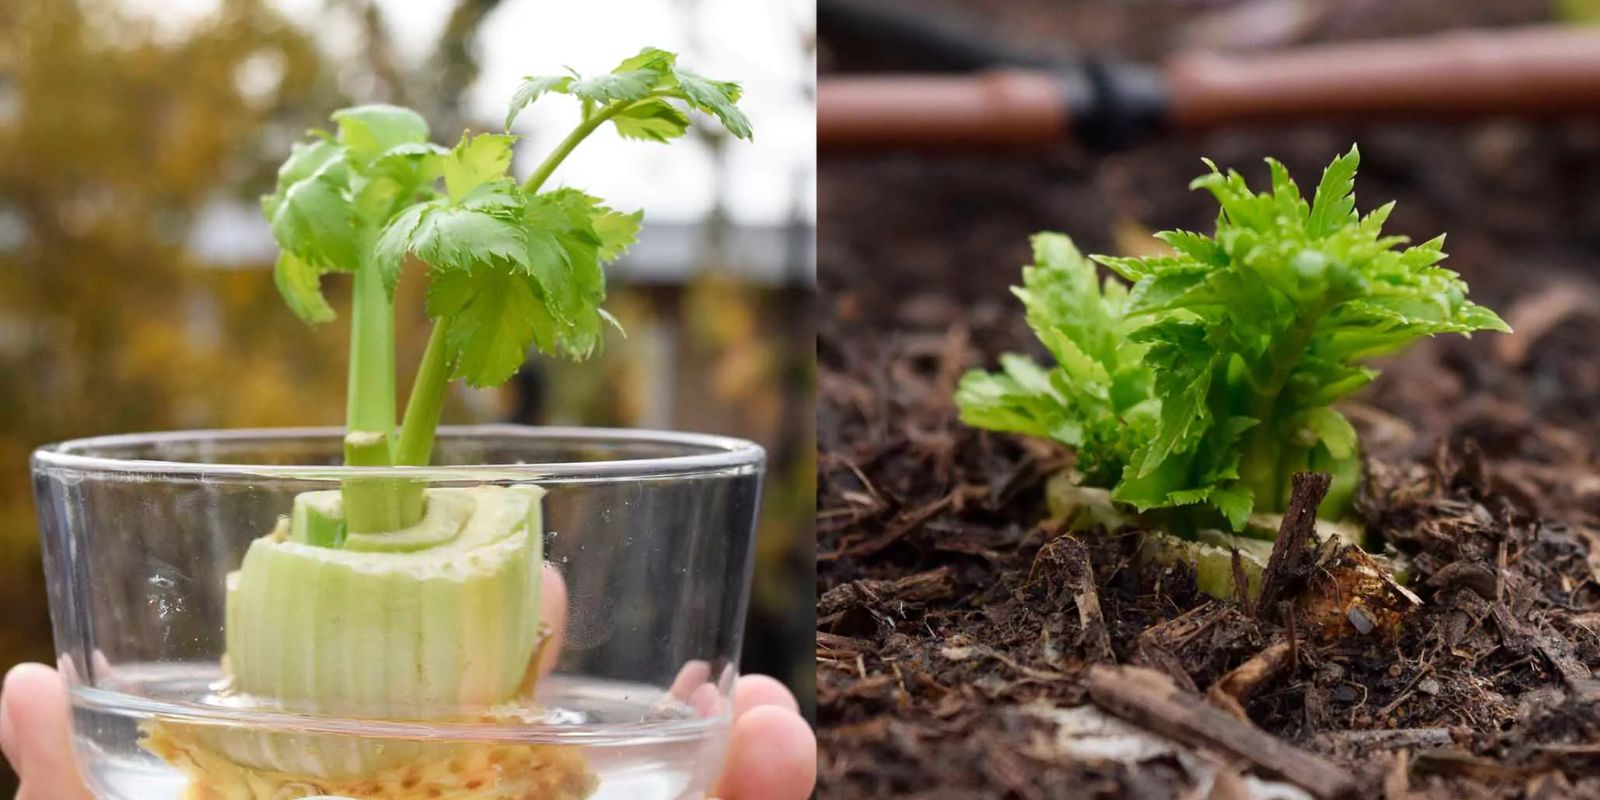
Step 2: Place in Water
- Fill a shallow bowl or container with about 1 inch of water.
- Place the celery base in the bowl, cut side facing up.
- Ensure that the base is stable and submerged enough to keep the bottom moist without covering the entire piece.
Step 3: Find a Sunny Spot
Position the bowl on a windowsill or in an area that receives ample natural light. Celery requires sunlight to sprout new growth, so aim for at least 6 hours of indirect sunlight per day.
Step 4: Monitor and Refresh the Water
- Change the water every 1–2 days to prevent mold and keep it fresh.
- As the celery base absorbs water, top it up to maintain the same level.
Step 5: Watch for Growth
Within 3–5 days, you’ll notice small leaves emerging from the center of the base. This indicates that your celery is regenerating.
Step 6: Transition to Soil (Optional)
- After about 1–2 weeks, when roots begin to form at the bottom, transfer the celery base to soil for continued growth.
- Choose a pot with good drainage and fill it with nutrient-rich potting soil.
- Bury the base so that only the new growth and top edge remain visible.
Step 7: Care for Your Plant
- Water the plant regularly, keeping the soil moist but not waterlogged.
- Place the pot in a sunny location, such as a balcony or windowsill.
- Fertilize occasionally with compost or a balanced organic fertilizer to support growth.
Step 8: Harvest and Repeat
Once the stalks reach a suitable size, snip them off as needed for cooking. Leave the base intact to allow for regrowth. Repeat the process for an ongoing supply of fresh celery!
Tips for Success
- Choose Fresh Scraps: A healthy, firm celery base with no signs of decay will have the best chance of regrowing.
- Monitor Water Levels: Stagnant water can lead to mold or rot, so be diligent about refreshing it regularly.
- Provide Ample Light: Lack of sunlight can lead to slow growth and weak stalks. If natural light is limited, consider using a grow light.
- Use Quality Soil: If transferring to a pot, opt for nutrient-dense potting mix to support robust growth.
- Prune as Needed: Trim any yellow or unhealthy leaves to direct energy toward new growth.
Benefits of Growing Celery Indoors
Regrowing celery indoors offers additional advantages:
- Year-Round Availability: No need to wait for the growing season; your plant thrives indoors regardless of the weather.
- Pest-Free Environment: Indoor gardening minimizes the risk of pests or diseases.
- Convenience: Fresh celery is always within reach for cooking or garnishing dishes.
Common Challenges and Solutions
- Slow Growth: If your celery isn’t sprouting, it may lack sunlight or nutrients. Move it to a brighter location or consider adding a liquid fertilizer.
- Rotting Base: Overly submerged bases or stagnant water can lead to rot. Reduce the water level and ensure regular changes.
- Leggy Stalks: If the plant becomes tall and weak, it’s likely stretching for light. Relocate it to a sunnier spot.
Creative Uses for Regrown Celery
Regenerated celery is not only for cooking—it also makes a unique addition to your home decor or gardening space. Use it to:
- Create a Mini Indoor Garden: Pair celery with other regrown kitchen scraps like green onions, lettuce, or carrots for a fun display.
- Teach Sustainability: Share the process with friends, family, or classrooms to inspire eco-friendly habits.
- Decorate Your Kitchen: A vibrant celery plant on your windowsill adds a touch of greenery to your cooking space.
Final Thoughts
Regrowing celery from kitchen scraps is a simple yet impactful way to embrace sustainability while enjoying fresh, homegrown produce. It’s an easy project that saves money, reduces waste, and offers a rewarding sense of accomplishment.
So, the next time you prepare celery, don’t toss that base—give it a second life! Share your regrowth journey on social media and inspire others to join the regenerative gardening movement.
🌱 Start your celery regrowth today and watch your kitchen scraps transform into a thriving, productive plant! 🌱
#RegrowCelery #SustainableGardening #ZeroWasteLiving #IndoorGardening #GrowYourOwnFood #GardeningForBeginners

