Introduction
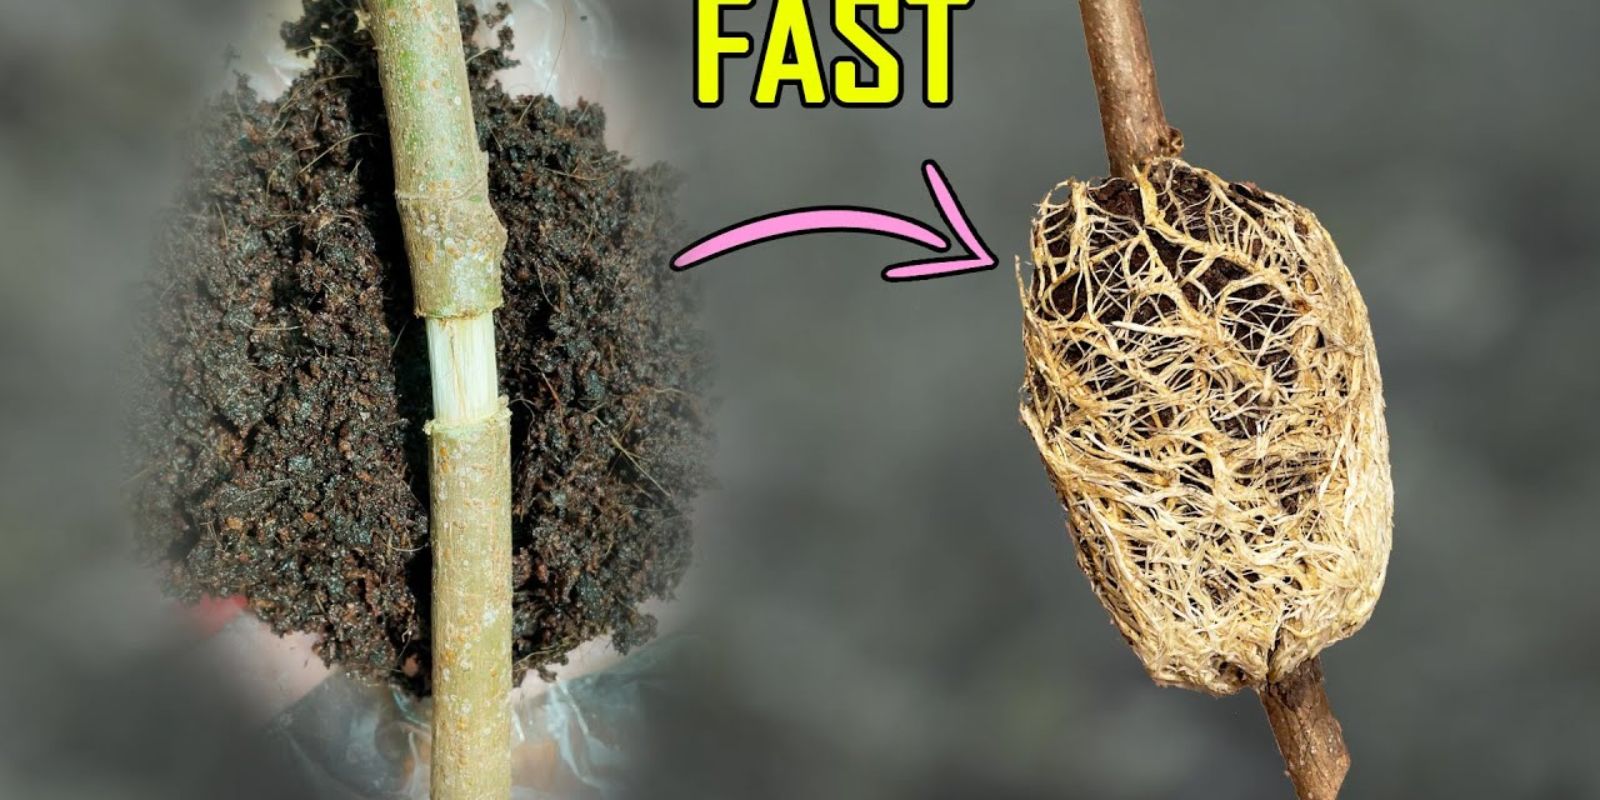
Air layering is a centuries-old propagation technique used by gardeners and horticulturists to clone plants, particularly woody shrubs and trees. Unlike other methods such as cutting or seed propagation, air layering allows you to grow roots on a branch while it’s still attached to the parent plant. This not only increases the chances of success but also ensures the new plant is already well-developed. Ideal for plants like citrus trees, figs, magnolias, and rubber plants, air layering is a versatile and rewarding way to expand your garden.
In this article, we will dive into the step-by-step process, best practices, and essential tips for successful air layering. By the end, you’ll be equipped with the knowledge to propagate like a pro and grow a thriving collection of plants.
Understanding Air Layering
Air layering involves encouraging a plant stem to produce roots while it remains attached to the parent plant. The primary goal is to create a new plant that is genetically identical to its parent, ensuring the desired traits are preserved.
Why Choose Air Layering?
- High Success Rate: The stem receives nutrients and water from the parent plant, reducing stress.
- Quick Root Formation: Ideal for plants that are slow or challenging to propagate by cuttings.
- Cost-Effective: Requires minimal tools and materials, making it accessible to all gardeners.
- Preserves Parent Plant: The original plant remains intact and continues to grow normally.
Step-by-Step Guide to Air Layering
Step 1: Select the Right Plant
Choose a healthy, mature plant with woody or semi-woody stems. Common candidates include fruit trees (e.g., citrus, guava), flowering shrubs (e.g., roses, hydrangeas), and indoor plants (e.g., rubber trees, monsteras).
Step 2: Choose a Branch
Select a branch that is about the thickness of a pencil or slightly thicker. Ensure it’s free of damage or disease and has several healthy leaves.
Step 3: Prepare the Branch
- Use a sharp, clean knife to make a cut around the branch, about 1-2 inches wide. This process is called girdling.
- Remove the bark and scrape off the green cambium layer beneath to prevent the branch from healing over.
Step 4: Apply Rooting Hormone
Dust the exposed area with rooting hormone to stimulate root growth. This step is optional but increases the chances of success.
Step 5: Wrap with a Moist Medium
- Take a handful of sphagnum moss or coco peat and soak it in water until it’s thoroughly moist but not dripping.
- Wrap the damp material around the exposed section of the branch, covering it completely.
Step 6: Secure with Plastic Wrap
- Wrap clear plastic or cling film around the moss, ensuring it’s snug but not too tight. This helps retain moisture and warmth.
- Use twist ties or garden tape to secure both ends of the plastic. Leave a small gap for airflow if necessary.
Step 7: Monitor Progress
Check the air layer every 1-2 weeks to ensure the moss remains moist. You can carefully unwrap a small section to inspect root growth. Depending on the plant, roots will form in 4-8 weeks.
Step 8: Remove and Plant
Once you see a healthy mass of roots, cut the branch just below the rooted section using clean pruning shears.
- Remove the plastic and carefully plant the rooted stem in a pot or directly in the garden soil.
- Water thoroughly and place in a location with indirect sunlight until it establishes.
Best Practices for Successful Air Layering
- Timing Matters: Perform air layering during the growing season, typically spring or early summer, when plants are actively producing new growth.
- Keep it Moist: Drying out is the most common reason for failure. Ensure the moss remains consistently damp.
- Use Sharp Tools: Always use sterilized and sharp tools to make clean cuts and prevent disease.
- Support Large Branches: If air layering a thick branch, use supports like stakes to prevent breakage.
- Acclimate the New Plant: Transition the new plant gradually to outdoor conditions by increasing its exposure to sunlight and wind over a few weeks.
Common Mistakes to Avoid
- Skipping the Cambium Removal: Ensure you completely remove the green cambium layer; otherwise, the wound will heal instead of rooting.
- Overwatering the Medium: The moss should be moist, not waterlogged, to avoid rotting the stem.
- Impatience: Avoid unwrapping the plastic too early, as this can disrupt root development.
Advantages of Air Layering
- Produces Mature Plants Faster: The propagated plant already has a head start, often flowering and fruiting sooner than seedlings.
- Versatility: Works for a wide range of plants, from ornamental trees to fruit-bearing shrubs.
- Eco-Friendly: No need for disposable pots or extra soil; a simple piece of plastic and moss is enough.
Plants Ideal for Air Layering
- Fruit Trees: Citrus, mango, guava, fig.
- Flowering Shrubs: Camellias, rhododendrons, roses.
- Houseplants: Rubber plants, fiddle-leaf figs, philodendrons.
- Ornamental Trees: Magnolia, Japanese maple.
Benefits for Gardeners
Air layering offers a hands-on learning experience for gardeners, empowering them to multiply their favorite plants with minimal effort. It’s an excellent way to share plants with friends, expand your garden, or even start a small nursery.
Conclusion
Air layering is a game-changing propagation technique that every gardener should try. With its simplicity and high success rate, you can propagate a variety of plants with confidence. Not only will you save money, but you’ll also enjoy the satisfaction of nurturing a new plant from your existing collection.
Have you tried air layering? Share your experiences or tips in the comments below! Let’s grow together. 🌿
#AirLayering #PlantPropagation #GardeningTips #GreenThumb #PlantParentLife

