Introduction
A polytunnel, often referred to as a hoop house, is an invaluable asset for gardeners looking to extend their growing season, protect their plants from the elements, and enhance their yields. Whether you’re a seasoned gardener or a newcomer eager to dive into year-round cultivation, building a polytunnel can significantly boost your gardening productivity. In this comprehensive guide, we’ll walk you through the process of constructing a polytunnel, offering tips and insights to ensure a successful and rewarding project.
1. Understanding the Basics
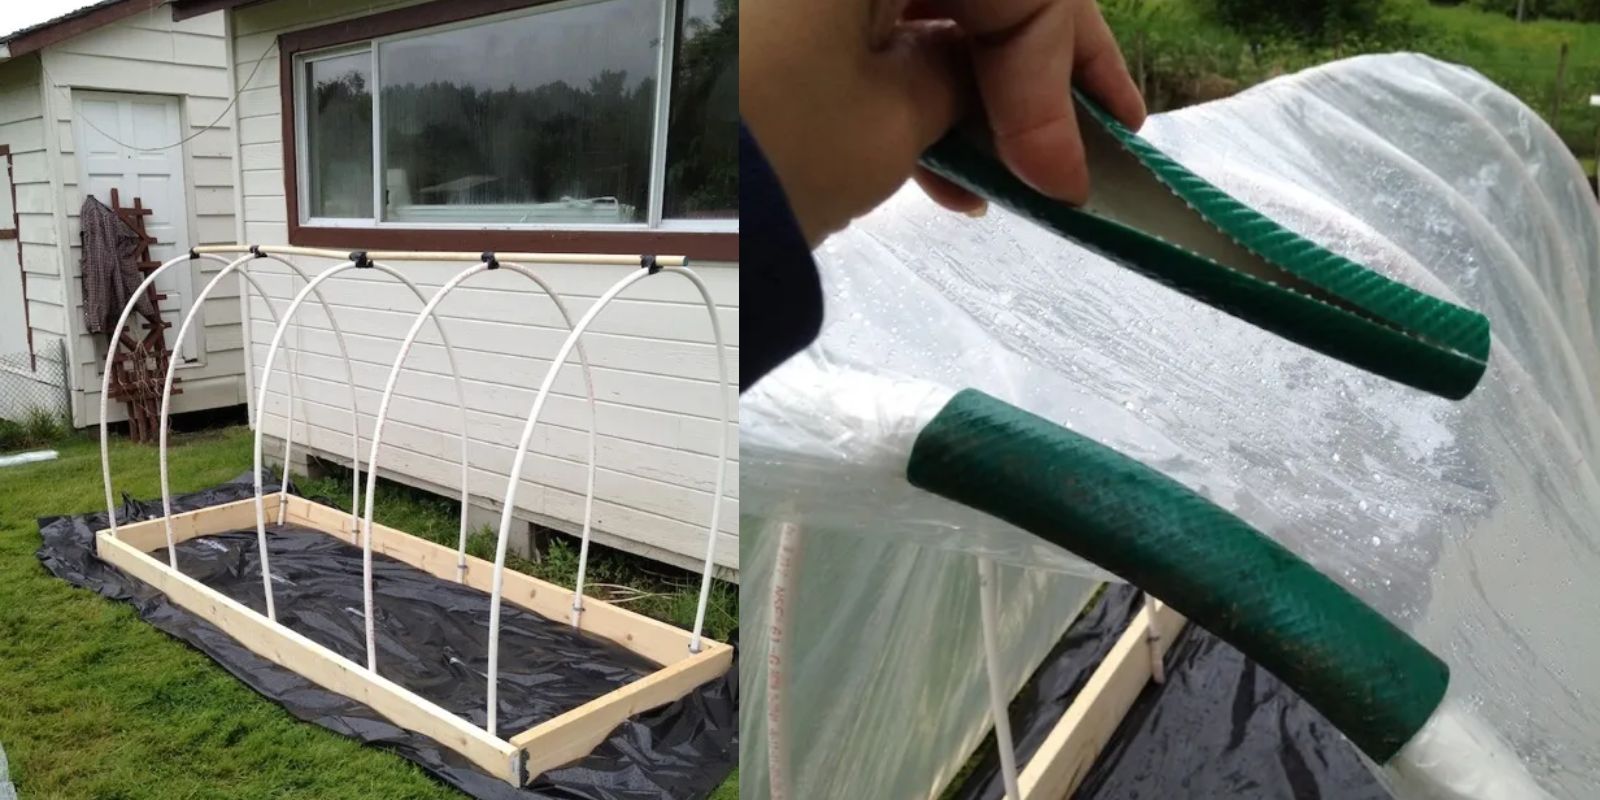
Before embarking on your polytunnel project, it’s crucial to understand its components and benefits. A polytunnel consists of a frame covered with polythene sheeting. The structure creates a controlled environment that shields plants from extreme weather conditions while allowing sunlight to penetrate. This setup is ideal for growing a variety of crops, from vegetables to flowers, throughout the year.
2. Planning Your Polytunnel
Choosing the Right Location
Selecting the optimal site for your polytunnel is the first step in ensuring its effectiveness. Here’s what to consider:
- Sunlight: Choose a location that receives ample sunlight throughout the day. A south-facing site is ideal for maximizing solar exposure.
- Drainage: Avoid low-lying areas where water might pool. Good drainage is essential to prevent waterlogging and root rot.
- Accessibility: Ensure the site is easily accessible for maintenance and harvesting.
Determining the Size
Polytunnels come in various sizes. Consider your gardening needs and available space when deciding on dimensions. Typical sizes range from small, single-bay structures to large, multi-bay tunnels. Common dimensions are 10×20 feet or 14×48 feet, but custom sizes are also possible.
3. Gathering Materials
A successful polytunnel project requires several key materials:
- Frame Material: PVC pipes or metal tubing are commonly used. PVC is more affordable and easier to work with, while metal tubing offers greater durability.
- Polythene Sheeting: Choose high-quality, UV-resistant polythene sheeting to ensure longevity. The thickness of the sheeting should be at least 6 mils.
- Ground Stakes or Anchors: These are used to secure the polytunnel to the ground.
- Connectors and Clamps: Necessary for assembling the frame and securing the sheeting.
Additional Tools:
- Tape measure
- Saw (for cutting pipes or tubing)
- Drill (for creating holes and securing components)
- Hammer and nails (for anchoring)
4. Constructing the Frame
Step-by-Step Assembly
- Measure and Cut: Based on your chosen dimensions, measure and cut the PVC pipes or metal tubing. For a typical arch-shaped frame, cut the pipes into the required lengths for arches and base supports.
- Assemble the Frame: Connect the pipes or tubing to form the arches and base. Use connectors and clamps to secure the joints. Ensure that the frame is stable and evenly spaced. You may need additional crossbars or supports for larger structures.
- Anchor the Frame: Secure the frame to the ground using stakes or anchors. This will prevent the polytunnel from being displaced by wind or other elements.
5. Preparing the Site
Clearing and Leveling
- Clear the Area: Remove any debris, rocks, or vegetation from the site. This will create a clean, flat surface for the polytunnel.
- Level the Ground: Ensure the ground is level to avoid uneven tension on the polythene sheeting.
Laying Out the Frame
- Position the Frame: Place the assembled frame in its designated location. Make sure it is centered and aligned correctly.
6. Attaching the Cover
Steps for a Secure Cover
- Unroll the Polythene: Unroll the polythene sheeting and drape it over the frame. Ensure that it covers the entire structure.
- Secure the Edges: Use ground stakes or anchors to secure the edges of the polythene to the ground. Stretch the sheeting tightly to avoid wrinkles, which can impede light penetration and air circulation.
- Trim Excess: Cut off any excess polythene, leaving a few inches of overlap for securing to the ground.
7. Adding Ventilation
Importance of Ventilation
Proper ventilation is crucial for regulating temperature and humidity inside the polytunnel. Without it, plants may suffer from excessive heat or damp conditions.
How to Install Ventilation
- Create Openings: Cut openings in the polythene for doors and vents. The size and placement of these openings will depend on the size of your polytunnel and your specific ventilation needs.
- Install Doors: Simple flaps or zippered doors can be added for easy access. Ensure that doors are easy to open and close while maintaining a tight seal when closed.
- Add Vents: Install adjustable vents or roll-up sides to allow for temperature control and airflow.
8. Final Touches
Inspect and Adjust
- Check for Loose Parts: Examine the frame and cover for any loose components or gaps. Make necessary adjustments to ensure the structure is secure.
- Ensure Proper Tension: Check that the polythene is evenly stretched across the frame. Adjust as needed to maintain a tight fit.
Maintenance Tips
- Regular Checks: Periodically inspect the polytunnel for damage or wear. Repair any tears or leaks promptly.
- Cleaning: Clean the polythene cover to remove dirt and debris. This will help maintain light transmission and plant health.
Conclusion
Building a polytunnel is a rewarding project that can significantly enhance your gardening experience. By following these steps, you can create a functional and durable structure that will allow you to grow a wide range of plants year-round. Whether you’re aiming to extend your growing season or protect your plants from harsh weather, a well-constructed polytunnel is a valuable investment for any gardener.
Motivational Sentence:
Transform your gardening space and enjoy fresh produce in any season with a DIY polytunnel! 🌿🏠 #PolytunnelDIY #GreenhouseGardening #YearRoundGrowing #GardenProjects #DIYGreenhouse #GardeningGoals #GrowYourOwnFood

