Orchids are renowned for their stunning beauty and unique flowers, but their care can be a bit of a mystery to many. One of the most critical aspects of orchid care lies in understanding and maintaining healthy roots. In this comprehensive guide, we’ll explore everything you need to know about orchid roots, from their unique characteristics to the best practices for keeping them in optimal condition. By the end, you’ll be equipped with the knowledge to help your orchids thrive.
Understanding Orchid Roots
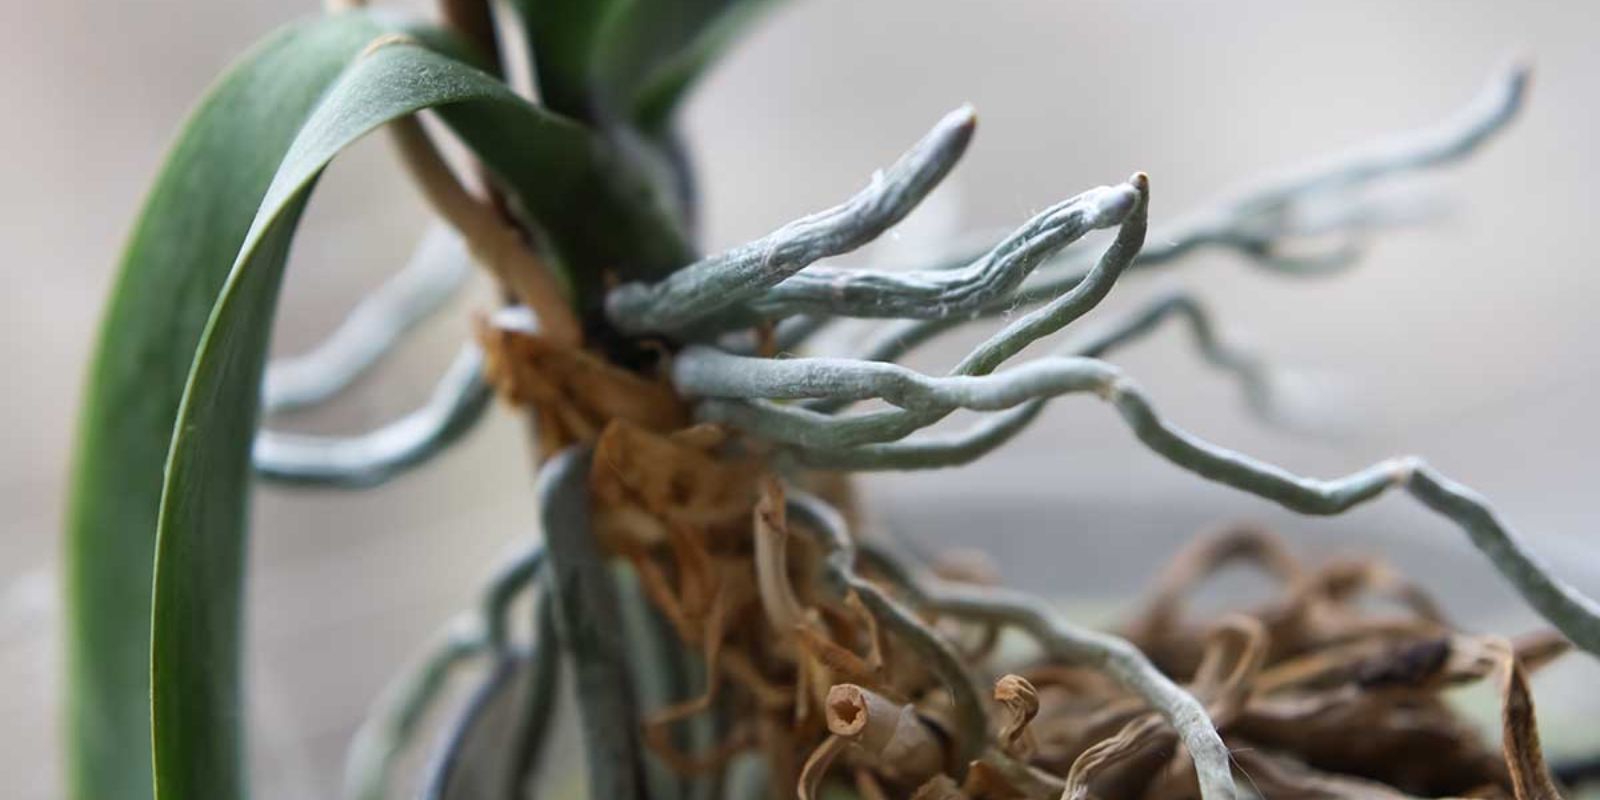
Orchid roots are quite different from those of other houseplants. They are primarily aerial, meaning they often grow above the surface of the potting medium, and they have a specialized outer layer called velamen. This spongy, absorbent tissue helps orchids cling to trees in their natural habitats and absorbs moisture and nutrients efficiently.
Key Characteristics of Orchid Roots:
- Aerial Nature: Many orchid species, particularly epiphytes like Phalaenopsis, grow roots that extend out of the pot. These roots are seeking light, air, and moisture, mimicking their natural environment where they attach to trees.
- Velamen Layer: The velamen not only absorbs water and nutrients but also protects the roots from excessive water loss and physical damage.
- Color Indicators: Healthy orchid roots are typically firm and have a green or white appearance. The color changes depending on their moisture level – green when wet and silvery or white when dry.
The Importance of Airflow for Orchid Roots
One of the most crucial factors for orchid root health is proper airflow. Unlike terrestrial plants, orchids don’t thrive in dense, water-retentive soils. Instead, they require a well-aerated environment that mimics the airy, loose conditions of their natural habitats.
How to Ensure Adequate Airflow:
- Use a Well-Draining Potting Medium: Orchid-specific mixes containing bark, perlite, and sphagnum moss are ideal. These materials allow for excellent air circulation around the roots.
- Choose the Right Pot: Orchids do best in pots with multiple drainage holes or slits that allow for maximum air movement. Transparent pots are also popular as they allow light to reach the roots, which some orchids benefit from.
- Avoid Overcrowding: When potting your orchid, ensure the roots have enough space to breathe. Overcrowded roots can lead to rot and other issues.
Moisture Management: The Balance Between Wet and Dry
Orchids are sensitive to moisture levels, and managing this balance is essential for healthy root development. Overwatering is one of the most common mistakes, leading to root rot, while underwatering can cause dehydration and hinder growth.
Tips for Proper Watering:
- Water Sparingly: Water your orchid only when the potting medium is almost dry. A good rule of thumb is to water once a week, but this can vary based on your environment.
- Use Room Temperature Water: Avoid using cold water, as it can shock the roots. Instead, opt for room temperature water.
- Drain Excess Water: After watering, make sure the pot drains completely. Orchids should never sit in standing water, as this can quickly lead to root rot.
Light Exposure: More Than Just Leaves Need Light
While most plants rely on their leaves for photosynthesis, some orchids also benefit from light exposure to their roots. This is particularly true for orchids with aerial roots that naturally grow outside the pot.
How to Provide Adequate Light:
- Bright, Indirect Light: Place your orchid in a spot that receives bright but indirect sunlight. Direct sunlight can be too intense and may scorch both leaves and roots.
- Transparent Pots: Using clear pots allows light to penetrate the roots, which can enhance their health. This setup mimics the way roots naturally receive dappled light in the wild.
Monitoring and Maintaining Root Health
Regularly inspecting your orchid’s roots is essential to catching any potential problems early. Healthy roots are a good indicator of an overall healthy plant.
Steps for Monitoring Root Health:
- Check for Firmness: Healthy orchid roots should feel firm to the touch. If they are mushy or hollow, this is a sign of rot, and these roots should be removed.
- Color Inspection: As mentioned earlier, the color of orchid roots can tell you a lot about their health. Green roots are well-hydrated, while white or silvery roots need water. Brown or black roots typically indicate rot or disease.
- Prune Unhealthy Roots: Using sterilized scissors, carefully trim away any dead, rotting, or diseased roots. This prevents the spread of rot and makes way for new, healthy growth.
Repotting Orchids: When and How to Do It
Orchids should be repotted every 1-2 years to refresh the potting medium and provide room for root growth. Repotting is also an opportunity to inspect and trim the roots.
Guidelines for Repotting:
- Choose the Right Time: The best time to repot an orchid is just after it has finished flowering. This allows the plant to focus on root development rather than blooming.
- Prepare Fresh Potting Medium: Use fresh orchid mix and ensure it is moistened before use. Discard the old medium, as it can break down over time and suffocate the roots.
- Gently Remove the Orchid: Carefully remove the orchid from its pot, being mindful of the delicate roots. If the roots are stuck to the pot, gently tease them free or cut away the pot if necessary.
- Repot in a Slightly Larger Pot: Choose a pot that is just large enough to accommodate the current root system with a little room for growth. Fill the pot with the fresh medium, ensuring the roots are well-supported but not compacted.
Conclusion: Nurturing Orchid Roots for Long-Term Success
Understanding and caring for orchid roots is key to ensuring these elegant plants remain healthy and vibrant. By providing adequate airflow, managing moisture levels, ensuring proper light exposure, regularly monitoring root health, and repotting when necessary, you can help your orchids thrive for years to come.
Engagement:
What techniques have you found most effective in keeping your orchid roots healthy? Share your experiences and tips in the comments!

