
Jackfruit (Artocarpus heterophyllus) is a tropical fruit native to Southwest India, known for its large size, sweet flavor, and versatility in both savory and sweet dishes. The tree itself is not only prized for its delicious fruit but also for its fast growth and ability to thrive in tropical climates. However, for those looking to cultivate specific desirable traits in jackfruit trees, grafting is a reliable and efficient technique. Grafting allows you to propagate trees with improved qualities such as disease resistance, early fruiting, and fruit size.
If you’ve ever wondered how to grow a jackfruit tree with your desired traits, this step-by-step guide will walk you through the process of grafting jackfruit trees, ensuring that you can replicate the best characteristics from a parent tree and establish a strong, healthy graft.
Why Grafting Jackfruit Trees?
Grafting is a horticultural technique that involves joining two plants together so that they grow as one. This method allows the grower to create a new plant (the grafted tree) with desirable characteristics from the parent trees. Specifically, grafting is a popular choice for jackfruit trees for several reasons:
- Faster fruiting: Grafted trees often bear fruit much sooner than those grown from seeds, as the rootstock and scion are already mature, reducing the time required for the tree to reach fruit-bearing age.
- Uniform quality: Grafting ensures that the fruit produced by the new tree will have the same quality as the parent tree, including flavor, texture, and size.
- Increased disease resistance: By selecting a rootstock that is resistant to certain soil-borne diseases, you can improve the resilience of the tree.
- Better root system: Grafting onto a strong rootstock can help develop a more robust root system, providing stability and better nutrient uptake.
Now that we understand why grafting is an essential technique, let’s dive into the steps involved in grafting a jackfruit tree successfully.
Step-by-Step Guide to Graft a Jackfruit Tree
Step 1: Select the Rootstock and Scion
The first step in the grafting process is selecting the right materials. The rootstock is the lower part of the tree that provides the root system, while the scion is the upper part that will grow into the branches and fruit.
- Rootstock: Choose a young, healthy jackfruit seedling as the rootstock. It should be no older than one year to ensure a good match with the scion. The rootstock should have strong, vigorous growth and be free from disease.
- Scion: The scion should come from a mature, healthy tree that produces the type of jackfruit you want to propagate. Select a branch that is about 6-12 inches long with several healthy buds.
Step 2: Prepare the Grafting Tools
Before starting, ensure you have the right tools for the job. Properly cleaned and sharp tools will ensure a clean cut, which is essential for the success of the graft. You will need the following:
- A sharp knife or grafting blade
- Grafting tape or plastic wrap
- Scissors for trimming excess tape
- A small container with water (for soaking the scion)
- A clean cloth for wiping the tools
Step 3: Prepare the Rootstock
Begin by preparing the rootstock. Take the young jackfruit seedling and select a healthy area near the top of the stem. You will need to make a clean, diagonal cut to create a surface where the scion can be joined. The cut should be about 1-2 inches long and slightly angled to ensure the graft fits snugly.
- Use a sharp knife to make the cut at a 45-degree angle to maximize the surface area for the graft.
- Immediately dip the cut end in water or wrap it with a damp cloth to prevent it from drying out.
Step 4: Prepare the Scion
Next, you need to prepare the scion. Carefully select a healthy branch from the parent tree, making sure it has several buds. Use your sharp knife to cut a 6-12 inch section from the branch. The cut should be clean and smooth.
- Trim the bottom of the scion at a similar 45-degree angle to match the cut on the rootstock.
- Ensure that the scion has enough stem length to match the rootstock’s height.
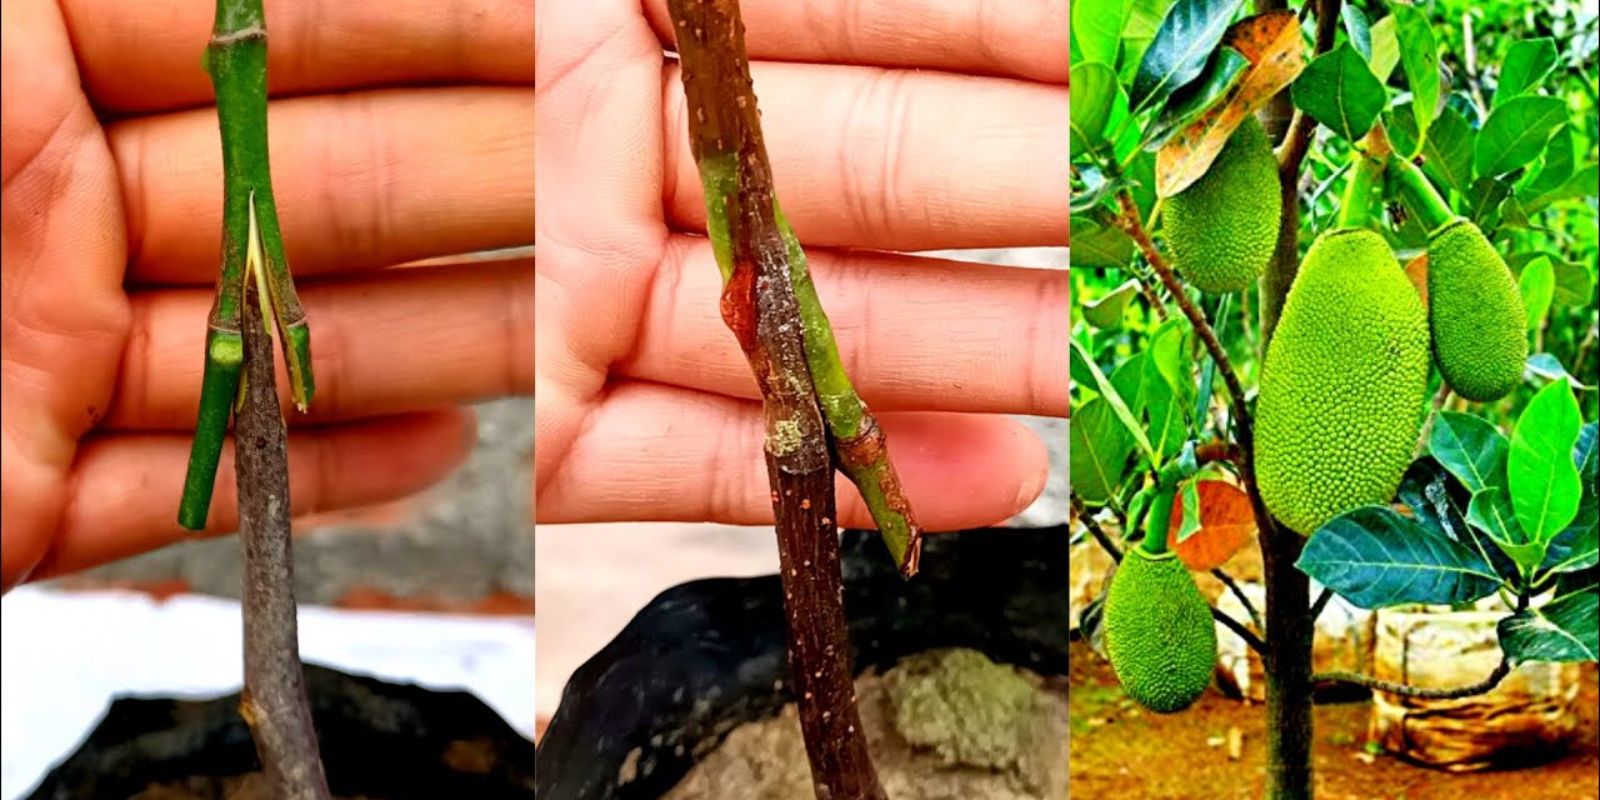
Step 5: Align the Cambium Layers
The cambium is a thin layer of living tissue found just under the bark of both the rootstock and scion. Successful grafting depends on the cambium layers from both the scion and rootstock aligning correctly. This allows the tissues to fuse and form a strong union, which will help the tree grow.
- Carefully place the cut end of the scion against the cut area of the rootstock, ensuring the cambium layers from both parts are in contact.
- Align the cut surfaces as closely as possible to ensure a perfect fit.
Step 6: Secure the Graft
Once the scion and rootstock are properly aligned, use grafting tape or plastic wrap to secure the graft. The goal is to hold the scion in place while preventing it from moving or drying out. It’s important not to wrap the tape too tightly, as this can constrict the graft union.
- Wrap the graft area tightly enough to hold the scion and rootstock together.
- Use additional layers of tape to ensure stability and protection from external elements.
Step 7: Care for the Graft
Now that the graft is secured, it’s important to provide the proper environment for healing and growth. Keep the grafted plant in a warm, shaded area for a few weeks. Ensure that the graft union remains moist and protected from direct sunlight and extreme temperatures.
- Check the grafted plant regularly for signs of success, such as new growth on the scion.
- If the graft takes, you’ll notice buds swelling within 2-3 weeks. If the scion begins to grow, that’s a positive sign that the graft has successfully taken.
Step 8: Remove the Grafting Tape
After about 4-6 weeks, you can begin to slowly remove the grafting tape. This is the point when the graft should have healed and the scion should begin growing actively. Be careful not to damage the newly fused graft union when removing the tape.
- Gently peel back the tape and observe the scion’s growth.
Step 9: Transplanting
Once the graft has healed and the new scion is growing well, you can transplant the young jackfruit tree into a larger pot or directly into the ground. Ensure the tree is placed in a location with full sunlight and well-draining soil, as jackfruit trees thrive in these conditions.
Caring for Grafted Jackfruit Trees
After successfully grafting your jackfruit tree, it’s important to continue proper care to ensure it grows strong and healthy.
- Watering: Keep the soil consistently moist but not waterlogged. Overwatering can cause root rot, so ensure proper drainage.
- Sunlight: Jackfruit trees require full sunlight to thrive. Place your tree in a sunny spot for at least 6-8 hours per day.
- Fertilizing: Use a balanced fertilizer rich in potassium, phosphorus, and nitrogen to promote healthy growth and fruiting.
- Pruning: Regularly prune the tree to remove any dead or diseased branches. Pruning also helps maintain the shape and encourages better air circulation.
- Pest Control: Watch out for pests such as aphids and caterpillars. Organic insecticides or neem oil can be effective in controlling these pests.
Conclusion
Grafting jackfruit trees is an incredibly rewarding process that can help you propagate desirable traits from a parent tree, such as fruit quality, disease resistance, and quicker fruiting. By following these steps carefully and providing the right care, you can enjoy the fruits of your labor within just a few years.
Whether you’re a seasoned gardener or a beginner, grafting provides a unique opportunity to grow healthy, productive jackfruit trees and contribute to sustainable gardening practices. Happy grafting!
Viral Gardening Hashtags:
#JackfruitGrafting #TropicalGardening #FruitTreeGrafting #DIYGardening #SustainableGardening #GardenHacks #FruitTreeCare #GraftingSuccess #GrowYourOwnFruit