Introduction
Starting seeds indoors is a practical and rewarding way to jump-start your gardening season. Whether you’re aiming for a lush vegetable garden, vibrant flower beds, or a mix of both, peat pellets are an excellent tool for germination. Their compact, nutrient-rich design makes them a favorite among gardeners who value simplicity, cleanliness, and efficiency. This comprehensive guide will walk you through the steps of using peat pellets to grow strong and healthy seedlings, along with tips for ensuring a successful transplant.
Why Use Peat Pellets for Starting Seeds?
Peat pellets offer several advantages over traditional seed-starting methods:
- Convenience: Peat pellets eliminate the need for loose soil, minimizing mess and hassle.
- Nutrient-Rich Base: Made from compressed peat moss, they provide essential nutrients to support early plant growth.
- Eco-Friendly: Most peat pellets are biodegradable and can be transplanted directly into the soil, reducing waste.
- Space-Saving: Their compact size allows you to start multiple seeds in a small area.
- Root Protection: The pellets reduce transplant shock by allowing the roots to grow through the pellet walls directly into the garden soil.
Step-by-Step Guide to Starting Seeds Indoors with Peat Pellets
- Gather Your Materials
Before starting, collect the essentials:- Peat pellets
- A seed tray or shallow container
- Warm water
- Seeds of your choice
- Clear plastic dome or plastic wrap (to create a greenhouse effect)
- Spray bottle or small watering can
- Prepare the Peat Pellets
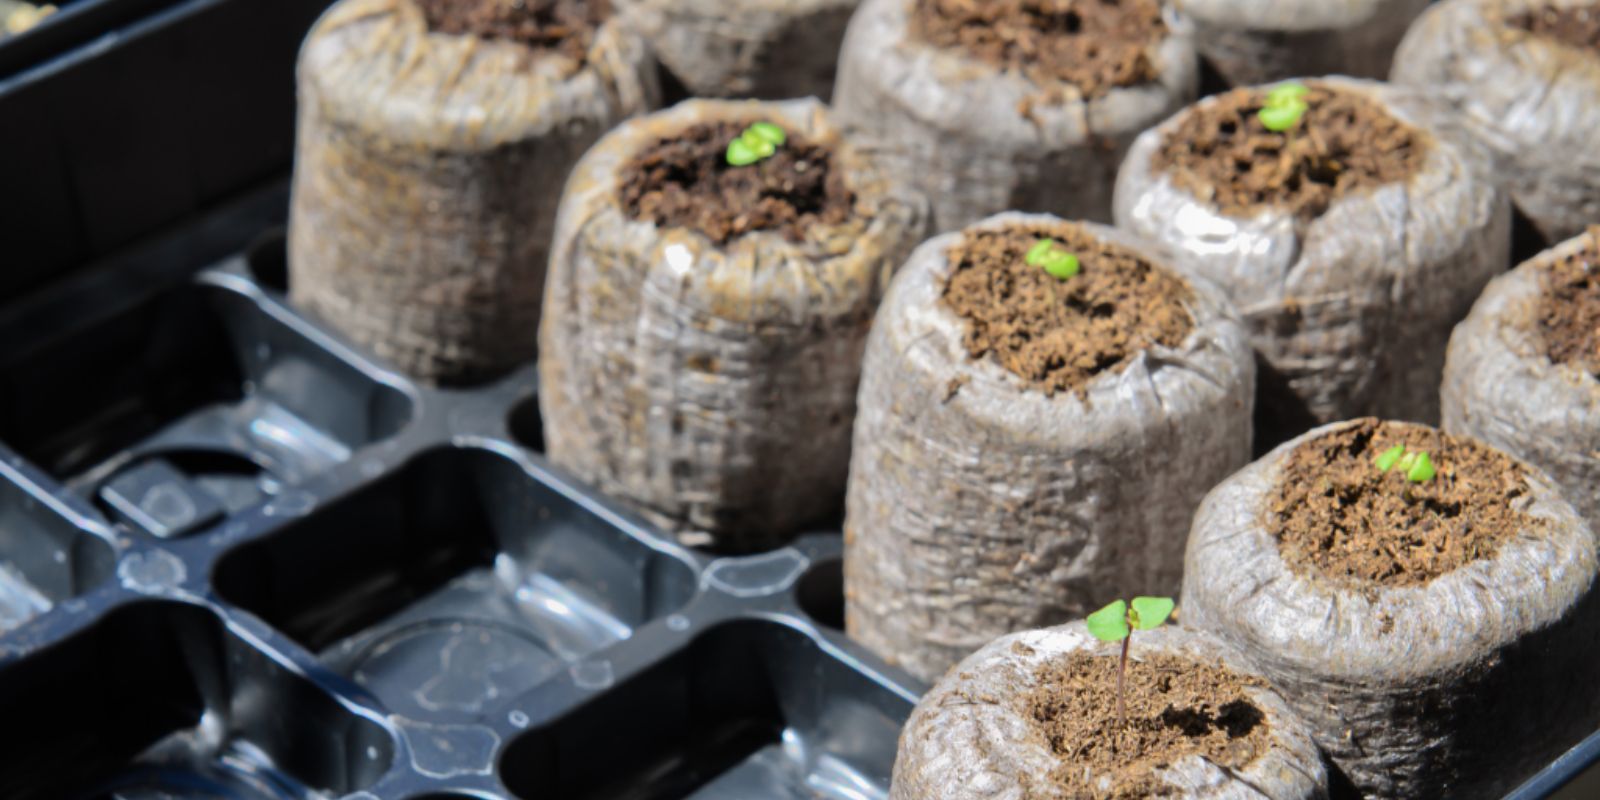
Place the pellets in your seed tray, ensuring they have enough space to expand. Add warm water gradually to the tray, allowing the pellets to absorb the water and swell. Depending on the brand, this process can take 5–10 minutes. Once fully expanded, they’ll look like small cylinders with a depression on top for planting seeds. - Plant Your Seeds
Using a pencil or your finger, create a small hole in the center of each pellet. Place one or two seeds into the hole, depending on the size of the seed and your desired germination rate. Cover the seeds lightly with the surrounding peat. - Create a Greenhouse Effect
Cover the seed tray with a clear plastic dome or stretch plastic wrap over it. This helps retain moisture and warmth, essential for germination. Place the tray in a warm location (around 65–75°F) to encourage sprouting. - Provide Adequate Light
As soon as your seeds sprout, remove the plastic dome and move the tray to a well-lit area. Ideally, place it near a south-facing window or use grow lights to ensure the seedlings receive 12–16 hours of light daily. - Water with Care
Keep the peat moist but not waterlogged. Use a spray bottle to mist the pellets gently. Avoid overwatering, as it can lead to root rot or fungal issues. - Monitor and Thin Seedlings
Once seedlings emerge, check their progress regularly. If more than one seed sprouts in a pellet, thin them by snipping the weaker seedling at the base to ensure the stronger plant has ample room to grow. - Transplant Seedlings
When your seedlings develop their first set of true leaves (the second set of leaves), they’re ready to be transplanted. The beauty of peat pellets is their easy transfer to the garden or larger containers. Plant the entire pellet directly into the soil, as the roots will grow through the biodegradable mesh.
Tips for Success
- Label Your Seeds: Keep track of what you’ve planted by labeling each pellet or section of the tray.
- Choose High-Quality Seeds: Opt for fresh seeds from reliable sources for better germination rates.
- Sterilize Your Equipment: Ensure your seed trays and tools are clean to prevent fungal infections.
- Provide Consistent Warmth: If your indoor space is cool, consider using a seedling heat mat to maintain optimal temperatures.
- Harden Off Before Planting Outdoors: Gradually introduce your seedlings to outdoor conditions by placing them outside for a few hours daily, increasing the duration over a week.
Common Challenges and Solutions
- Slow Germination: If seeds take longer than expected to sprout, check the temperature and light levels. Cold or dim conditions can delay germination.
- Mold Growth on Pellets: Ensure proper ventilation and avoid overwatering. Remove moldy pellets to protect other seedlings.
- Leggy Seedlings: Stretching occurs when seedlings don’t receive enough light. Move them closer to a grow light or a brighter window.
- Dry Pellets: If the pellets dry out, rehydrate them by adding water to the tray.
Peat Pellet Alternatives
While peat pellets are an excellent option, there are other eco-friendly seed-starting methods to explore:
- Coconut Coir Pellets: Similar to peat pellets but made from renewable coconut fibers.
- Compostable Pots: Biodegradable pots can also be planted directly in the soil.
- DIY Seed Starting Mix: Create your own mix using compost, vermiculite, and coconut coir or peat moss.
Why Start Seeds Indoors?
Starting seeds indoors offers several benefits for gardeners:
- Early Start: You can extend your growing season by starting plants indoors weeks before outdoor planting is possible.
- Control Over Conditions: Indoor seed starting allows you to manage temperature, light, and moisture levels.
- Cost-Effective: Growing plants from seeds is often more affordable than buying transplants.
- Wider Variety: You’ll have access to a broader range of plant varieties compared to what’s available as nursery plants.
Conclusion
Starting seeds indoors with peat pellets is a game-changer for gardeners of all skill levels. This simple yet effective method ensures that your plants have the best start possible, paving the way for a thriving garden. Whether you’re cultivating vegetables, herbs, or flowers, peat pellets provide a mess-free, nutrient-rich solution for germination.
Call to Action
Have you tried starting seeds indoors with peat pellets? Share your seed-starting hacks, success stories, or questions in the comments below! Don’t forget to tag us in your gardening photos using #SeedStarting #IndoorGardening #PeatPellets #GrowYourOwnFood #HomeGardeningTips #GardeningHacks!

