
Installing an efficient irrigation system is one of the best investments you can make for your garden or lawn. A well-designed system ensures that your plants receive the right amount of water at the right time, promoting healthy growth while conserving water. Whether you’re a seasoned gardener or a beginner, understanding the basics of irrigation installation can help you create a sustainable watering solution tailored to your garden’s needs. This guide will walk you through the essential steps of installing an irrigation system, from planning and selecting the right components to testing and maintaining the system.
The Importance of a Proper Irrigation System
Water is a vital resource for plant growth, but improper watering can lead to several problems, such as overwatering, underwatering, and uneven water distribution. A well-planned irrigation system addresses these issues by delivering water directly to the roots of your plants, minimizing evaporation and runoff. In addition, automated irrigation systems can save time and reduce water waste, making them an eco-friendly choice for modern gardening.
1. Planning the Layout
The first step in installing an irrigation system is to plan the layout. A well-thought-out design ensures that all areas of your garden receive adequate water, avoiding both dry spots and areas that are overly saturated.
- Map Your Garden: Start by mapping out your garden or lawn, noting the different zones that require irrigation. Consider factors like the size of the area, the types of plants, and their water needs. Group plants with similar water requirements together to create irrigation zones.
- Identify Water Sources: Determine the location of your water source, such as a tap or well. Consider the water pressure and flow rate, as these will affect the efficiency of your irrigation system.
- Consider Sun and Shade: Areas exposed to full sun may require more water than shaded areas. Keep this in mind when planning the placement of sprinklers or drip lines.
A well-planned layout will serve as a blueprint for your irrigation system, ensuring efficient water use and coverage.
2. Choosing the Right Irrigation System
Selecting the right type of irrigation system is crucial to meeting your garden’s specific needs. There are several types of irrigation systems to choose from, each with its advantages and ideal applications:
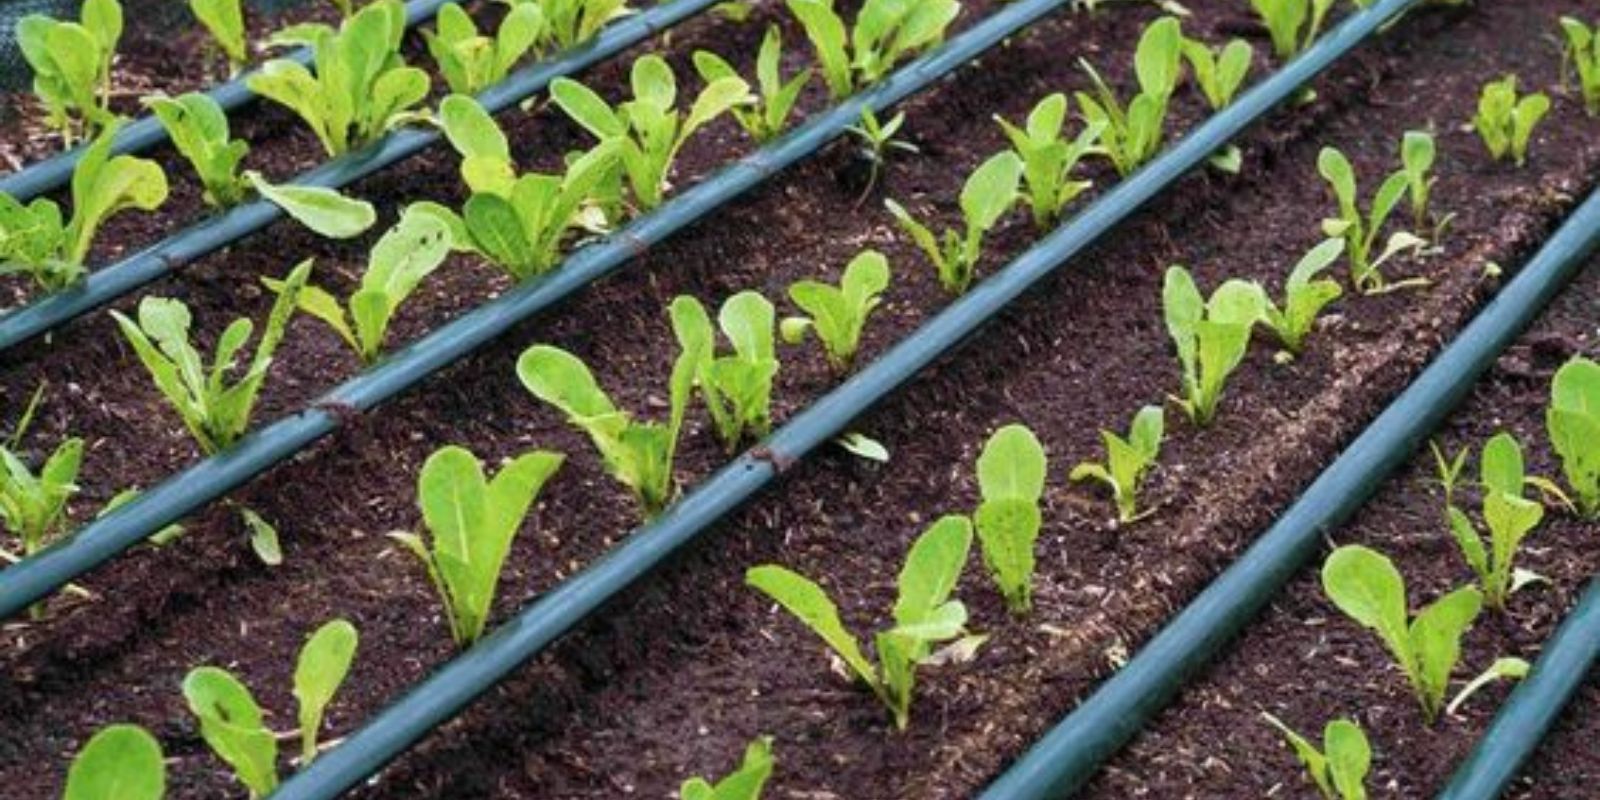
- Drip Irrigation: Drip irrigation delivers water directly to the base of plants through a network of tubes and emitters. This method is highly efficient, reducing water waste and evaporation. Drip irrigation is ideal for vegetable gardens, flower beds, and areas with plants that require precise watering.
- Sprinkler Systems: Sprinkler systems distribute water over a wide area, mimicking natural rainfall. They are well-suited for lawns and large garden areas. Sprinklers come in various types, including stationary, rotating, and oscillating, allowing you to choose the best option for your garden.
- Soaker Hoses: Soaker hoses are porous hoses that release water slowly along their length. They are easy to install and are ideal for watering rows of plants, such as in vegetable gardens or flower beds.
- Combination Systems: In some cases, a combination of different irrigation methods may be necessary to meet the varied needs of your garden. For example, you might use drip irrigation for flower beds and a sprinkler system for the lawn.
Consider the water needs of your plants, the size of your garden, and your budget when choosing an irrigation system.
3. Gathering Materials
Once you’ve planned your layout and selected the appropriate irrigation system, it’s time to gather the necessary materials. Having all the components on hand before you begin installation will streamline the process and prevent delays.
- Pipes and Tubing: Depending on the system you’ve chosen, you’ll need pipes or tubing to distribute water throughout your garden. For drip irrigation, flexible tubing is used, while sprinkler systems typically require rigid PVC or polyethylene pipes.
- Connectors and Fittings: Connectors, fittings, and valves are essential for linking pipes and tubes together and directing water flow. Make sure to choose the correct size and type for your system.
- Emitters and Sprinklers: These are the components that deliver water to your plants. Drip emitters release water slowly and precisely, while sprinklers cover larger areas. Choose emitters and sprinklers that match the water needs of your plants.
- Timers and Controllers: Automatic timers and controllers are invaluable tools for regulating watering schedules. They allow you to set specific times for watering, ensuring consistent irrigation without the need for manual intervention.
- Filters and Pressure Regulators: These components help maintain water quality and pressure, preventing clogs and ensuring efficient operation.
Having the right materials ensures that your irrigation system functions smoothly and delivers water efficiently.
4. Installing Pipes and Sprinklers
With your materials ready, you can begin installing the pipes, sprinklers, or drip lines according to your plan. Proper installation is key to achieving even water distribution and avoiding issues like leaks or clogs.
- Lay Out the Pipes: Begin by laying out the main water line from your water source to the irrigation zones. Dig trenches if you’re burying pipes underground. For drip systems, lay the tubing along the plant rows or around the base of plants.
- Install Sprinklers or Emitters: Attach sprinklers or emitters to the pipes or tubing according to your layout plan. Ensure that sprinklers are spaced correctly to cover the intended area without overlapping too much, which can lead to water waste. Drip emitters should be placed near the base of each plant.
- Secure the Pipes: Secure the pipes or tubing with stakes or clips to keep them in place. If you’re burying pipes, fill in the trenches carefully, ensuring there are no kinks or sharp bends that could impede water flow.
Proper installation ensures that your irrigation system operates efficiently and delivers water evenly to all areas of your garden.
5. Connecting to the Water Source
Once the pipes and sprinklers are in place, the next step is to connect the system to your water source. This step is straightforward but requires careful attention to ensure a secure and leak-free connection.
- Attach to the Water Source: Connect the main water line to your outdoor tap, well, or other water sources. Use a backflow preventer to prevent contaminated water from flowing back into your water supply. If necessary, install a filter to keep debris from clogging the system.
- Install a Pressure Regulator: If your water pressure is too high, it can damage the system or cause uneven water distribution. Install a pressure regulator to maintain a consistent and safe water pressure.
- Test for Leaks: Turn on the water supply and check for leaks at all connection points. Tighten any loose fittings and make adjustments as needed.
Ensuring a secure connection to the water source is crucial for the overall efficiency and reliability of your irrigation system.
6. Setting Up Timers and Controllers
Automating your irrigation system with timers and controllers can save time and ensure that your plants receive consistent watering. These devices allow you to program watering schedules based on your garden’s needs.
- Install the Timer: Attach the timer to your water source, and connect it to the main water line. Set the timer according to your watering schedule. For example, early morning is the best time to water, as it reduces evaporation and allows plants to absorb moisture before the heat of the day.
- Program the Controller: If using a more advanced controller, program the watering cycles for each zone. Consider factors like soil type, plant needs, and weather conditions when setting the schedule.
- Test the System: Run a test cycle to ensure that the timer and controller are functioning correctly. Make adjustments as needed to optimize water delivery.
Automating your irrigation system with timers and controllers helps maintain consistent watering, even when you’re not around.
7. Testing the System
After installation, it’s important to test the entire system to ensure it’s working as intended. This step helps identify any issues that need to be addressed before the system is fully operational.
- Run a Full Cycle: Turn on the system and run a full watering cycle, observing each zone to ensure even coverage. Check for dry spots, overwatering, and leaks.
- Adjust Sprinklers and Emitters: If you notice areas that are receiving too much or too little water, adjust the position of sprinklers or the flow rate of emitters. Make sure water is reaching the intended areas without causing runoff or puddling.
- Inspect for Leaks: Walk along the irrigation lines and inspect for any leaks or drips that could indicate loose fittings or damaged pipes. Address any issues promptly to prevent water waste.
Testing your system thoroughly ensures that it operates efficiently and meets the watering needs of your garden.
Conclusion
Installing an irrigation system is a valuable investment in the health and beauty of your garden or lawn. By following these steps, you can create a system that provides consistent, efficient watering, helping your plants thrive while conserving water. Proper planning, choosing the right materials, and careful installation are key to a successful irrigation system.
Call to Action
Ready to install your irrigation system? Share your experiences, ask questions, or offer tips in the comments below. Let’s work together to create efficient and sustainable watering solutions for our gardens!