
Pruning roses is an essential task for any gardener looking to keep their rose bushes in top shape. Proper pruning not only enhances the plant’s health but also encourages more vibrant blooms. While it might seem intimidating at first, following these seven simple steps will make the process manageable and rewarding. This guide will walk you through the best practices for pruning roses, ensuring your garden remains a dazzling display of color and vitality.
Introduction: The Importance of Pruning Roses
Pruning roses is crucial for several reasons. It helps to remove dead or diseased wood, encourages new growth, improves air circulation, and can even shape the plant to enhance its beauty. Proper pruning ensures that the plant expends its energy on healthy growth and abundant flowering rather than on maintaining unproductive or diseased branches.
When done correctly, pruning not only rejuvenates the plant but also prolongs its lifespan and increases the quality of blooms. Whether you’re a seasoned gardener or a novice, understanding the basics of rose pruning will help you achieve a stunning rose garden that’s the envy of your neighborhood.
Step 1: Choose the Right Time
Timing is critical when it comes to pruning roses. The ideal time for pruning is late winter to early spring, just before the plant starts to bud. This timing varies depending on your climate and the type of roses you have. In general, you want to prune when the risk of hard frost has passed, but before new growth begins. In colder regions, this might be late March to early April, while in milder climates, it could be as early as February.
Pruning too early can expose tender new growth to frost, while pruning too late can prevent the plant from producing its best blooms. Observing local weather patterns and the growth cycle of your specific rose variety will help you determine the optimal time for pruning.
Step 2: Gather Your Tools
Before you start pruning, make sure you have the right tools. Invest in high-quality, sharp pruning shears, and always clean them before use to prevent the spread of disease. A pair of gloves is also essential to protect your hands from thorns and potential infections.
In addition to shears, you may need a pruning saw for larger branches and loppers for hard-to-reach areas. Having a small bucket or garden cart nearby for collecting pruned material will also make cleanup easier. Ensuring your tools are in good condition will make the pruning process smoother and more efficient.
Step 3: Remove Deadwood
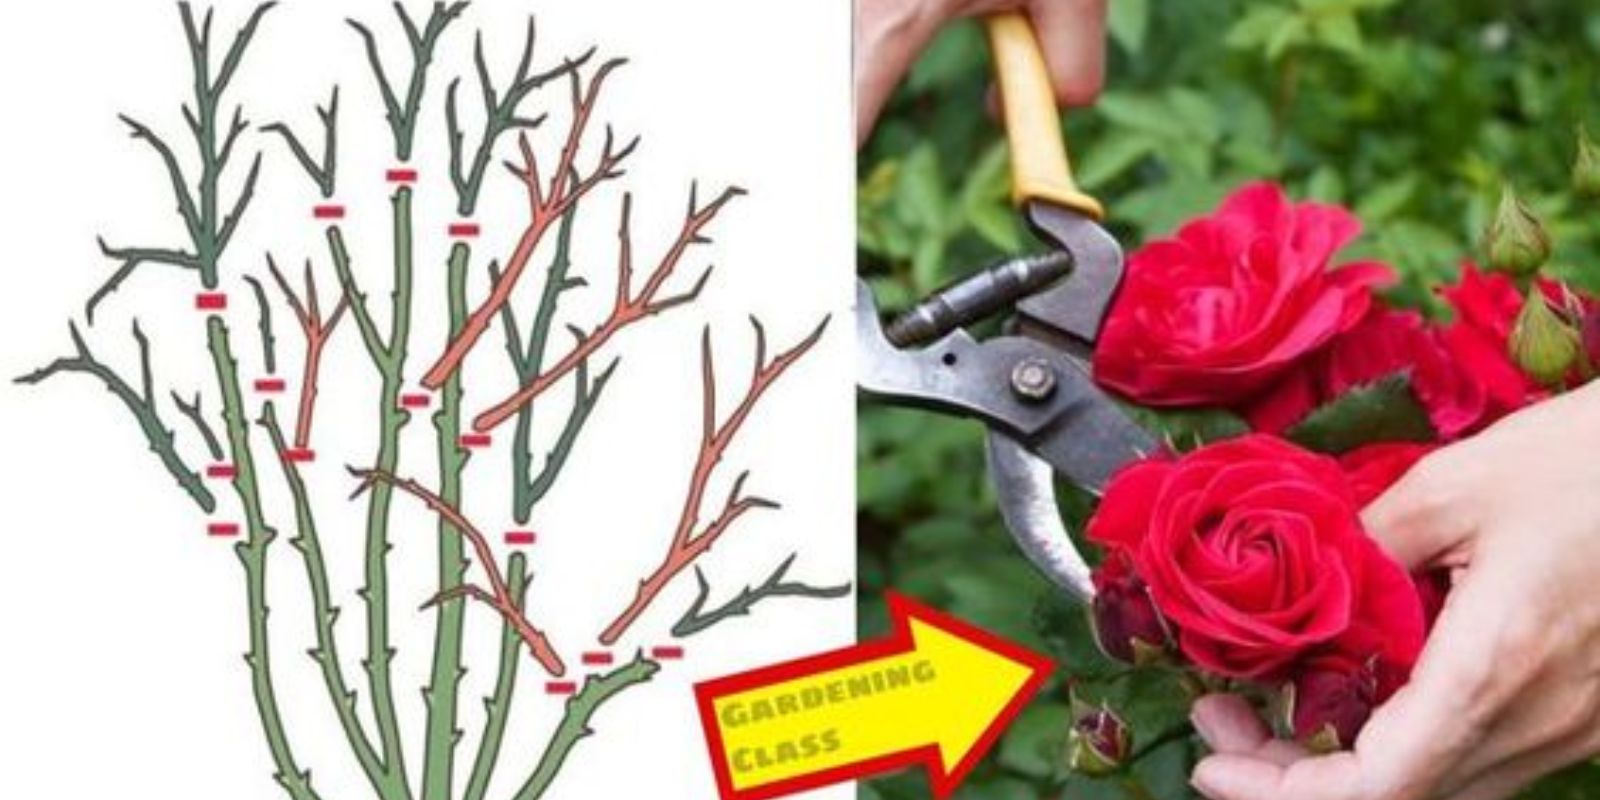
Begin by removing any dead, diseased, or damaged wood. This step is crucial as deadwood can harbor pests and diseases that might spread to the healthy parts of the plant. Look for branches that are brittle, discolored, or have blackened tips. Cut these back to the point where the wood appears healthy and vibrant.
Make your cuts at a slight angle, just above a healthy bud or branch junction. This will help prevent water from collecting on the cut surface, which can lead to rot. Removing deadwood not only improves the plant’s appearance but also reduces the risk of disease.
Step 4: Shape the Plant
Once the deadwood is removed, start shaping your rose bush. Aim to create an open, balanced structure that allows for good air circulation and sunlight penetration. Focus on trimming back branches that are growing inward or crossing over each other. These branches can create a tangled mess that impedes air flow and can contribute to fungal diseases.
Shape the plant to encourage a strong central leader or main stem, with lateral branches spreading outward. Avoid cutting too much at once; instead, make incremental cuts and step back periodically to assess the plant’s overall shape. Proper shaping helps the rose bush maintain a pleasing form and promotes healthy growth.
Step 5: Open the Center
An important part of pruning is opening up the center of the plant. This practice improves air circulation and reduces the risk of diseases such as powdery mildew and black spot. Look for any branches growing toward the center of the bush and remove them. Additionally, thin out any congested areas to prevent overcrowding.
Opening up the center also allows more sunlight to reach the inner parts of the plant, which can enhance blooming and overall health. Make sure to remove any suckers or growth that appears from the base of the plant, as these can divert energy away from the main structure.
Step 6: Cut at an Angle
When making cuts, always cut at a 45-degree angle, just above an outward-facing bud. This angle helps to direct water away from the cut surface and reduces the risk of rot. Cutting above an outward-facing bud encourages new growth to emerge in the direction you want, leading to a well-shaped and productive plant.
Make clean cuts with sharp shears to minimize damage to the plant. Avoid making jagged or torn cuts, as these can create entry points for pests and diseases. Taking care to make precise cuts ensures that the plant heals quickly and continues to grow vigorously.
Step 7: Clean Up
After you’ve finished pruning, clean up the area around the plant. Remove all pruned material, including leaves, branches, and any debris from the garden bed. This step helps to prevent the spread of diseases and pests that might be present in the discarded material.
Dispose of the pruned material properly—do not leave it around the plant or in the garden. You can compost healthy plant material or dispose of diseased material according to local guidelines. Keeping your garden clean and tidy will contribute to the overall health and appearance of your rose bushes.
Conclusion: Reap the Rewards of Pruning
Pruning roses might seem like a challenging task, but with these seven simple steps, you’ll find it to be a manageable and rewarding experience. By choosing the right time, using the proper tools, and following these guidelines, you’ll help your rose bushes thrive and produce stunning blooms.
Remember, the benefits of pruning extend beyond the immediate appearance of the plant. A well-pruned rose bush is healthier, more vigorous, and better able to withstand pests and diseases. So, take a deep breath, gather your tools, and get started on your rose pruning journey. Your garden will thank you with a spectacular display of beautiful roses. 🌹🌿🌞