
Growing a walnut tree from seed is a rewarding process that requires patience, knowledge, and the right growing conditions. Whether you want to enjoy fresh walnuts or simply add a beautiful shade tree to your landscape, this guide will walk you through the steps of germinating, planting, and caring for a walnut tree from seed.
Why Grow a Walnut Tree from Seed?
Walnut trees (Juglans species) are known for their delicious nuts, strong wood, and aesthetic appeal. While buying a young sapling from a nursery is an option, growing a walnut tree from seed has several advantages:
- Cost-effective: Seeds are free if you collect them from existing trees.
- Stronger root system: Trees grown from seeds tend to develop more robust roots.
- Satisfaction of growing from scratch: There is something special about nurturing a tree from seed to maturity.
Choosing the Right Walnut Variety
Before you start, decide which walnut species suits your climate and soil conditions. The most common varieties include:
- English Walnut (Juglans regia): Known for its thin shell and mild-flavored nuts, it thrives in temperate climates.
- Black Walnut (Juglans nigra): Produces hard-shelled nuts with a rich, bold flavor and is valued for its timber.
- California Walnut (Juglans hindsii): A native species often used as a rootstock.
- Butternut (Juglans cinerea): Has a sweet, buttery-flavored nut but is less common.
Step 1: Collecting and Preparing Walnut Seeds
Walnuts ripen in the fall, typically between September and October. Follow these steps to gather and prepare them for planting:
1.1 Harvest Fresh Walnuts
- Collect walnuts that have naturally fallen from the tree.
- Remove the green or brown outer husk to prevent mold and disease.
- Choose large, undamaged nuts for the best chance of germination.
1.2 Clean the Seeds
- Wash the nuts thoroughly to remove any remaining husk residue.
- Let them dry for a few days in a cool, shaded area.
1.3 Check for Viability
- Place the walnuts in a bucket of water. Discard any that float, as they are likely empty or damaged.
Step 2: Stratifying the Seeds
Walnut seeds need cold stratification to break dormancy and encourage germination. This mimics the natural winter conditions they experience outdoors.
2.1 Refrigeration Method
- Place the seeds in a moist mixture of sand and peat moss.
- Store in a sealed plastic bag or container in the refrigerator at 34-40°F (1-4°C).
- Keep them moist but not soggy for 90-120 days.
2.2 Outdoor Stratification
- Plant the seeds in the ground in late fall, about 2 inches deep.
- Cover with mulch to protect from harsh winter conditions.
Step 3: Planting the Walnut Seeds
Once the cold stratification period is complete, the seeds are ready for planting.
3.1 Choosing the Planting Site
- Select a sunny location with well-draining soil.
- Avoid planting near driveways, sidewalks, or gardens, as walnut trees produce juglone, a chemical that inhibits the growth of certain plants.
3.2 Planting the Seeds
- Dig a hole about 2 inches deep.
- Place the walnut seed on its side, then cover with soil.
- Water lightly to keep the soil evenly moist but not waterlogged.
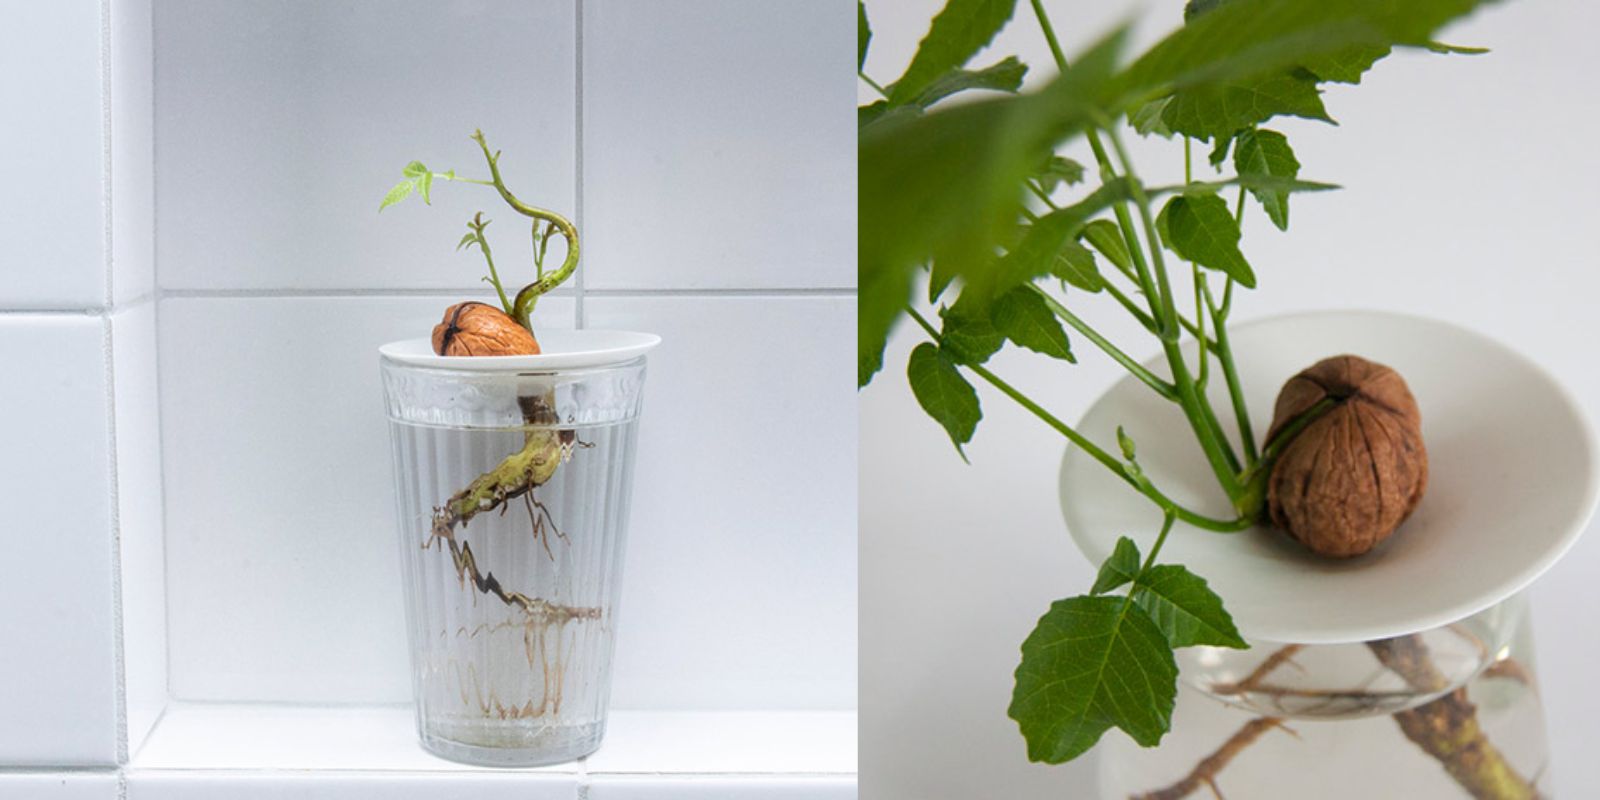
3.3 Indoor Planting (Optional)
- If starting seeds indoors, plant in deep pots with nutrient-rich potting soil.
- Keep pots in a warm, sunny location until seedlings emerge.
- Transplant outdoors when they are 6-12 inches tall.
Step 4: Caring for Walnut Seedlings
Walnut seedlings need proper care to establish strong roots and healthy growth.
4.1 Watering
- Keep the soil moist but not soggy.
- Water deeply and regularly, especially during dry periods.
4.2 Protecting Young Trees
- Use wire mesh or tree guards to prevent damage from rodents and deer.
- Apply a layer of mulch to retain moisture and suppress weeds.
4.3 Pruning and Maintenance
- Remove weak or crossing branches to encourage a strong central leader.
- Avoid excessive pruning in the first few years to prevent stress.
Step 5: Transplanting and Long-Term Care
Once your walnut seedling is established, it will need space to grow into a large, healthy tree.
5.1 When to Transplant
- If grown in a pot, transplant when it reaches 12-18 inches tall.
- Best time to transplant is early spring or late fall.
5.2 Long-Term Maintenance
- Fertilize lightly in the spring to encourage growth.
- Monitor for pests such as walnut weevils and aphids.
- Be patient—walnut trees take 5-7 years to produce nuts and 20+ years to reach full maturity.
Common Problems and Solutions
Even with the best care, walnut trees can face challenges. Here are some common issues and how to address them:
| Problem | Cause | Solution |
|---|---|---|
| Poor Germination | Insufficient stratification | Extend cold stratification period |
| Slow Growth | Lack of nutrients or water | Fertilize and water regularly |
| Pest Infestation | Walnut weevils, aphids | Use organic insecticides or beneficial insects |
| Yellowing Leaves | Overwatering or nutrient deficiency | Reduce watering, test soil nutrients |
Final Thoughts
Growing a walnut tree from seed is a long but rewarding journey. With patience, proper care, and the right conditions, you can enjoy the beauty and bounty of your very own walnut tree. Whether for shade, nuts, or timber, these magnificent trees make an excellent addition to any landscape.
🌳 Have you ever grown a walnut tree from seed? Share your experience and tips in the comments below! 🌱👇
#GrowYourOwnFood #WalnutTree #GardeningTips #SeedStarting #OrganicGardening #BackyardGardening