
Hibiscus plants are known for their strikingly beautiful, large blooms and vibrant colors. Whether you’re looking to expand your garden or share the beauty of your hibiscus plants with friends and family, propagating them from cuttings is a simple, cost-effective way to grow new plants. This guide will walk you through the process of propagating hibiscus from cuttings, from choosing the right stem to ensuring that your new plants take root and thrive.
Why Propagate Hibiscus from Cuttings?
Hibiscus plants are typically grown from seeds or cuttings, with cuttings being a faster and more reliable method. While growing from seed can be a rewarding experience, it can take longer and may not always yield the same results in terms of plant quality. By propagating hibiscus from cuttings, you can create clones of your favorite plants, ensuring that the new plants will have the same characteristics as the parent.
Propagation also allows you to create a garden full of vibrant hibiscus plants without purchasing new ones, which can be costly. Additionally, hibiscus plants can be quite large, so propagating them from cuttings gives you the opportunity to grow more plants in a smaller space.
Materials You’ll Need for Hibiscus Propagation
Before you start propagating hibiscus from cuttings, it’s essential to gather the necessary materials. Here’s a list of what you’ll need:
- Healthy hibiscus plant: Choose a mature hibiscus plant that is free from disease and pests.
- Sharp, sterile pruning shears or scissors: Clean tools are essential to avoid contaminating the cutting and the parent plant.
- Rooting hormone (optional): This can help stimulate root growth and improve your chances of successful propagation.
- Small pots: These will be used to plant your hibiscus cuttings.
- Well-draining potting mix: A mixture that drains well is essential to prevent the cutting from becoming waterlogged.
- Clear plastic bag or mini greenhouse: This will help retain moisture and create a humid environment for the cutting.
- Watering can or spray bottle: To keep the soil moist.
Step-by-Step Guide to Propagating Hibiscus from Cuttings
Follow these simple steps to propagate hibiscus plants from cuttings, and you’ll have a thriving new plant in no time.
1. Choose a Healthy Hibiscus Plant
The first step in propagating hibiscus from cuttings is to choose a healthy parent plant. Look for a hibiscus that is free from pests and diseases. The plant should also be in its active growing season, typically during the spring or early summer, when it is producing new growth.
When selecting a stem for the cutting, look for a healthy, semi-hardwood stem. Semi-hardwood stems are not too young and tender but also not fully mature and woody. These stems are more likely to root successfully. Avoid stems that are too soft or woody, as they may not root well.
2. Take the Cutting
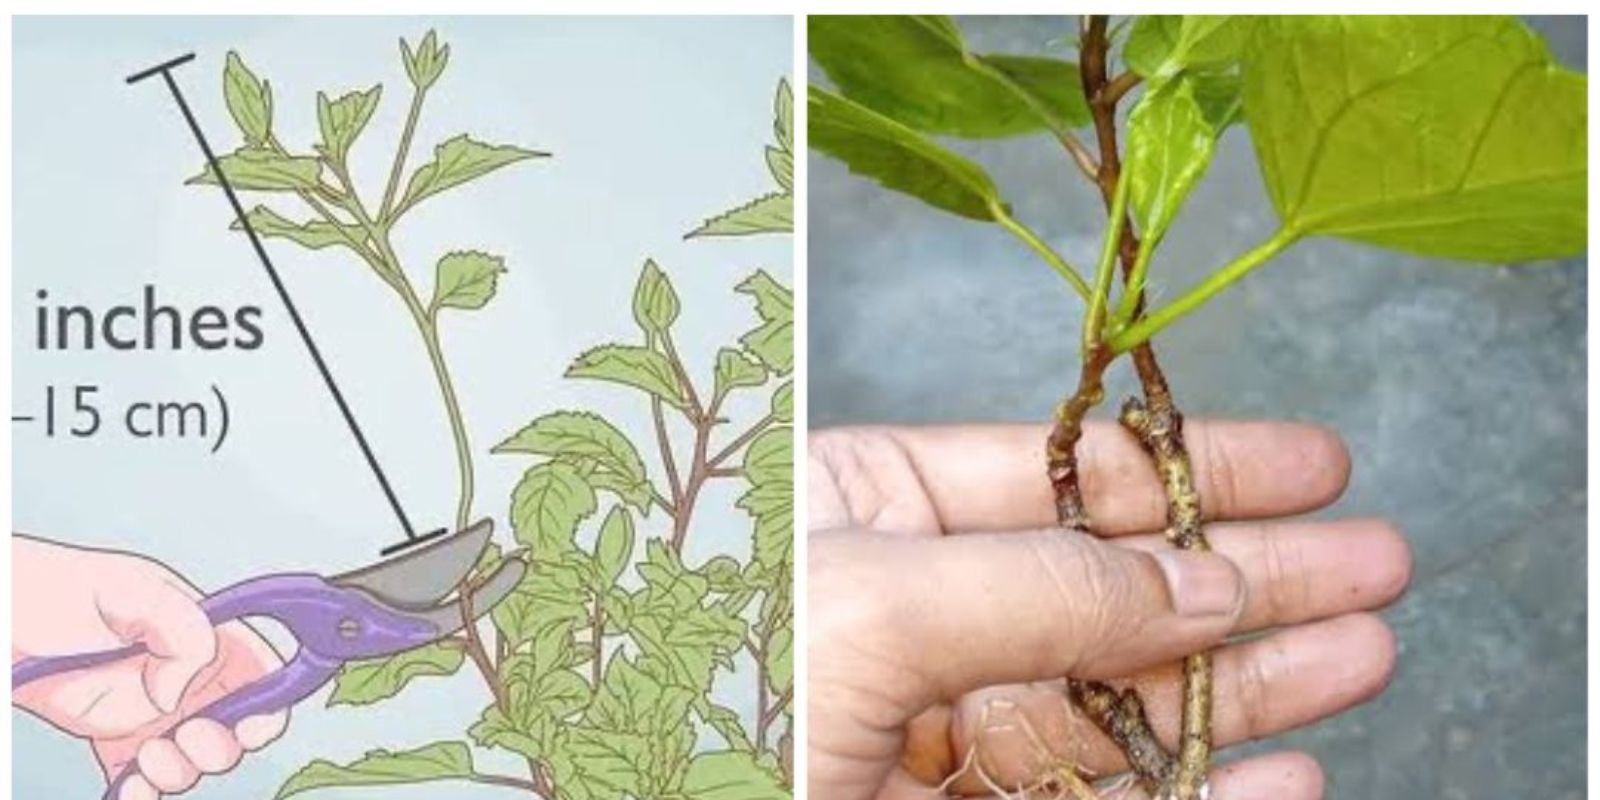
Once you’ve identified the right stem, it’s time to take the cutting. Using your sharp, sterile pruning shears, cut a 10-15 cm (4-6 inches) piece of stem just below a leaf node. This cutting should have at least a couple of leaves attached to it.
The cutting should be taken from the tip of the stem, where the new growth is located. Avoid cutting too close to the main plant, as the cutting needs to have enough stem length for rooting. Make sure to cut the stem at a 45-degree angle to maximize surface area and improve the chances of successful rooting.
3. Prepare the Cutting
After taking the cutting, remove the lower leaves from the stem, leaving only the top two or three leaves. This is important because the lower leaves will be buried in the soil and may rot if left attached. The upper leaves should remain intact to provide the cutting with energy while it’s forming roots.
If you’re using rooting hormone to help stimulate root growth, dip the cut end of the stem into the powder or gel. Rooting hormone is optional but can significantly increase the chances of success by encouraging faster and stronger root development.
4. Prepare the Potting Mix
Select a small pot with good drainage holes. You can use a typical plant pot or even a small plastic container. Fill the pot with a well-draining potting mix, such as a mix of peat moss, perlite, and vermiculite. Hibiscus cuttings need a light, airy mix to prevent the cutting from becoming waterlogged and to allow for proper root development.
Before inserting the cutting, moisten the soil lightly with water to ensure it is damp but not soaking wet. The goal is to create a moist environment that encourages root growth.
5. Plant the Cutting
Insert the cut end of the hibiscus cutting into the damp potting mix. Gently push the cutting into the soil about 2-3 cm (1 inch) deep, ensuring that it stands upright. Be careful not to crush or damage the stem during this process.
If you have used rooting hormone, be sure to handle the cutting gently to avoid disturbing the hormone at the base. Pat the soil gently around the base of the cutting to stabilize it in place.
6. Create a Humid Environment
To help the cutting retain moisture and create a more favorable environment for rooting, cover it with a clear plastic bag or place it inside a mini greenhouse. This will keep the humidity levels high, which is essential for successful rooting.
Make sure the plastic does not touch the leaves of the cutting, as this can cause mold and rot. To ensure air circulation, leave the bag or greenhouse slightly open at the top or sides. This will allow excess moisture to escape and prevent the cutting from becoming too damp.
7. Provide Indirect Light and Warmth
Place the pot in a warm, bright location, but avoid direct sunlight, as it can cause the cutting to overheat and dry out. Ideal temperatures for rooting hibiscus cuttings are between 18-24°C (65-75°F). Too much heat can cause the cutting to wilt, while too little heat can slow the rooting process.
Hibiscus cuttings need indirect light, as direct sunlight can burn the cutting or dry it out too quickly. A location near a window with filtered sunlight or under grow lights is perfect for this stage.
8. Water and Maintain Humidity
Check the cutting regularly and keep the soil moist but not soaking wet. Overwatering can lead to rot, while underwatering can cause the cutting to dry out and fail to root. Use a spray bottle or a watering can with a gentle spout to keep the soil moist. If the soil begins to dry out, lightly mist the cutting to help maintain humidity.
The rooting process typically takes 3-4 weeks. During this time, the cutting will begin to form roots. To check for roots, gently tug on the cutting after a few weeks. If you feel resistance, the cutting has likely developed roots.
9. Transplanting the Rooted Cutting
Once the hibiscus cutting has developed roots, you can transplant it into a larger pot or into your garden. Gently remove the cutting from the pot, taking care not to damage the newly formed roots. If the cutting is in a small pot, you can gradually acclimate it to the outdoors by placing it in a shaded area for a few hours a day and then increasing the exposure to sunlight over time.
If planting in the ground, choose a location with well-draining soil and ample sunlight. Hibiscus plants thrive in full sun, so be sure to plant them in a location that receives at least 6 hours of sunlight per day.
Conclusion
Propagating hibiscus from cuttings is a rewarding and cost-effective way to expand your garden and enjoy more of these beautiful plants. By following these simple steps, you can easily create new hibiscus plants that will flourish and produce stunning flowers. Whether you’re an experienced gardener or a beginner, propagating hibiscus from cuttings is a fun and educational process that will enhance your gardening skills.
With a little patience, you’ll soon have a collection of healthy hibiscus plants to enjoy for years to come. So, grab your scissors, get ready to propagate, and watch your garden bloom with vibrant colors and stunning blooms.