
Growing roses from cuttings is one of the most satisfying and cost-effective ways to propagate these beautiful, fragrant flowers. Whether you’re an experienced gardener or a novice, the process is simple, and with a little patience, you can cultivate a lush rose garden. In this guide, we will walk you through each step of propagating roses from cuttings, from choosing the right materials to caring for your new plants.
Why Grow Roses from Cuttings?
Rose cuttings are an excellent way to propagate roses because they allow you to create new plants that are genetically identical to the parent plant. This means that you can replicate the exact variety of rose you adore without the need for expensive nursery purchases. Additionally, propagating roses from cuttings is a relatively easy and inexpensive process. All it requires is a little knowledge and the right conditions, and you’ll have a garden full of vibrant, blooming roses.
Materials Needed
Before you begin, gather the necessary materials. Here’s a list of everything you’ll need to grow roses from cuttings:
- Healthy Rose Cuttings: Choose a healthy rose bush that is free from diseases and pests. Select mature, disease-free stems with no signs of rot or spots. The best time to take rose cuttings is during the growing season, from spring to early summer.
- Pruning Shears: Sharp, clean pruning shears are essential for cutting rose stems cleanly without causing damage.
- Rooting Hormone (Optional): While not always necessary, rooting hormone can encourage quicker root development and improve the success rate of propagation.
- Small Pots or Containers: Choose containers that provide good drainage, such as small plastic or clay pots.
- Well-Draining Soil: A mixture of peat, perlite, and vermiculite works well for roses as it ensures good drainage.
- Clear Plastic Bags or Propagation Domes: These will create a humid environment for the cuttings to root properly.
- Watering Can or Spray Bottle: For watering the cuttings without over-wetting them.
Step-by-Step Guide to Growing Roses from Cuttings
Step 1: Choose Healthy, Disease-Free Rose Stems
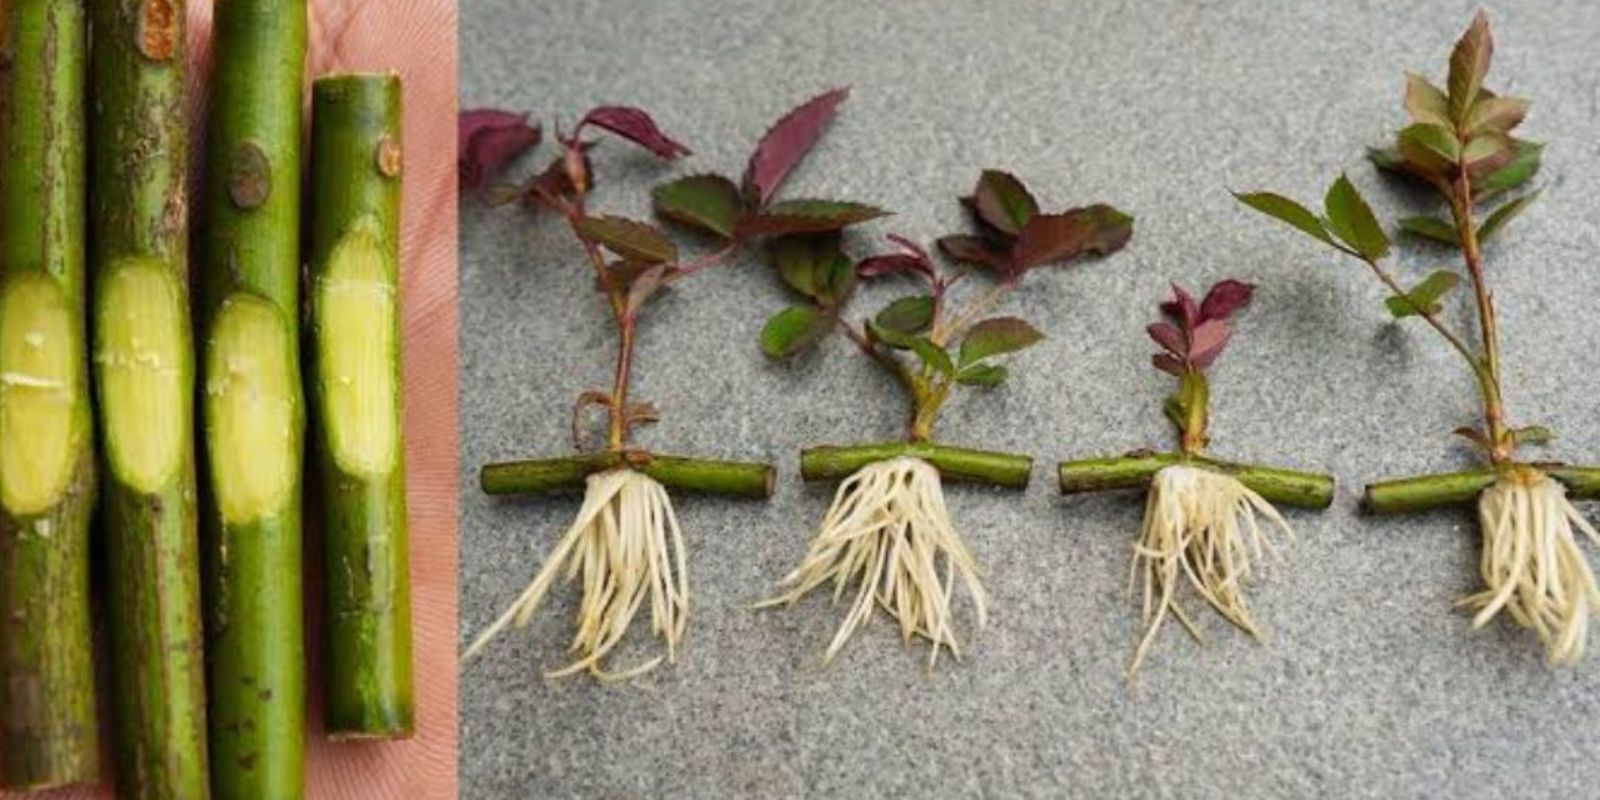
Select a healthy, mature rose plant that is free of pests and diseases. The best stems to use are semi-woody stems, which are not too old or too young. These stems should be about 6 to 8 inches long and have 2 to 3 sets of leaves. Avoid stems with flowers or buds, as they may not root well.
Step 2: Take the Cuttings
Using clean, sharp pruning shears, cut the selected stems just below a leaf node. A leaf node is where leaves and new growth emerge from the stem. Make sure the cutting is free from flowers, thorns, and any lower leaves, which can prevent root development. You should be left with a clean cutting that has a smooth edge and a couple of leaf nodes.
Step 3: Prepare the Cuttings for Planting
Remove any leaves from the bottom half of the cutting to prevent them from rotting in the soil. If you prefer, you can dip the cut end of the rose cutting into rooting hormone powder or gel, which can help stimulate root growth. This step is optional but can improve the chances of successful rooting.
Step 4: Prepare the Pots and Plant the Cuttings
Fill a small pot or container with a well-draining mix. The soil should be loose and airy to allow roots to establish easily. You can use a mix of peat, perlite, and vermiculite to achieve excellent drainage.
Make a small hole in the center of the soil using a stick or your finger, and place the cutting in the hole. Make sure the leaf nodes are above the soil level, as they will eventually produce new roots. Gently firm the soil around the cutting to hold it in place and water lightly. The soil should be moist, but not soggy, as excessive moisture can lead to rot.
Step 5: Create a Humid Environment
After planting the cuttings, cover the pot with a clear plastic bag or a propagation dome. This will trap moisture and create a humid environment that encourages rooting. Place the pot in a location with bright, indirect sunlight, avoiding direct sunlight, which can scorch the cuttings.
Make sure there is some airflow around the cuttings to prevent mold growth. If you’re using a plastic bag, be sure to leave small openings for ventilation. Keeping the humidity high is crucial for the cuttings to establish roots.
Step 6: Care for the Cuttings
Maintain the soil’s moisture level by misting the cuttings with water using a spray bottle. Keep the soil damp, but not overly wet. Overwatering can lead to root rot, so it’s important to strike a balance. Check the soil regularly to ensure it is neither too dry nor too wet.
During the rooting process, it’s essential to provide the right temperature. The ideal temperature range for rooting is between 65°F and 75°F (18°C to 24°C). Avoid placing the cuttings in areas with fluctuating temperatures, as this may hinder root development.
Step 7: Monitor the Progress
After about 4 to 6 weeks, you should begin to see signs of new growth on your rose cuttings. Look for the emergence of leaves and new shoots, which indicates that the cutting has developed roots. At this point, you can gently tug on the cutting to see if it resists, which is a sign that the roots have established.
If you don’t see any signs of growth after several weeks, it’s possible that the cutting has not rooted successfully. Don’t be discouraged—sometimes, not all cuttings take root. If this happens, try taking new cuttings from a different part of the plant and repeat the process.
Step 8: Transplant the Rooted Cuttings
Once the roots are well-established, it’s time to transplant the rose cuttings into larger pots or directly into the garden. When transplanting, be gentle with the roots, as they can be fragile. If you’re planting them in the garden, choose a sunny spot with well-drained soil.
Make a hole large enough to accommodate the root ball and place the cutting in the hole, filling it with soil and pressing down gently. Water the transplant thoroughly to help it settle into its new environment.
Step 9: Ongoing Care for Your New Roses
After transplanting, continue to care for your rose plant by watering it regularly. Roses need at least 6 hours of sunlight a day, so make sure your new rose bush gets plenty of light. If you’re growing the roses in pots, you may need to move them outdoors in the summer to ensure they get enough light.
Fertilize the plant once a month with a balanced rose fertilizer to support healthy growth and flowering. Roses also benefit from occasional pruning to remove dead or diseased wood and to encourage a bushier, more compact shape.
Step 10: Enjoy Your Beautiful Roses
With the right care, your rose cuttings will soon bloom and thrive, bringing color and fragrance to your garden. Be sure to remove spent blooms by deadheading, as this encourages the plant to produce more flowers.
Tips for Success
- Choose the right time: The best time to take rose cuttings is during the growing season, particularly in the spring and early summer when the stems are actively growing.
- Use clean tools: Always use sharp, clean pruning shears to avoid damaging the plant and to reduce the risk of transferring disease.
- Be patient: Rooting can take time, so don’t be discouraged if the process is slow. The results will be worth the wait.
Conclusion
Growing roses from cuttings is an enjoyable and rewarding gardening project. By following these simple steps and providing the right care, you can propagate new rose plants that will bloom beautifully in your garden. Whether you’re looking to expand your collection of roses or want to share a special variety with a friend, propagating roses from cuttings is a fulfilling way to cultivate these iconic flowers. Happy gardening, and may your rose garden thrive!