
Gladiolus, often referred to as “glads,” are beloved garden staples known for their stunning spikes of vibrant flowers. These perennial beauties can add a spectacular touch to your garden, but to enjoy their brilliance season after season, it’s essential to know how to properly save and store their corms. In this comprehensive guide, we will delve into everything you need to know about saving gladiolus for next season, ensuring that your garden remains colorful and lively year after year.
Understanding Gladiolus
The Basics
Gladiolus belong to the family Iridaceae and are native to Africa and the Mediterranean region. They are characterized by their tall flower spikes that can reach heights of up to four feet. Gladiolus come in a wide array of colors, making them popular choices for both gardens and floral arrangements.
Types of Gladiolus
While there are numerous varieties of gladiolus, they can broadly be categorized into two types:
- Summer-flowering Gladiolus: These are the most common types found in gardens, typically planted in the spring to bloom in summer.
- Winter-flowering Gladiolus: Found mostly in warmer climates, these can be planted in the fall for winter blooms.
Why Saving Gladiolus Corms is Important
Gladiolus corms are not only a financial investment but also a time-saver. By saving corms, you:
- Save Money: Purchasing new corms every year can become costly. Saving your own helps you cut expenses.
- Maintain Quality: Your saved corms may produce stronger plants than new ones, as they are acclimated to your specific growing conditions.
- Enhance Your Garden: Over time, you can build a diverse collection of gladiolus varieties in your garden.
Step-by-Step Guide to Saving Gladiolus Corms
1. Wait for the Foliage to Die Back
After blooming, allow the gladiolus foliage to yellow and die back naturally. This process typically takes about 6-8 weeks. The leaves are essential as they photosynthesize, transferring energy back into the corms.
- Tip: Avoid cutting back the leaves prematurely. Patience here pays off, as it allows the corms to store nutrients effectively.
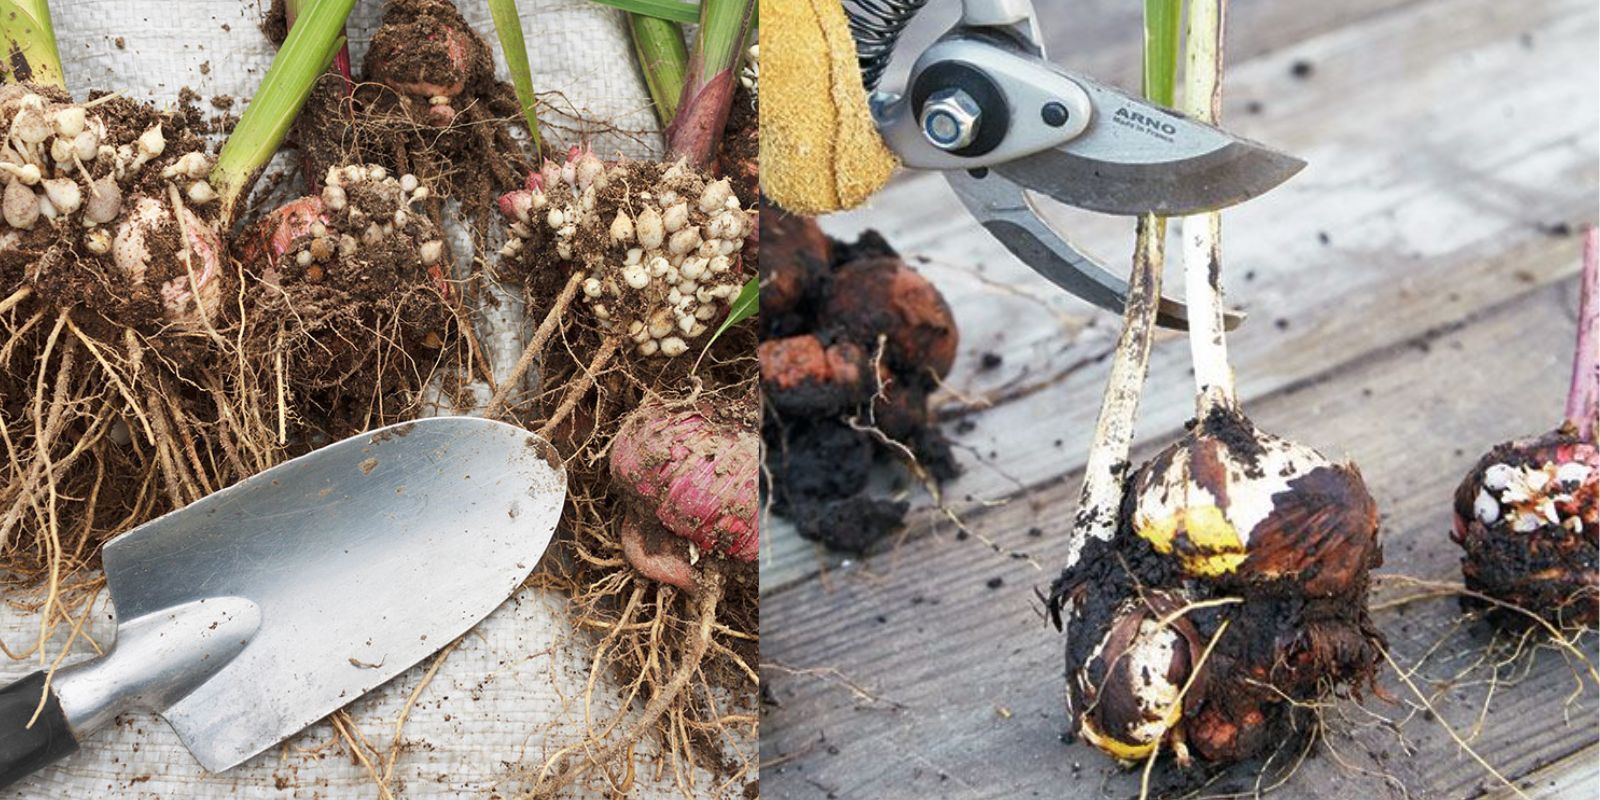
2. Dig Up the Corms
Once the foliage has died back, it’s time to dig up the corms.
- Tools Needed: Use a spade or garden fork, taking care not to damage the corms during the process.
- How to Dig: Gently insert your spade or fork about 6 inches away from the base of the plant to avoid injury to the corms. Lift them out of the soil carefully.
3. Clean the Corms
After you’ve unearthed the corms, remove any excess soil and debris.
- Cleaning Method: Avoid washing the corms with water, as this can introduce moisture, leading to rot. Instead, simply brush off the dirt gently with your fingers or a soft cloth.
4. Cure the Corms
Curing is an essential step that allows the corms to harden and prepares them for storage.
- How to Cure: Place the corms in a single layer in a cool, dry, and well-ventilated area. This process typically takes about two weeks. Make sure they are not exposed to direct sunlight.
5. Store Properly
Once cured, it’s time to store your gladiolus corms to keep them safe until planting time.
- Storage Method:
- Use a paper bag, mesh bag, or cardboard box to hold the corms.
- Avoid plastic bags, as they can trap moisture, leading to rot.
- Ideal Conditions: Store in a cool, dark, and dry location, ideally between 50-60°F (10-15°C).
6. Check for Pests and Rot
Regular inspections are crucial during storage.
- What to Look For: Examine the corms every few weeks for any signs of pests or decay.
- How to Handle Damage: If you find any damaged corms, remove them immediately to prevent spreading the problem to healthy ones.
7. Replant in Spring
As spring arrives and the danger of frost passes, it’s time to replant your gladiolus corms.
- Soil Preparation: Choose well-draining soil and prepare the planting area by loosening the soil to ensure good drainage.
- Planting Depth: Plant the corms about 4-6 inches deep, with the pointed end facing up.
- Watering: Water them thoroughly after planting, ensuring the soil is moist but not waterlogged.
Additional Tips for Gladiolus Care
- Fertilization: Apply a balanced fertilizer at planting and then again when the plants are about 12 inches tall.
- Mulching: Use organic mulch to retain moisture and suppress weeds.
- Watering: Gladiolus prefer evenly moist soil. Water them deeply during dry spells, but avoid letting them sit in water.
Troubleshooting Common Issues
1. Pests and Diseases
While gladiolus are relatively hardy, they can fall victim to pests like aphids and thrips, as well as diseases such as fungal rot.
- Prevention: Use insecticidal soap for pests and ensure good air circulation to prevent fungal diseases.
2. Poor Blooming
If your gladiolus plants are not blooming as expected, it could be due to several factors:
- Insufficient Sunlight: Ensure they receive at least 6-8 hours of sunlight daily.
- Nutrient Deficiency: Consider fertilizing if the foliage appears yellow.
Conclusion
Saving gladiolus corms not only ensures a beautiful bloom for the following season but also enhances your gardening experience. By following the steps outlined above, you can effectively preserve these stunning plants, allowing you to enjoy their vibrant flowers year after year.
Embrace the art of gardening and make the most of your gladiolus by applying these tips. With a little care and effort, your garden can be a colorful haven filled with gladiolus in full bloom!
Call to Action
Ready to save your gladiolus corms and enjoy a vibrant garden next season? Share your experiences and photos with the gardening community! 🌸💚
#Gladiolus #GardeningTips #FlowerPower #SaveYourPlants #GardenLife #PlantCare #GardeningGoals #FloralBeauty #GreenThumb