
Elderberries are a cherished plant, known for their beautiful clusters of white flowers and dark purple-black berries that are packed with health benefits. Elderberries are used in various ways, such as making syrups, jams, and even wine, due to their high levels of antioxidants and immune-boosting properties. Growing elderberries can be a great addition to your home garden, and the best part is that you don’t need to buy new plants each time—by rooting elderberry cuttings, you can propagate new plants effortlessly.
In this article, we’ll walk you through the process of rooting elderberry cuttings, from selecting the right cutting to planting it and nurturing it into a healthy, productive elderberry bush.
Why Root Elderberry Cuttings?
Rooting elderberry cuttings is a cost-effective way to propagate new plants without needing to buy them from a nursery. By taking cuttings from an established elderberry plant, you can clone the exact variety you want. It’s an excellent way to expand your elderberry collection or to share with friends and family.
Propagation by cutting is also faster than growing elderberries from seeds, which can take longer to germinate and establish. Once rooted, elderberry plants grow quickly and can provide you with berries in the same year, especially if you start the cuttings in the early spring or late winter.
What You’ll Need to Root Elderberry Cuttings
Before you begin, ensure you have the following materials:
- Healthy Elderberry Bush: Choose a mature, healthy plant to take your cuttings from. It should have no signs of disease or pest damage.
- Sharp Pruning Shears: A clean, sharp pair of pruning shears will ensure that you cut the stems without damaging them.
- Rooting Hormone (optional): While not strictly necessary, rooting hormone can speed up the process of root formation and improve the chances of success.
- Small Pots or Containers: Choose containers with drainage holes to prevent water from accumulating at the bottom, which could rot the cutting.
- Well-Draining Potting Soil: You’ll need soil that drains well but still retains moisture, such as a potting mix designed for seedlings.
- Plastic Bag or Dome: To maintain high humidity around the cuttings and prevent them from drying out.
- Watering Can or Spray Bottle: To keep the soil moist but not waterlogged.
When to Take Elderberry Cuttings
The best time to take elderberry cuttings is during late winter to early spring when the plant is dormant. This timing helps minimize stress on the plant and encourages the cuttings to focus on root development. You can also take semi-hardwood cuttings during the summer if you want to try a different technique.
Steps to Root Elderberry Cuttings
Now, let’s dive into the step-by-step process of rooting your elderberry cuttings.
Step 1: Select the Right Cutting
Choose a healthy, mature elderberry plant to take your cuttings from. Look for stems that are about 1/4-inch to 1/2-inch thick and have grown during the previous season. Avoid taking cuttings from diseased or damaged parts of the plant. The best cuttings are those that are semi-ripe, meaning the wood is firm but still flexible.
Cut about 6-8 inches from the tip of the stem. The cutting should have at least 2-3 nodes, which are the spots where leaves or buds are attached to the stem. A good cutting will be healthy and free of pests.
Step 2: Prepare the Cutting
After making the cut, remove any leaves from the lower half of the cutting. This will prevent the leaves from rotting in the soil and allow the cutting to focus on root development.
If your cutting has any remaining leaves at the top, you can leave them intact to help the cutting photosynthesize and grow. The goal is to have a clean stem that’s about 3-4 inches long below the leaves.
Step 3: Trim the Base and Apply Rooting Hormone (Optional)
At the base of the cutting, make a clean diagonal cut just below a node. This will allow for more surface area for the roots to grow. You can now dip the cut end of the cutting in rooting hormone powder. This is an optional step, but it can significantly improve your chances of success by stimulating the development of roots.
Gently tap the cutting to remove any excess rooting hormone before planting it.
Step 4: Plant the Cutting in a Pot
Fill a small pot or container with well-draining potting soil, leaving a little space at the top for watering. Insert the cutting into the soil, burying the bottom half of the cutting about 2-3 inches deep, making sure that the node is fully submerged.
Press the soil gently around the cutting to ensure it stands upright and is securely planted. You can plant multiple cuttings in one pot if you’re propagating several, but make sure they are spaced apart to prevent competition for resources.
Step 5: Water and Cover to Maintain Humidity
Water the cutting thoroughly until the soil is evenly moist but not soggy. Elderberry cuttings need moisture to form roots but can easily rot if the soil stays too wet.
To help retain moisture and maintain high humidity, cover the pot with a plastic bag or plastic dome. This creates a mini-greenhouse effect, preventing the cutting from drying out. Be sure to remove the cover for a few minutes each day to allow air circulation and prevent mold growth.
Step 6: Place in a Warm, Bright Spot
Place your cutting in a warm, bright location out of direct sunlight. A windowsill that gets indirect light or a greenhouse is ideal. The temperature should ideally be between 65°F and 75°F (18°C to 24°C).
Check the soil daily and water as needed to keep it moist. Be patient, as root development can take anywhere from 3-4 weeks to several months, depending on environmental conditions and the variety of elderberry.
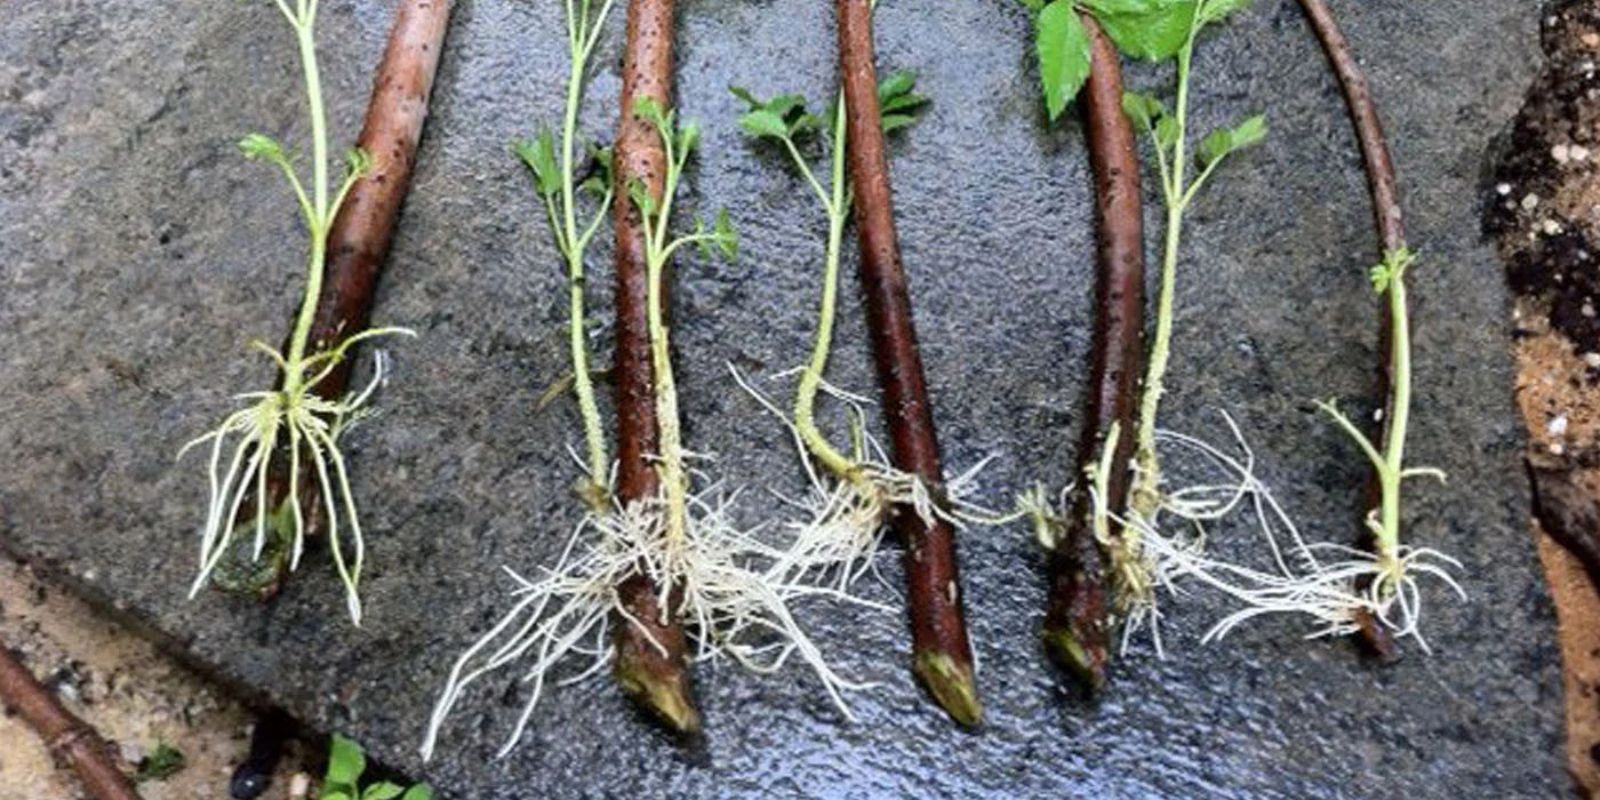
Step 7: Check for Roots
After 3-4 weeks, gently tug on the cutting to see if you feel resistance. If the cutting resists, it means that roots have begun to form. You can also check by gently pulling the cutting out of the soil to inspect the roots.
If you see roots, you can transplant the cutting into a larger container or directly into your garden. If no roots have formed, allow it to continue growing for another few weeks.
Transplanting Your Rooted Cuttings
Once your elderberry cuttings have developed strong roots, it’s time to transplant them into a larger pot or directly into your garden. If planting outdoors, choose a sunny location with well-draining soil. Elderberries prefer soil with a slightly acidic to neutral pH and a spot that receives full sun to partial shade.
When transplanting, be sure to handle the young plants gently and avoid damaging the roots. Water the plants thoroughly after planting to help them establish in their new home.
Caring for Elderberry Plants
After transplanting, continue to water your elderberry plant regularly, especially during dry periods. Mulching around the base can help retain moisture and reduce the risk of weeds. Prune the plant during the winter to remove dead wood and encourage healthy growth.
Elderberries grow best in areas with a cool winter and can be pruned heavily to maintain their shape. Once established, they will require minimal maintenance, but a little care will ensure your plant remains healthy and productive.
Conclusion
Propagating elderberries from cuttings is a simple and effective way to grow your own fruit-bearing plants. By following these steps, you’ll be able to create a thriving elderberry bush that can provide you with beautiful flowers and nutrient-rich berries for years to come. Remember to choose healthy cuttings, maintain the right humidity and temperature, and be patient as the roots form. With a little effort, you’ll soon have a flourishing elderberry garden!
Happy gardening, and may your elderberry plants thrive!
#ElderberryPropagation #GrowYourOwn #GardeningTips #DIYGardening #HomegrownBerries #SustainableGardening #PlantPropagation #GreenThumb #GardeningCommunity #HealthyLiving