
Introduction
Orchids are celebrated for their exquisite beauty and elegance, making them a prized addition to any home or garden. However, even the most experienced orchid enthusiasts can face the challenge of a dying orchid. Whether it’s due to overwatering, incorrect lighting, or pest issues, a struggling orchid can be disheartening. Fortunately, with the right approach and care, many orchids can be revived and restored to their former glory. In this comprehensive guide, we will explore practical and effective tips to help you revive a dying orchid and ensure its continued health and beauty.
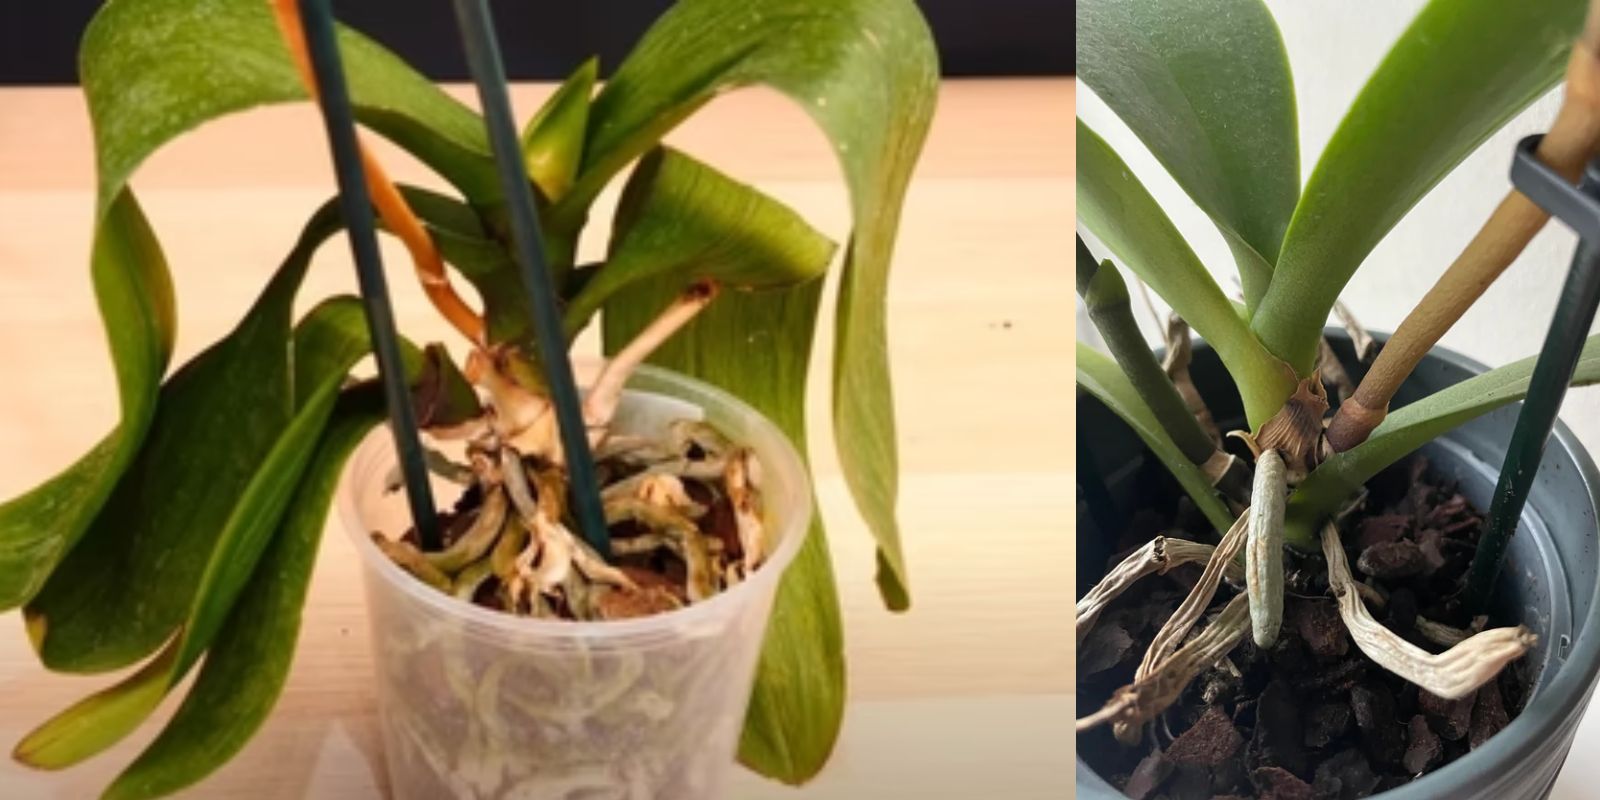
1. Assess the Problem
The first step in reviving a dying orchid is to accurately diagnose the issue. Different problems require different solutions, so it’s essential to identify the cause of the plant’s distress.
- Check for Overwatering: Overwatered orchids often exhibit yellowing leaves, root rot, and a musty smell. To determine if overwatering is the issue, gently remove the orchid from its pot and inspect the roots. Healthy roots should be firm and white or green, while rotting roots will be brown and mushy.
- Inspect for Underwatering: If the orchid’s leaves are wrinkled or dry, it might be underwatered. Check the potting mix; if it’s bone-dry, it’s a sign that the plant hasn’t been receiving enough water.
- Look for Pests and Diseases: Examine the plant for any signs of pests such as mealybugs, scale, or aphids. Also, check for fungal or bacterial infections that may manifest as spots, mold, or unusual growths.
2. Adjust Watering Practices
Watering is crucial to orchid health, and improper watering is a common cause of problems. Here’s how to adjust your watering practices:
- Watering Frequency: Water your orchid when the top inch of the potting mix feels dry. Avoid a strict schedule; instead, base your watering on the plant’s needs and the environmental conditions.
- Proper Drainage: Ensure the orchid pot has drainage holes to prevent water from accumulating at the bottom. Use a well-draining orchid mix that allows excess water to escape.
- Water Quality: Use room-temperature water and avoid tap water that contains chlorine or other chemicals. Rainwater or distilled water can be a better option for sensitive orchids.
3. Check Light Conditions
Light is a critical factor in orchid health, and inadequate or excessive light can contribute to a plant’s decline.
- Provide Adequate Light: Most orchids prefer bright, indirect light. Place your orchid near a window with filtered light or use sheer curtains to diffuse direct sunlight. A south or east-facing window is often ideal.
- Avoid Direct Sunlight: Direct sunlight can cause leaf burn and stress. If you notice sunburn spots or faded leaves, move the orchid to a location with more indirect light.
- Adjust for Light Levels: If the orchid is not blooming or growing, it may need more light. Conversely, if it shows signs of stress, reduce its exposure to direct light.
4. Examine Temperature and Humidity
Orchids are sensitive to temperature and humidity changes, and maintaining the right conditions is essential for their health.
- Stable Temperature: Most orchids thrive in temperatures between 65-75°F (18-24°C) during the day and slightly cooler at night. Avoid placing orchids near drafts, heaters, or air conditioners.
- Maintain Humidity: Orchids typically require humidity levels between 40-60%. Use a humidity tray, room humidifier, or place the orchid on a pebble tray filled with water to increase moisture in the air.
- Monitor Conditions: Use a thermometer and hygrometer to keep track of temperature and humidity levels. Adjust as needed to provide a stable environment for your orchid.
5. Repotting as a Solution
Repotting can be necessary if the orchid’s roots are damaged or the potting mix has degraded.
- When to Repot: Repot your orchid if you notice signs of root rot, a tightly bound root ball, or old, decomposed potting mix. Repotting is also recommended every 1-2 years to refresh the growing medium.
- Choosing a Potting Mix: Use a specialized orchid mix that includes materials like bark, perlite, and sphagnum moss. This mix provides the necessary aeration and drainage for healthy root growth.
- Repotting Technique: Gently remove the orchid from its pot, trim any dead or damaged roots, and place the plant in a new pot with fresh potting mix. Be careful not to damage the healthy roots during the process.
6. Trim Dead Parts
Trimming dead or damaged parts of the orchid can help focus the plant’s energy on new growth and recovery.
- Remove Dead Leaves: Cut away yellowing or dying leaves at their base using clean, sharp scissors. This prevents the plant from using resources on non-functional parts.
- Trim Diseased Roots: If you find any rotting or diseased roots, trim them back to healthy tissue. Disinfect your pruning tools between cuts to prevent spreading any potential disease.
- Encourage New Growth: Pruning can stimulate new growth by removing parts of the plant that are no longer contributing to its health.
7. Fertilize Lightly
Fertilization supports orchid recovery, but over-fertilizing can harm the plant.
- Use a Balanced Fertilizer: Choose a balanced orchid fertilizer with equal parts nitrogen, phosphorus, and potassium. A 30-10-10 or 20-20-20 formula is often recommended.
- Follow a Schedule: Fertilize your orchid once a month during the growing season (spring and summer) and reduce feeding during the dormant period (fall and winter). Avoid over-fertilizing, which can lead to salt build-up and root damage.
- Dilute Fertilizer: Use a diluted solution of fertilizer to avoid overwhelming the plant. Follow the manufacturer’s instructions for the correct dosage.
8. Monitor for Pests and Diseases
Pests and diseases can further stress a struggling orchid, so it’s essential to address these issues promptly.
- Inspect Regularly: Check your orchid regularly for signs of pests like mealybugs, scale, and aphids. Look for discolored spots, webbing, or sticky residues on the leaves.
- Treat Infections Promptly: Use appropriate treatments such as insecticidal soap, neem oil, or fungicides to manage pests and diseases. Always follow the instructions on the product label.
- Prevent Recurrence: Maintain good hygiene by cleaning the orchid’s leaves and surrounding area. Ensure that your orchid is in a well-ventilated space to reduce the risk of future infestations.
Conclusion
Reviving a dying orchid requires a combination of careful observation, proper care, and timely interventions. By assessing the problem, adjusting your watering practices, providing the right light and temperature, repotting when necessary, trimming dead parts, fertilizing correctly, and addressing pests and diseases, you can give your orchid the best chance of recovery.
Remember, orchids are resilient plants that, with the right care, can bounce back from even severe issues. Start applying these tips today and restore your orchid to its former splendor. With patience and dedication, you can enjoy the beauty and elegance of a thriving orchid in your home once again.