
Gardenia and jasmine are some of the most cherished plants in the gardening world. Their intoxicating fragrances and elegant blooms make them a favorite among enthusiasts. What if you could grow an endless supply of these beauties right at home? With the secret technique of propagation that florists swear by, you can multiply these plants effortlessly and transform your garden into a haven of blooms.
In this article, we’ll guide you through a step-by-step process to reproduce gardenia and jasmine plants, ensuring their continuous growth and beauty in your home or garden.
Why Propagate Gardenia and Jasmine?
Propagation is not just a cost-effective way to increase the number of plants; it also allows you to share the joy of gardening with friends and family. Gardenia and jasmine plants are ideal for propagation due to their adaptability and resilience. These plants grow well in pots and gardens, making them perfect for indoor and outdoor spaces.
By propagating gardenia or jasmine, you can:
- Save money on purchasing new plants.
- Ensure consistent blooms in your garden.
- Create personalized gifts for loved ones.
Step-by-Step Guide to Reproducing Gardenia or Jasmine
Step 1: Select and Prepare a Healthy Twig
Start by choosing a healthy twig from an established gardenia or jasmine plant. Ensure the twig has at least two nodes (points where leaves grow). These nodes are critical because they are where the roots will form during the propagation process.
Using a clean, sharp pair of scissors or pruning shears, cut a 6–8-inch section of the twig. Trim off the leaves from the first and second nodes to expose the knots completely. This will allow the plant to focus its energy on root development instead of sustaining the leaves.
Step 2: Submerge the Twig in Water
Place the prepared twig into a clear jar or bottle of water, ensuring that the exposed nodes are completely submerged. It’s essential to use clean, room-temperature water to encourage healthy root growth.
Step 3: Choose the Right Spot
Position the jar in a well-lit area with indirect sunlight. Direct sunlight can be too harsh and may damage the delicate cutting. A bright windowsill or a shaded outdoor spot works well for this step.
Step 4: Maintain Clean Water
Change the water every week to prevent the growth of algae and the presence of mosquitoes. Fresh water also ensures the plant cutting remains healthy and continues to absorb nutrients.
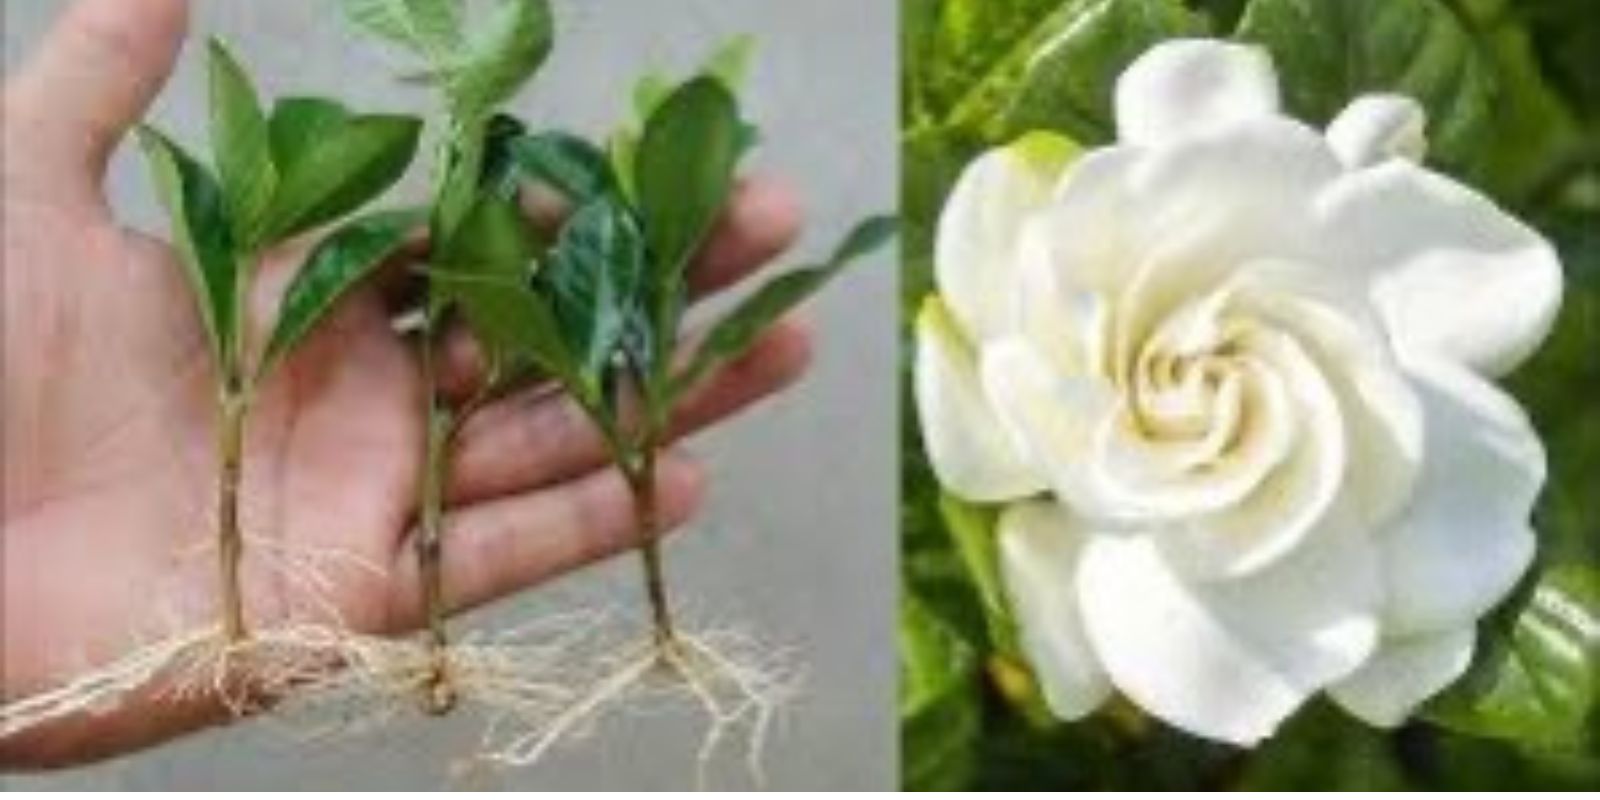
Step 5: Wait for Roots to Form
Over the next 4–6 weeks, roots will begin to sprout from the submerged nodes. Be patient and keep an eye on the development. Once the roots are about 1–2 inches long, the twig is ready to be planted.
Step 6: Prepare a Pot with Soil
Fill a small pot with well-draining soil or coconut fiber. This lightweight medium provides the aeration necessary for young roots to thrive.
Step 7: Plant the Rooted Twig
Using your finger or a stick, create a small hole in the soil. Carefully place the rooted twig into the hole, ensuring the roots are not damaged. Gently press the soil around the base of the twig to secure it.
Step 8: Water Lightly
Moisten the soil lightly to help the roots settle into their new environment. Avoid overwatering, as excessive moisture can lead to root rot.
Step 9: Provide Soft Light
Place the pot in an area with soft, indirect light. Early morning sun is ideal, but avoid harsh midday or afternoon sunlight.
Step 10: Observe Growth
After about a month, you’ll notice new buds and tiny leaves emerging from the twig. This is a sign that your gardenia or jasmine plant is thriving and ready for further propagation or transplantation.
Tips for Successful Propagation
- Use Clean Tools: Always sterilize your scissors or shears before cutting the twig to prevent infection.
- Monitor Humidity: Gardenia and jasmine thrive in humid environments. If your air is dry, consider misting the plant occasionally or placing a humidifier nearby.
- Fertilize Sparingly: Once the plant has established itself, use a balanced fertilizer to promote healthy growth and blooms.
- Avoid Overcrowding: If you’re propagating multiple cuttings, ensure they have enough space to grow without competing for resources.
Benefits of Propagating Gardenia and Jasmine
Cost-Effective Gardening
Instead of purchasing new plants, propagation allows you to multiply your gardenia and jasmine collection for free.
Eco-Friendly Practices
Propagation reduces waste and encourages sustainable gardening practices by reusing materials and resources.
Personalized Gifts
A propagated gardenia or jasmine plant makes a heartfelt and unique gift for friends and family.
Improved Garden Aesthetics
With more plants, you can enhance the beauty of your garden or indoor space, creating a lush and fragrant environment.
Common Challenges and How to Overcome Them
- Cutting Doesn’t Root: Ensure the nodes are completely submerged in water and that the jar is in a well-lit area.
- Roots Rot: Avoid overwatering and ensure the cutting is not sitting in stagnant water.
- Leaves Wilt: If leaves begin to wilt, it could be due to insufficient light or excessive moisture. Adjust the plant’s environment accordingly.
Conclusion
Propagating gardenia and jasmine is a rewarding gardening activity that anyone can master. By following this step-by-step guide, you’ll not only save money but also enjoy the satisfaction of watching your plants grow and flourish. Whether you’re an experienced gardener or a beginner, this method is simple, effective, and guaranteed to yield beautiful results.
Ready to give it a try? Start propagating your gardenia or jasmine today, and let us know how it goes! Share your tips and progress in the comments below. Let’s grow together! 🌱