
Thuja, commonly known as Arborvitae, is a popular evergreen tree prized for its lush foliage and versatility in landscaping. Whether you want to create a natural privacy screen or enhance the aesthetic appeal of your garden, propagating Thuja from cuttings can be a rewarding endeavor. In this guide, we will delve into the step-by-step process of propagating Thuja cuttings using aloe vera, a natural rooting hormone that can significantly improve your success rate.
Understanding Thuja
What is Thuja?
Thuja is a genus of coniferous trees in the cypress family, known for their dense foliage and unique shapes. They are often used for hedges, screens, or as standalone specimen plants. There are several species of Thuja, with Thuja occidentalis (Eastern Arborvitae) and Thuja plicata (Western Red Cedar) being the most commonly cultivated. These trees can grow quite tall, making them excellent for providing privacy in gardens and landscapes.
Benefits of Propagating Thuja
- Cost-Effective: Propagating Thuja from cuttings is much cheaper than purchasing new plants from a nursery.
- Genetic Consistency: When you propagate from cuttings, you maintain the same genetic characteristics as the parent plant, ensuring that the new plants will have the same traits.
- Quick Results: Thuja cuttings can root relatively quickly, allowing you to grow new plants in a shorter time frame compared to other methods.
- Sustainable Gardening: Propagating plants at home reduces the need for commercial plant purchases and contributes to sustainable gardening practices.
What You’ll Need
Before getting started, gather the necessary materials for successful propagation:
Materials:
- Healthy Thuja Plant: Ensure that the parent plant is healthy and disease-free.
- Aloe Vera Plant: Fresh aloe vera gel will act as a natural rooting hormone.
- Clean Scissors or Pruners: To take cuttings.
- Potting Mix: A well-draining potting mix suitable for propagation.
- Pots or Seedling Trays: For planting the cuttings.
- Plastic Bag or Dome: To create a humid environment for the cuttings.
Tools:
- Watering Can or Spray Bottle: For watering the cuttings.
- Garden Labels (optional): To label your cuttings for tracking purposes.
Step-by-Step Guide to Propagate Thuja from Cuttings Using Aloe Vera
Step 1: Select and Prepare the Cuttings
- Choose a Healthy Parent Plant: Select a mature and healthy Thuja plant that shows no signs of disease or pest infestation. The best time to take cuttings is in late spring or early summer when the plant is actively growing.
- Take the Cuttings: Using clean scissors or pruners, take 4-6 inch cuttings from the tips of the branches. Ensure each cutting has at least a few sets of leaves. It’s important to take cuttings from new growth, as these are more likely to root successfully.
Step 2: Prepare the Aloe Vera Gel
- Harvest Aloe Vera Gel: Cut a fresh leaf from an aloe vera plant. Slice the leaf open and scoop out the clear gel using a spoon or knife. This gel contains natural hormones that promote root growth and can help prevent cuttings from drying out.
- Keep It Fresh: Use the aloe vera gel immediately after cutting to maximize its effectiveness.
Step 3: Apply Aloe Vera Gel to Cuttings
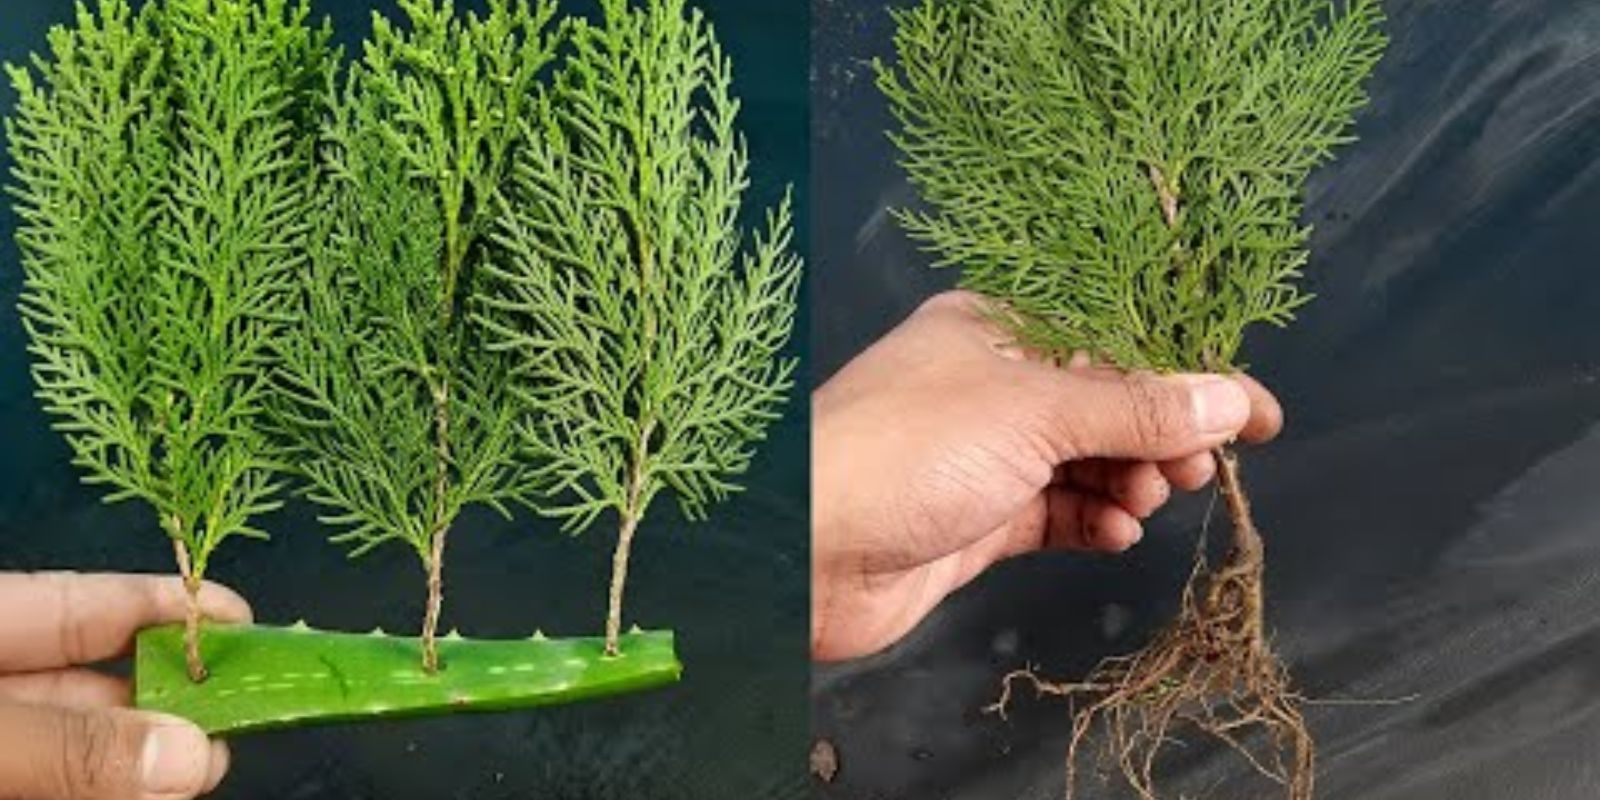
- Coat the Cut Ends: Dip the cut end of each Thuja cutting into the aloe vera gel, ensuring it is well-coated. This step is crucial, as the gel will help stimulate root development.
Step 4: Plant the Cuttings
- Prepare the Potting Mix: Fill your pots or seedling trays with a well-draining potting mix. You can also mix in some perlite or sand to improve drainage.
- Insert the Cuttings: Make a hole in the soil with your finger or a pencil and carefully insert the cut end of the Thuja cutting into the soil. Ensure that at least one or two leaves are above the soil surface. Firm the soil around the cutting to provide stability.
Step 5: Water the Cuttings
- Moisten the Soil: After planting, water the cuttings lightly to settle the soil around them. Be careful not to overwater, as this can lead to rot.
- Maintain Humidity: Cover the pots or trays with a plastic bag or a clear plastic dome to create a humid environment. This will help prevent the cuttings from drying out while they establish roots.
Step 6: Provide Appropriate Conditions
- Choose the Right Location: Place the pots in a warm, bright location with indirect sunlight. Direct sunlight can be too harsh for young cuttings and may cause them to scorch.
- Monitor Temperature and Humidity: Keep the temperature around 70-75°F (21-24°C) for optimal growth. Check the humidity levels inside the plastic cover regularly and mist the cuttings lightly if they begin to dry out.
Step 7: Care for the Cuttings
- Water as Needed: Check the moisture level in the soil regularly. Water the cuttings if the top inch of soil feels dry, ensuring they remain consistently moist but not soggy.
- Remove the Cover: After a few weeks, start removing the plastic cover for a few hours each day to acclimate the cuttings to the outside environment. Gradually increase the time they are uncovered over the next week.
Step 8: Monitor for Root Development
- Check for Roots: After 4-8 weeks, gently tug on the cuttings to see if you feel resistance. If you do, that means roots are forming. You can also check by gently removing the cutting from the soil to inspect the roots.
- Transplant When Ready: Once the cuttings have developed a strong root system, they can be transplanted into larger pots or directly into your garden. Choose a suitable location with well-draining soil and adequate sunlight for your Thuja plants.
Step 9: Care for Your New Thuja Plants
- Water Regularly: After transplanting, continue to water your new Thuja plants regularly, especially during dry spells. Young plants need consistent moisture to establish their root systems.
- Fertilize: After a few weeks of transplanting, you can apply a balanced, slow-release fertilizer to promote healthy growth.
- Monitor Growth: Keep an eye on your Thuja plants for any signs of pests or diseases. Regularly check for yellowing leaves or stunted growth, which could indicate a problem.
Troubleshooting Common Issues
1. Cuttings Not Rooting
If your cuttings are not rooting, consider the following:
- Check the Cuttings: Ensure you took cuttings from healthy, new growth.
- Moisture Levels: Make sure the soil is consistently moist, but not waterlogged.
- Temperature: Ensure the cuttings are kept in a warm environment.
2. Mold Growth
If you notice mold developing on the cuttings, this could be due to excess moisture or poor air circulation. To prevent this:
- Remove the plastic cover for a few hours each day to allow for air circulation.
- Ensure you’re not overwatering the cuttings.
3. Wilting Leaves
If the leaves on your cuttings start to wilt, it may indicate that they are drying out. Mist the cuttings lightly or increase the humidity around them until they perk up.
Conclusion
Propagating Thuja from cuttings using aloe vera is an easy and effective method that allows you to grow beautiful, healthy plants at home. With the right materials, care, and a little patience, you can expand your garden and enjoy the benefits of these magnificent evergreens.
Start your propagation journey today, and watch your Thuja thrive! Happy gardening! 🌲💚
Hashtags: #ThujaPropagation #AloeVera #GardeningTips #EcoFriendly #PlantParenthood #SustainableGardening #GreenThumb