
Orchids are one of the most beloved plants among gardeners and indoor plant enthusiasts, prized for their stunning flowers and the elegance they bring to any space. Whether you’re a seasoned orchid grower or a novice looking to expand your collection, propagating orchids is a rewarding way to grow new plants from those you already have. This guide will explore four effective techniques for orchid propagation: division, keiki growth, stem cuttings, and backbulbs. By mastering these methods, you can enjoy an ever-growing collection of these beautiful plants.
Introduction to Orchid Propagation
Orchid propagation is the process of creating new orchid plants from existing ones. While it might seem like a complex task, with a little patience and care, it’s something anyone can do. Orchids can be propagated in several ways, each suited to different types of orchids and varying levels of experience. Whether you’re looking to replicate a favorite plant or simply experiment with new techniques, propagating orchids can be a delightful and fulfilling experience.
1. Division: An Ideal Method for Sympodial Orchids
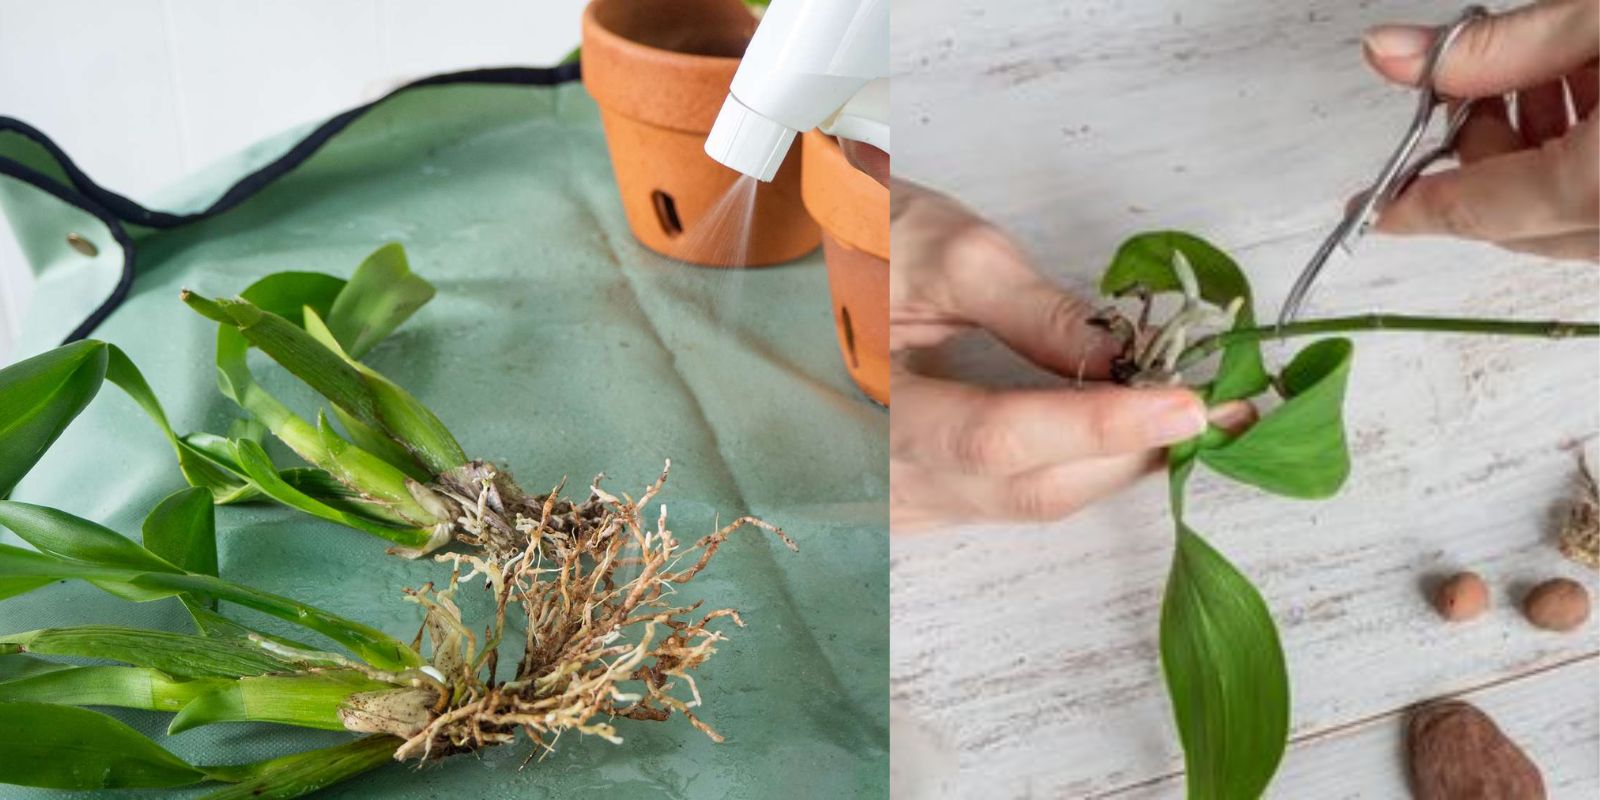
Division is one of the simplest and most common methods of orchid propagation, especially for sympodial orchids, such as Cattleyas, Oncidiums, and Dendrobiums. These orchids grow horizontally, producing new growths called pseudobulbs along a rhizome. Over time, the plant becomes crowded in its pot, making it a perfect candidate for division.
Steps to Propagate Orchids by Division:
- Choose the Right Time: The best time to divide an orchid is after it has finished flowering and is entering a new growth phase. This ensures that the plant is strong enough to recover from the process.
- Remove the Orchid from Its Pot: Gently remove the orchid from its pot, being careful not to damage the roots. If the plant is pot-bound, you may need to carefully cut the pot away.
- Separate the Pseudobulbs: Examine the rhizome and decide how many divisions you want to make. Each division should have at least three pseudobulbs to ensure it has enough energy to grow. Use a sterile knife or scissors to cut through the rhizome, separating the plant into sections.
- Repot the Divisions: Plant each division in a new pot with fresh orchid mix. Water them lightly and place them in a location with indirect light to recover.
- Care for the Divisions: Keep the newly divided plants in a warm, humid environment and gradually return them to their normal care routine. Within a few weeks, new growth should begin to appear.
Division is a straightforward method that works well for mature plants that have outgrown their pots. It’s an excellent way to keep your orchids healthy and create new plants at the same time.
2. Keiki Growth: Nature’s Way of Orchid Propagation
Keiki growth is a fascinating way to propagate orchids, particularly with monopodial orchids like Phalaenopsis and Vandas. The word “keiki” means “baby” in Hawaiian, and in orchid terminology, it refers to a small plant that grows from the node of an orchid stem. These baby plants are essentially clones of the parent plant and can be potted separately once they develop roots.
Steps to Propagate Orchids Using Keikis:
- Identify a Keiki: A keiki will appear as a small shoot growing from a node on the flower spike or sometimes from the base of the plant. Over time, it will develop its own leaves and roots.
- Wait for Root Development: Allow the keiki to remain attached to the mother plant until it has grown several roots that are at least 2-3 inches long. This ensures that the keiki is strong enough to survive on its own.
- Remove the Keiki: Once the roots are well-developed, use a sterile knife or scissors to carefully cut the keiki away from the mother plant. Be sure to include as much of the root system as possible.
- Pot the Keiki: Plant the keiki in a small pot with fresh orchid mix. Water it lightly and place it in a warm, humid environment with indirect light.
- Care for the Keiki: Treat the keiki as you would a mature orchid, providing the necessary humidity, light, and water. It may take some time, but with proper care, the keiki will grow into a full-sized orchid.
Keiki growth is a natural and exciting way to propagate orchids. It’s a slow process, but the reward of seeing a baby orchid grow into a flowering plant is well worth the wait.
3. Stem Cuttings: An Innovative Approach to Propagation
Stem cuttings offer a more experimental approach to orchid propagation. This method works well with certain types of orchids, such as Dendrobiums and Epidendrums, which produce long flower spikes. By cutting these spikes into sections, you can encourage new growth from dormant nodes.
Steps to Propagate Orchids by Stem Cuttings:
- Choose a Healthy Flower Spike: Select a mature flower spike that has finished blooming. The spike should be healthy and green, with visible nodes along its length.
- Cut the Spike into Sections: Use a sterile knife or scissors to cut the spike into sections, each containing at least one node. Ensure that the cuts are clean and straight.
- Prepare a Growing Medium: Fill a shallow tray with a moist growing medium, such as sphagnum moss or perlite. This will provide the right environment for root development.
- Place the Cuttings in the Medium: Lay the stem cuttings horizontally on the growing medium, with the nodes facing upward. Cover the tray with a plastic lid or place it in a humid environment to maintain moisture.
- Monitor and Care for the Cuttings: Keep the tray in a warm location with indirect light. Check the cuttings regularly and mist them if the medium dries out. With time, new growth should emerge from the nodes.
Stem cuttings can be a fun and rewarding way to propagate orchids, especially if you enjoy experimenting with different techniques. This method requires patience, but the results can be highly gratifying.
4. Backbulbs: Reviving Old Growth for New Plants
Backbulbs are old, dormant pseudobulbs that no longer produce flowers. However, they still contain the energy needed to grow new shoots, making them a valuable resource for propagation. This method works well with sympodial orchids that produce pseudobulbs, such as Cattleyas and Oncidiums.
Steps to Propagate Orchids Using Backbulbs:
- Select Healthy Backbulbs: Choose backbulbs that are plump and firm, even if they have no leaves. These bulbs still have the potential to produce new growth.
- Remove the Backbulbs: Carefully separate the backbulbs from the rest of the plant using a sterile knife. If they are attached to the rhizome, cut them away, leaving a small section of the rhizome attached to the bulb.
- Prepare a Potting Medium: Plant the backbulbs in a pot filled with a well-draining orchid mix. The medium should be kept slightly moist but not wet.
- Place the Pot in a Humid Environment: Keep the pot in a warm, humid environment with indirect light. You can cover it with a plastic bag to maintain humidity.
- Wait for New Growth: It may take several weeks or even months, but eventually, new shoots will emerge from the backbulb. Once the new growth has developed roots, you can treat it as a regular orchid.
Using backbulbs for propagation is a great way to make the most of older, less productive parts of your orchid. With proper care, these backbulbs can give rise to vibrant new plants.
Conclusion: Expanding Your Orchid Collection
Propagating orchids is a rewarding way to expand your plant collection and share the beauty of these exquisite flowers with others. Whether you choose to divide your orchids, grow keikis, experiment with stem cuttings, or revive backbulbs, each method offers a unique opportunity to explore the fascinating world of orchid care.
By mastering these techniques, you can enjoy the satisfaction of watching new orchids grow and thrive. Don’t hesitate to get started—your next beautiful orchid could be just a propagation away! Share your propagation experiences, successes, or questions in the comments below and join a community of orchid enthusiasts eager to learn and grow together.