
Orchids, belonging to the family Orchidaceae, are among the most exquisite and beloved flowering plants. Known for their stunning blooms and intricate shapes, orchids are a favorite among gardeners and plant enthusiasts. While growing orchids from seeds can be a complex process, propagating them from leaves is a simpler and equally rewarding method. This guide will walk you through the steps to successfully propagate orchids from leaves at home.
Introduction to Orchid Propagation
Propagating orchids from leaves is a fascinating process that allows you to multiply your collection without the need for seeds or purchasing new plants. It’s a cost-effective and engaging way to enhance your gardening skills and enjoy more of these beautiful plants. With patience and proper care, you can propagate orchids and watch them grow into healthy, blooming plants.
Steps to Propagate Orchidaceae from Leaves
1. Select a Healthy Leaf
Why It Matters:
The success of propagation largely depends on starting with a healthy leaf. A robust, disease-free leaf has a better chance of developing roots and growing into a new plant.
How to Select:
- Choose a mature, green leaf from your orchid plant.
- Avoid leaves that are damaged, yellowing, or have any signs of disease.
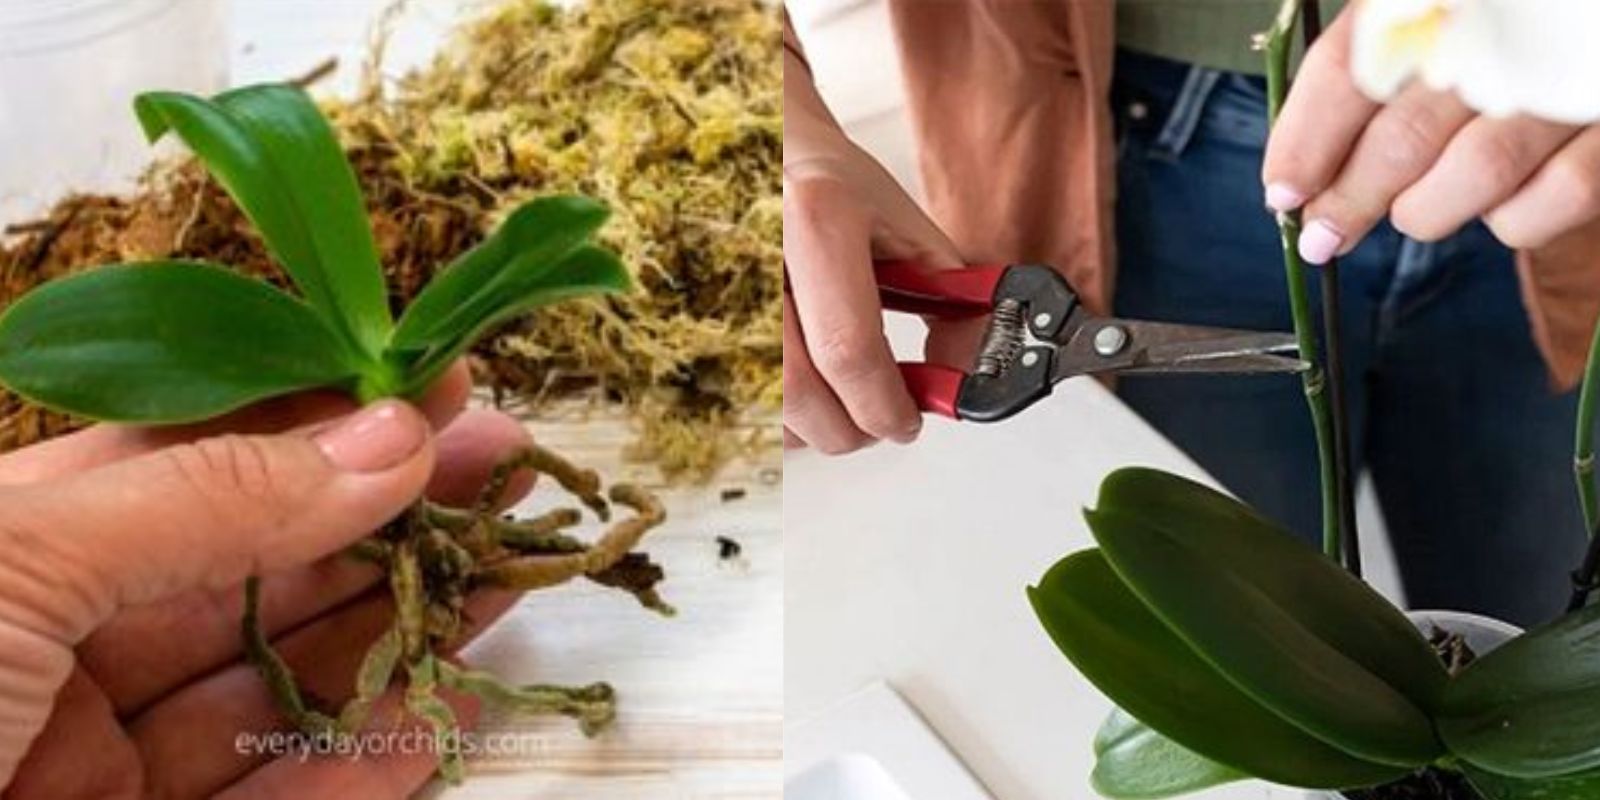
2. Cut the Leaf
Why It Matters:
Proper cutting ensures that the leaf sections are viable for propagation and have the best chance of developing roots.
How to Cut:
- Sterilize a pair of scissors or a sharp knife to prevent the spread of disease.
- Cut the selected leaf into sections, each about 2-3 inches long. Ensure each section includes a portion of the midrib (the central vein of the leaf).
3. Prepare the Potting Mix
Why It Matters:
Orchids require a well-draining medium to prevent root rot and provide the necessary aeration for root development.
How to Prepare:
- Use a potting mix specifically designed for orchids, typically composed of bark, sphagnum moss, and perlite.
- Alternatively, you can create your own mix using equal parts sphagnum moss and perlite, ensuring it retains moisture while allowing excess water to drain away.
4. Plant the Leaf Sections
Why It Matters:
Proper planting of the leaf sections is crucial for successful root development and growth.
How to Plant:
- Fill a shallow pot or tray with the prepared potting mix.
- Insert the cut end of each leaf section into the mix, burying it about half an inch deep.
- Ensure the sections are upright and stable in the potting mix.
5. Provide Humidity and Warmth
Why It Matters:
Orchids thrive in warm, humid environments. Creating similar conditions at home increases the chances of successful propagation.
How to Provide:
- Place the pot in a warm location with indirect sunlight.
- To maintain high humidity, cover the pot with a clear plastic bag or use a humidity tray (a shallow tray filled with water and pebbles).
- Ensure the plastic bag does not touch the leaf sections directly. Use stakes or supports if necessary.
6. Water and Wait
Why It Matters:
Consistent moisture is essential for root development, but overwatering can lead to rot. Patience is key as orchids can take several weeks to show signs of growth.
How to Water:
- Keep the potting mix moist but not waterlogged. Water lightly and regularly, ensuring the mix does not dry out completely.
- Avoid direct watering on the leaf sections; instead, water around them to keep the mix evenly moist.
Waiting Period:
- Be patient. It can take several weeks to a few months for the leaf sections to develop roots and new growth.
- During this period, maintain consistent humidity and warmth, and check regularly for signs of growth.
Advantages of Propagating Orchids from Leaves
- Cost-Effective: Propagating from leaves eliminates the need to buy new plants, saving money while expanding your collection.
- Simplicity: This method is simpler and less time-consuming compared to growing orchids from seeds.
- Sustainability: By propagating your plants, you contribute to a more sustainable gardening practice.
- Educational: The process provides an educational experience, helping you learn more about plant biology and orchid care.
Common Challenges and Solutions
Challenge 1: Leaf Sections Not Rooting
Solution:
- Ensure the leaf sections are from a healthy plant.
- Maintain consistent moisture and avoid overwatering.
- Check for proper humidity levels; low humidity can hinder root development.
Challenge 2: Mold or Rot
Solution:
- Sterilize all tools and containers before use to prevent contamination.
- Use a well-draining potting mix to avoid waterlogging.
- Remove any sections that show signs of mold or rot immediately to prevent spread.
Challenge 3: Slow Growth
Solution:
- Be patient, as orchids naturally have a slow growth rate.
- Ensure optimal environmental conditions, including light, temperature, and humidity.
- Consider using a diluted orchid fertilizer to provide essential nutrients.
Conclusion
Propagating orchids from leaves at home is a rewarding and straightforward method to expand your orchid collection. By selecting healthy leaves, preparing the potting mix, and providing the right environmental conditions, you can successfully propagate these beautiful plants. The process not only enhances your gardening skills but also brings the joy of watching new plants grow and flourish. Start your orchid propagation journey today and experience the satisfaction of nurturing your own orchids. Happy propagating!