
Introduction: Indoor plants are a popular way to bring nature into your home, adding beauty, color, and even purifying the air. Whether you’re a seasoned gardener or a beginner, propagating your indoor plants can be a rewarding and cost-effective way to expand your collection. But what if you don’t have extra pots lying around? The good news is that you don’t need them to successfully propagate your indoor plants. By utilizing various techniques such as water propagation, air layering, and direct soil propagation, you can grow new plants without ever needing a pot. In this article, we’ll explore these methods in detail and provide you with step-by-step instructions to help you propagate your favorite plants easily and sustainably.
1. Water Propagation: The Simple and Popular Method
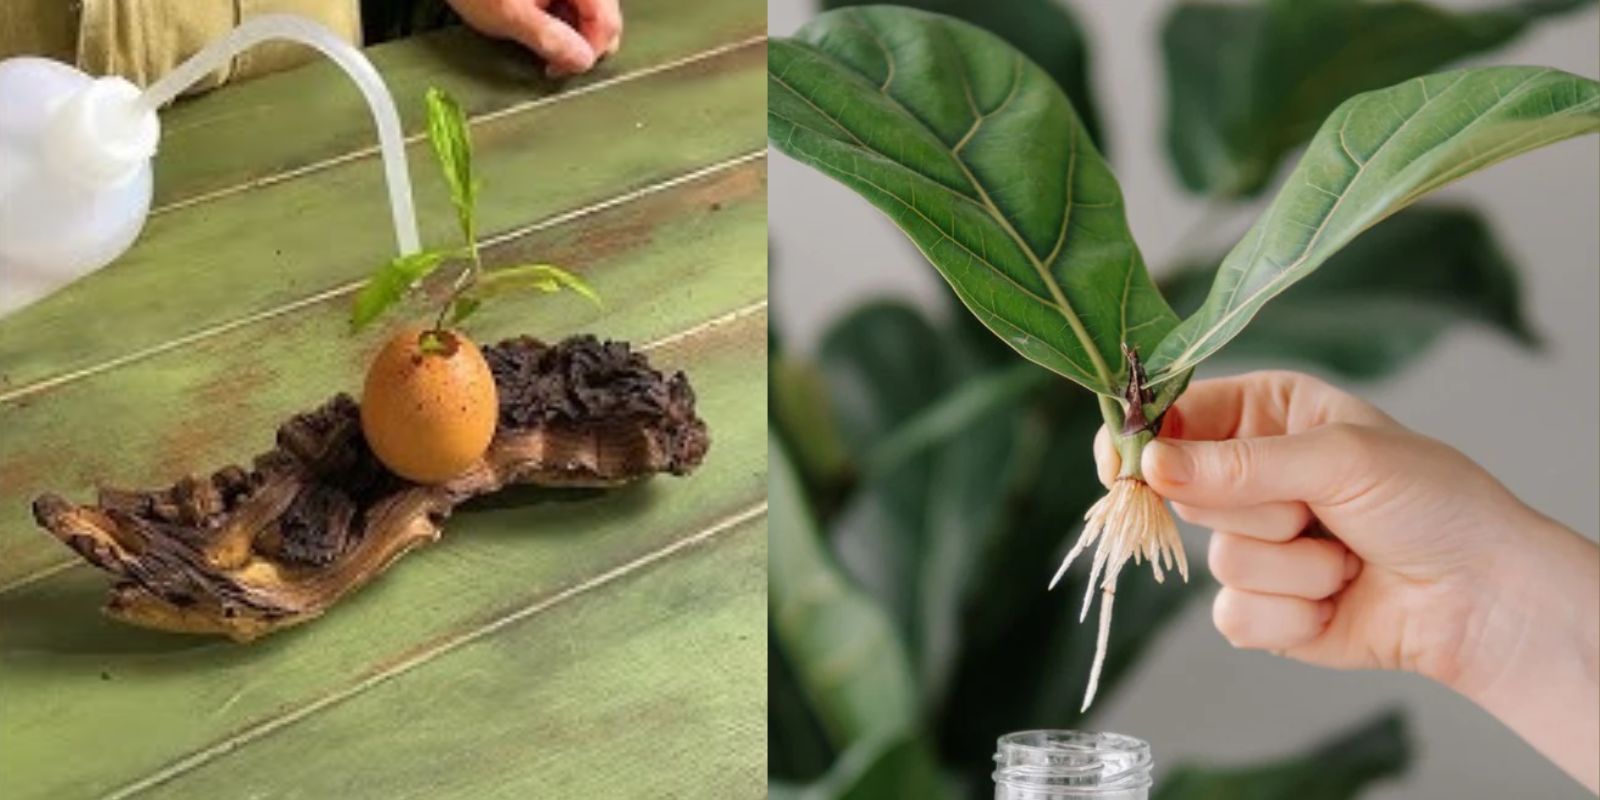
Water propagation is perhaps the most well-known and easiest method for propagating indoor plants without pots. This technique is especially useful for plants with stems or cuttings that root well in water, such as pothos, philodendrons, and spider plants.
How to Do It:
- Select a Healthy Cutting: Start by choosing a healthy stem with a few leaves. Use a clean, sharp pair of scissors or pruning shears to cut just below a node (the point where a leaf meets the stem).
- Prepare the Water: Place the cutting in a jar or container filled with water, ensuring that the cut end is submerged while the leaves remain above the waterline. You can use any clear glass container, such as a jar, cup, or vase, as long as it can hold the cutting securely.
- Change the Water Regularly: Every few days, replace the water with fresh water to prevent stagnation and the growth of bacteria. Make sure the cutting is always submerged in water.
- Wait for Roots to Form: Over time, roots will begin to sprout from the base of the cutting. Depending on the plant species, this may take a few weeks. Once the roots are a few inches long, your new plant is ready to be transferred to the soil or left in the water.
Water propagation allows you to watch the roots develop in real-time, making it a fascinating and satisfying process for plant lovers.
2. Air Layering: Propagating Larger Plants Without Pots
Air layering is a more advanced method of propagation that works well for larger indoor plants or woody plants like rubber trees and figs. This technique involves encouraging roots to form while the cutting is still attached to the parent plant.
How to Do It:
- Select the Branch: Choose a healthy branch on your plant and locate a section just below a leaf node. This is where the roots will form.
- Make a Small Cut: Use a sharp knife or pruning shears to make a small slit in the bark of the branch. The slit should be about 1–2 inches long.
- Wrap with Damp Moss: Take some sphagnum moss, soak it in water, and then wrap it around the area where you made the slit. The moss should completely cover the cut area.
- Wrap in Plastic: Wrap plastic around the moss to keep it moist and secure it in place. This can be done with plastic wrap or a plastic bag. Make sure the moss remains damp, but not soaking wet.
- Wait for Roots to Form: Leave the branch undisturbed for a few weeks to allow roots to develop in the moss. Once you see roots emerging through the moss, you can cut the branch below the new root system.
- Plant the New Cutting: You can now remove the branch from the parent plant and plant it in the soil. While you may have initially avoided pots, now you’ll need one to house the new plant!
Air layering is a great way to propagate larger plants and can also help rejuvenate older plants by encouraging new growth.
3. Direct Soil Propagation: Going Pot-Free from the Start
For those who want to skip the water or air layering methods altogether, direct soil propagation is a practical alternative. With this technique, you can propagate plants directly in the soil, whether in a garden bed or a container without a pot.
How to Do It:
- Choose a Healthy Cutting: As with other methods, start by selecting a healthy cutting from your plant. For direct soil propagation, opt for softwood or semi-hardwood cuttings, which are easier to root in soil.
- Prepare the Cutting: Trim the bottom of the cutting just below a node (the leaf node is where roots are likely to form). Remove any leaves from the bottom half of the cutting, leaving only a few leaves at the top.
- Prepare the Soil: If you’re propagating in your garden, ensure the soil is well-drained and loose. In a container, use a mix of potting soil and perlite or sand to create a light, well-draining soil.
- Plant the Cutting: Insert the bottom end of the cutting into the soil, making sure that at least one node is buried. Press the soil gently around the cutting to keep it upright.
- Water and Cover: Water the cutting lightly and cover it with a plastic bag or a clear plastic container to create a mini greenhouse effect. This helps retain moisture and humidity, which encourages root growth.
- Wait for Roots to Form: After a few weeks, check for roots by gently tugging on the cutting. If you feel resistance, it means the roots have formed, and your cutting is ready to be transferred to a larger container or directly into the ground.
Direct soil propagation works well for many plant varieties, and by skipping the pot, you’re already using a more eco-friendly method of growing your plants!
4. Leaf Cuttings: A Pot-Free Way to Grow Succulents and More
Many indoor plants can be propagated from just a leaf cutting, especially succulent varieties like jade plants, snake plants, and begonias. Leaf cuttings are a great method to try if you don’t have extra pots around or if you want to start a new plant in a more low-maintenance way.
How to Do It:
- Select a Healthy Leaf: Choose a healthy, mature leaf from your plant. For succulents, make sure the leaf is firm and not damaged. If you’re propagating a snake plant, just a single leaf is enough.
- Cut the Leaf: Using clean scissors or a sharp knife, cut the leaf at its base. Let the cutting dry out for a day or two to allow the wound to callus over. This helps prevent rot.
- Place the Leaf on the Soil: After the cut has healed, place the leaf on top of the soil in a shallow container. You don’t need to bury it — simply rest the leaf on the surface.
- Water and Wait: Lightly water the leaf and keep the soil slightly moist but not soggy. In a few weeks, you should see tiny roots and, eventually, a new plant growing from the base of the leaf.
Leaf propagation is especially useful for plants like succulents, where the plant grows from the leaf itself rather than a stem.
5. Growing Your New Plants Without Pots
After successfully propagating your plants, you may find yourself with many new baby plants ready to thrive. If you’ve been avoiding pots altogether, you can continue growing them in containers made from everyday household items, such as:
- Plastic Containers: Reuse plastic containers like yogurt cups, water bottles, or takeout containers to grow your cuttings.
- Old Shoes or Boots: Turn old footwear into quirky plant containers for small cuttings.
- DIY Planters: Get creative and craft your own planters from materials such as newspaper, cardboard, or wood.
These options will allow you to grow your plants sustainably without the need for traditional pots.
Conclusion
Propagating indoor plants without pots is a simple and rewarding way to expand your plant collection and practice sustainable gardening. Whether you use water propagation, air layering, direct soil propagation, or leaf cuttings, the key is patience and care. By utilizing household materials and avoiding traditional pots, you’re not only saving money but also reducing your environmental impact. Start experimenting with these techniques and grow your green thumb while enjoying the beauty and serenity that plants bring to your space.
Embrace the green revolution — propagate your plants today! 🌱
#PlantPropagation #IndoorGardening #EcoFriendlyPlants #NoPotsNeeded #GardeningHacks #SustainableGardening #GreenThumb #PlantLovers #DIYGarden