
Introduction
As the seasons change and the leaves begin to fall, many gardeners find themselves faced with the task of cleaning up their yards. However, instead of raking and bagging those leaves for disposal, why not consider turning them into leaf mold? This natural, nutrient-rich amendment can improve soil structure, retain moisture, and boost the health of your plants. In this article, we’ll explore the benefits of leaf mold, the process of making it, and tips for incorporating it into your gardening routine.
The Benefits of Leaf Mold
Before diving into the how-to of making leaf mold, let’s discuss why it’s worth your time and effort:
1. Improves Soil Structure
Leaf mold is an excellent soil amendment that enhances soil structure. As it decomposes, it increases aeration and drainage, allowing roots to grow more easily and access water and nutrients.
2. Enhances Moisture Retention
One of the standout qualities of leaf mold is its ability to retain moisture. The organic material can hold up to three times its weight in water, making it a fantastic addition to dry soils or during hot summer months.
3. Nutrient-Rich
As leaves break down, they release nutrients back into the soil. Leaf mold is rich in beneficial microorganisms, which help create a healthy soil ecosystem, promoting plant growth and resilience against pests and diseases.
4. Cost-Effective and Sustainable
Making leaf mold is an eco-friendly way to recycle fallen leaves, reducing waste and saving money on store-bought fertilizers. It’s a simple process that anyone with a garden can do.
5. Supports Beneficial Microorganisms
Leaf mold encourages the growth of beneficial microbes and fungi in the soil, which are essential for breaking down organic matter and making nutrients available to plants.
The Process of Making Leaf Mold
Creating leaf mold is a straightforward process that requires minimal effort. Follow these steps to turn your fallen leaves into a valuable garden resource.
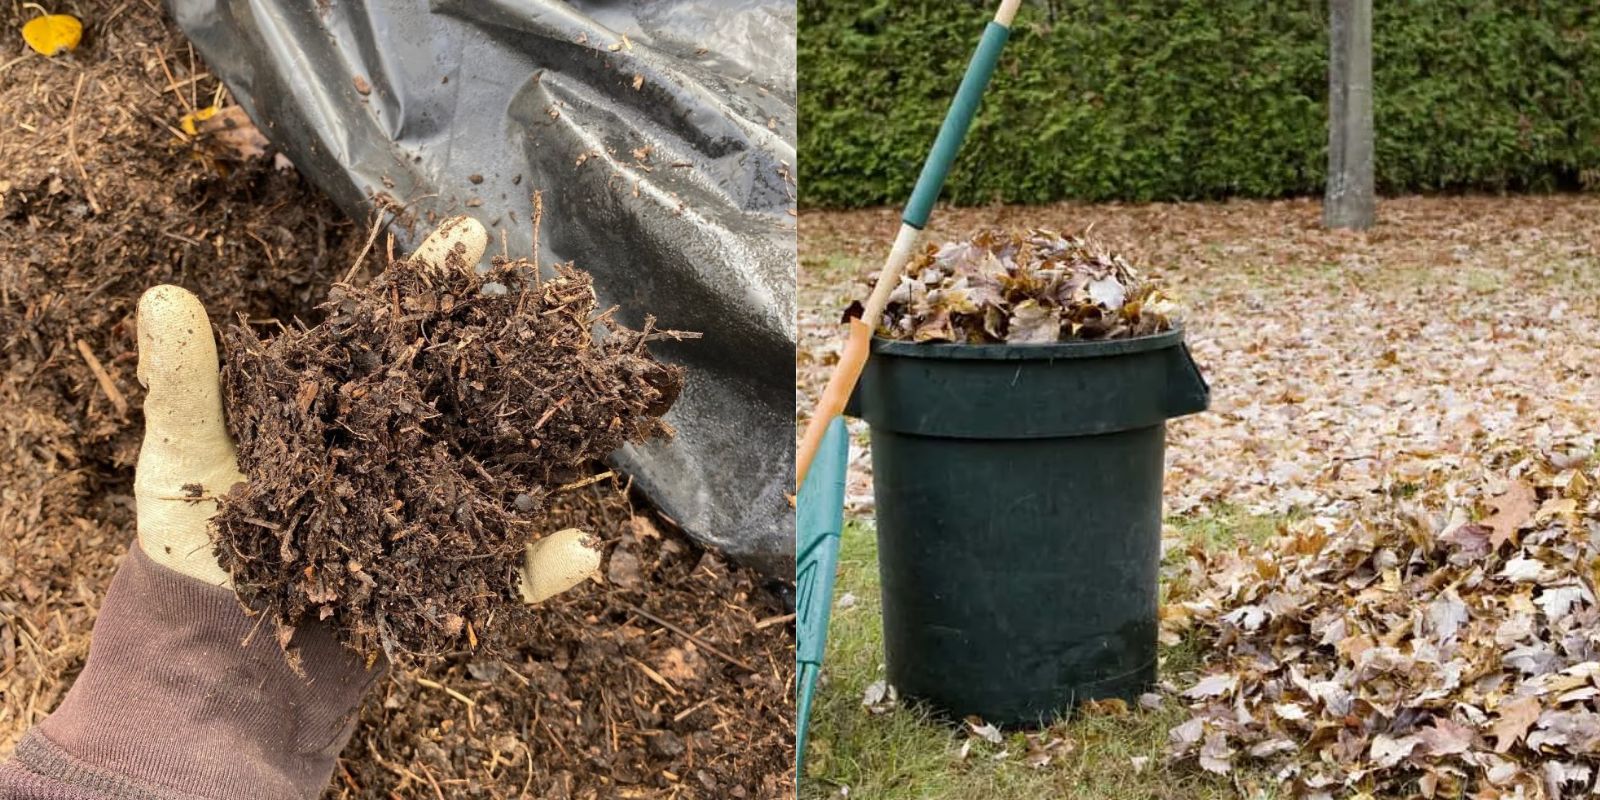
Step 1: Collect Fallen Leaves
The first step in making leaf mold is gathering fallen leaves. Look for leaves in your yard, local parks, or wooded areas. While you can use leaves from various trees, some of the best choices include:
- Oak leaves
- Maple leaves
- Beech leaves
- Birch leaves
Avoid using leaves from black walnut trees, as they contain chemicals that can be harmful to other plants.
Step 2: Chop or Shred the Leaves (Optional)
While you can compost whole leaves, chopping or shredding them can significantly speed up the decomposition process. Smaller pieces have a greater surface area, which allows microbes to break them down more quickly. You can use a lawnmower with a bag attachment, a leaf shredder, or simply run over the leaves with a weed trimmer. If you don’t have any of these tools, you can also place the leaves in a pile and stomp on them to break them up.
Step 3: Choose a Composting Method
You have several options for creating your leaf mold:
- Leaf Pile: Simply create a pile of leaves in a corner of your yard. Ensure it is at least 3 feet tall for proper aeration and moisture retention.
- Compost Bin: If you prefer a neater approach, consider using a compost bin. These can help contain the leaves and prevent them from blowing away.
- Garbage Bags: You can also use large trash bags to store leaves. Make a few holes in the bags for aeration, then fill them with chopped leaves. This method is particularly useful if you have limited space.
Step 4: Moisten the Leaves
Once your leaves are collected, it’s important to ensure they are adequately moistened. If the leaves are dry, add water until they reach a damp, sponge-like consistency. This moisture is essential for starting the decomposition process. If you are using bags, remember to periodically check and add moisture as needed.
Step 5: Turn the Pile (Optional)
If you’re using a leaf pile, turning it occasionally can help aerate the pile and speed up decomposition. However, this step is not mandatory. If you’re using bags, simply shake them periodically to keep the leaves aerated.
Step 6: Wait for Decomposition
Leaf mold typically takes anywhere from 6 months to 2 years to decompose fully, depending on factors like moisture levels, leaf type, and temperature. Keep an eye on the pile or bags, checking for moisture and turning if necessary.
You’ll know your leaf mold is ready when it has transformed into a dark, crumbly substance that smells earthy. The leaves will no longer be recognizable, and you should see a significant reduction in volume.
Step 7: Use Leaf Mold in Your Garden
Once your leaf mold is ready, it’s time to incorporate it into your garden. Here are a few ways to use it:
- Soil Amendment: Mix leaf mold into your garden soil to improve its structure, moisture retention, and nutrient content. This is especially beneficial when preparing your garden beds for planting.
- Mulch: Spread a layer of leaf mold around your plants as mulch to help retain moisture, suppress weeds, and regulate soil temperature.
- Potting Mix: Blend leaf mold with potting soil for potted plants, providing them with extra nutrients and improving drainage.
Tips for Successful Leaf Mold Creation
To ensure your leaf mold is of the highest quality, consider these helpful tips:
- Avoid Diseased Leaves: If you notice any leaves showing signs of disease or pest infestations, discard them to prevent spreading issues in your garden.
- Balance Leaf Types: Mixing different types of leaves can improve the overall nutrient profile of your leaf mold.
- Consider Adding Nitrogen: If your leaf pile is mostly brown materials (dried leaves), consider adding a nitrogen source, such as grass clippings or kitchen scraps, to help kickstart the decomposition process.
- Be Patient: Quality leaf mold takes time to develop. Resist the urge to rush the process, and allow nature to work its magic.
- Store Properly: If you have excess leaf mold, store it in a dry place until you’re ready to use it. It can be stored for several years without losing its effectiveness.
Conclusion
Creating leaf mold is an excellent way to recycle fallen leaves and enrich your garden soil. With its numerous benefits, including improved soil structure, moisture retention, and nutrient availability, leaf mold is truly a gardener’s gold. By following the simple steps outlined in this article, you can turn those discarded leaves into a valuable resource for your garden. So the next time you rake up those leaves, remember that you have the power to create something wonderful for your plants.
Get Started Today!
Transform your fallen leaves into leaf mold and discover the benefits of this fantastic garden resource. Your plants will thank you!
#LeafMold #GardeningTips #SoilHealth #OrganicGardening #Composting #SustainableGardening #GardenersGold #EcoFriendlyGardening #NatureLovers #GardeningHacks