
Biochar is a revolutionary soil amendment that offers numerous benefits for garden health and sustainability. By converting organic waste into biochar, gardeners can improve soil fertility, enhance water retention, and reduce greenhouse gas emissions. This article will guide you through the process of making biochar in a burn pit, a simple yet effective method for producing this valuable gardening resource.
Understanding Biochar
Biochar is a form of charcoal created by pyrolyzing organic materials—such as wood, crop residues, or other biomass—at high temperatures in the absence of oxygen. The result is a stable, carbon-rich substance that can significantly improve soil health and fertility.
Benefits of Biochar
- Soil Improvement: Biochar enhances soil structure, increases nutrient and water retention, and promotes beneficial microbial activity.
- Waste Reduction: Making biochar from organic waste reduces landfill contributions and recycles biomass into a useful product.
- Climate Mitigation: Biochar sequesters carbon in the soil, which helps to reduce greenhouse gases and combat climate change.
Preparing Your Burn Pit
Creating biochar requires a controlled burning process, which can be efficiently managed using a burn pit. Here’s how to set up and prepare your burn pit for biochar production:
1. Choose the Right Location
Select a safe, well-ventilated area for your burn pit. Ideally, this should be an open space away from flammable structures or vegetation. Ensure that the location complies with local regulations regarding open burning.
2. Dig and Line the Pit
Dig a shallow pit, approximately 2-3 feet deep and 3-4 feet wide. Line the pit with stones, bricks, or metal to help contain the fire and reflect heat inward. This lining will help achieve a more controlled burning process.
Selecting and Preparing Biomass
The quality of the biochar produced depends significantly on the biomass used. Follow these steps to select and prepare the right materials:
1. Choose Suitable Materials
Use dry, untreated organic materials for making biochar. Suitable options include:
- Wood: Hardwood is preferred due to its higher carbon content and density.
- Crop Residues: Corn stalks, wheat straw, or other plant residues work well.
- Leaves and Branches: Avoid using materials that have been treated with chemicals or pesticides.
2. Prepare the Biomass
Cut the biomass into small pieces to facilitate even burning. Smaller pieces will also char more thoroughly, producing better quality biochar.
Burning the Biomass
The burning process is crucial to producing high-quality biochar. Follow these guidelines to achieve optimal results:
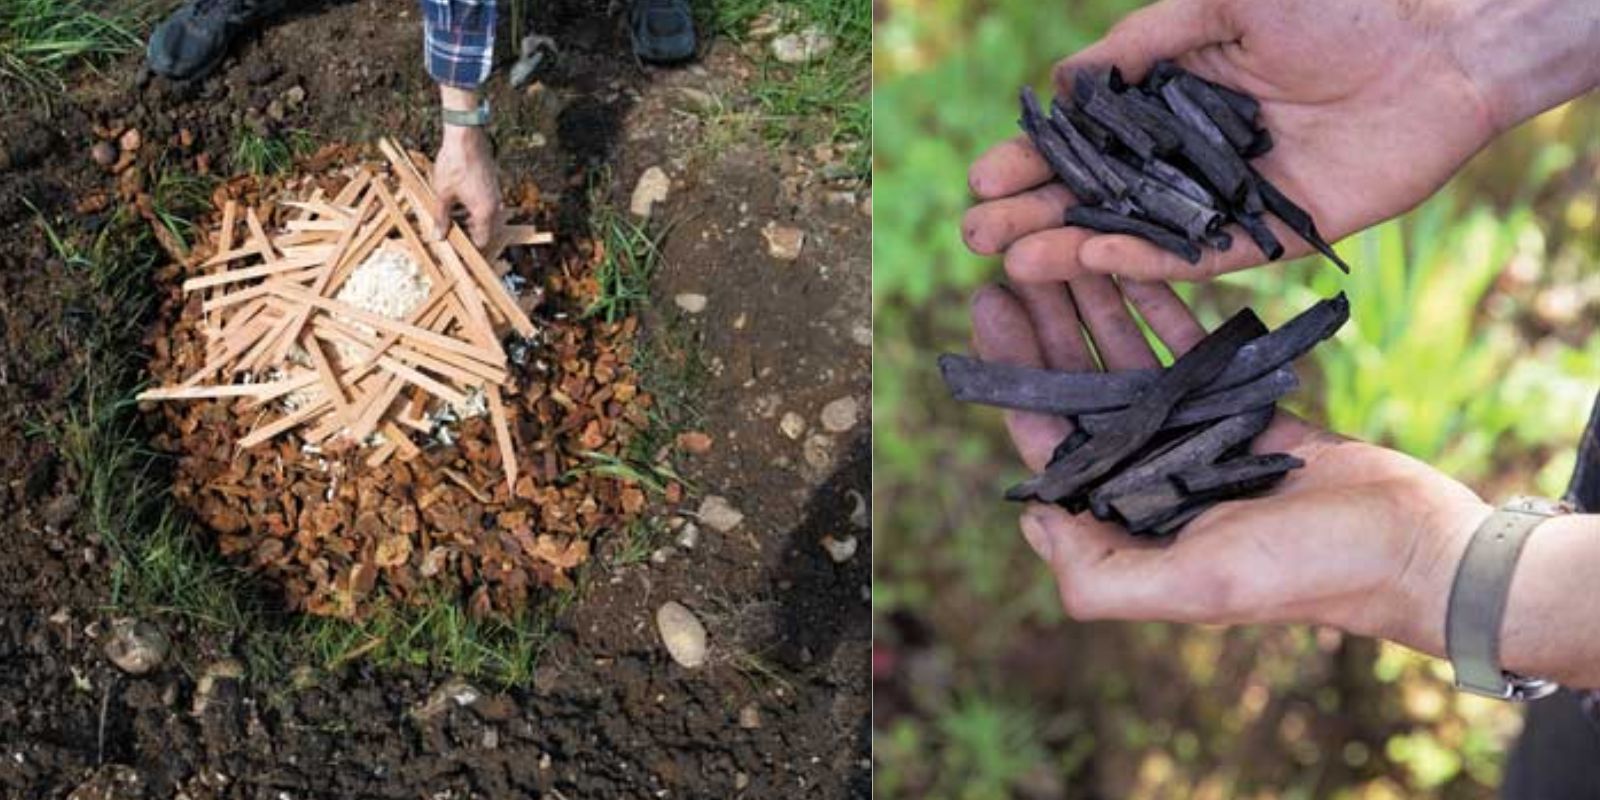
1. Light the Fire
Start a fire in the burn pit using kindling or small, dry branches. Gradually add the prepared biomass, ensuring that the fire remains steady and controlled.
2. Maintain a Low Oxygen Environment
To produce biochar, the biomass needs to burn at a high temperature in a low-oxygen environment. You can achieve this by:
- Covering the Fire: Once the biomass is partially burned, cover it with a layer of soil or additional biomass to restrict oxygen flow.
- Controlled Burn: Keep the fire low and slow, allowing the biomass to char rather than combust completely to ash.
3. Monitor the Process
Regularly check the burn pit to ensure the fire remains under control and the biomass is evenly charred. Adjust the covering material as needed to maintain the right conditions for biochar production.
Cooling and Processing the Biochar
Once the burning process is complete, allow the biochar to cool before handling it. Follow these steps for cooling and processing:
1. Cool the Biochar
After the biomass has been fully charred, extinguish the fire by covering the pit with soil or adding water to cool the material completely. This step is crucial to prevent the biochar from re-burning and to stabilize it for soil use.
2. Crush the Biochar
Once cooled, break up the charred material into smaller pieces. Use a hammer or another tool to crush it into a fine powder. This powder can be more easily mixed into the soil.
3. Prepare for Soil Application
The processed biochar is now ready to be incorporated into your garden soil. It’s advisable to let the biochar “age” or “condition” for a few weeks before application, allowing it to absorb moisture and nutrients.
Incorporating Biochar into Your Garden
To maximize the benefits of biochar, follow these steps to incorporate it into your garden soil:
1. Mix with Soil
Incorporate the crushed biochar into your garden soil using a garden fork or tiller. Aim for a depth of 6-12 inches to ensure the biochar is well-distributed throughout the root zone.
2. Combine with Other Amendments
Mix the biochar with compost or other organic soil amendments to enhance its effectiveness. This combination will provide a balanced nutrient profile and improve soil structure.
3. Water the Soil
After incorporating biochar, water the soil thoroughly to help it settle and integrate with existing soil. This will also activate the beneficial microbial activity in the biochar.
Tips for Successful Biochar Production
To ensure the best results from your biochar-making efforts, consider these additional tips:
1. Safety First
Always prioritize safety when working with fire. Have a water source or fire extinguisher on hand, and monitor the burn pit at all times.
2. Optimize Biomass Quality
Select high-quality biomass and ensure it is dry and untreated. This will produce more effective biochar and prevent the introduction of unwanted chemicals into your soil.
3. Avoid Overproduction
Produce biochar in manageable quantities to avoid wastage and ensure it is used effectively in your garden.
Conclusion
Making biochar in a burn pit is a practical and environmentally friendly way to enhance your garden soil. By following the steps outlined in this guide—preparing your burn pit, selecting and preparing biomass, controlling the burning process, and incorporating biochar into your soil—you can create a valuable soil amendment that improves plant health and contributes to sustainable gardening practices.
Transform your garden with homemade biochar and join the community of eco-conscious gardeners. Share your biochar-making experiences and tips using hashtags like #Biochar #SustainableGardening #EcoFriendlyGardening #GardenHealth #MotherEarthGardener. Happy gardening!