
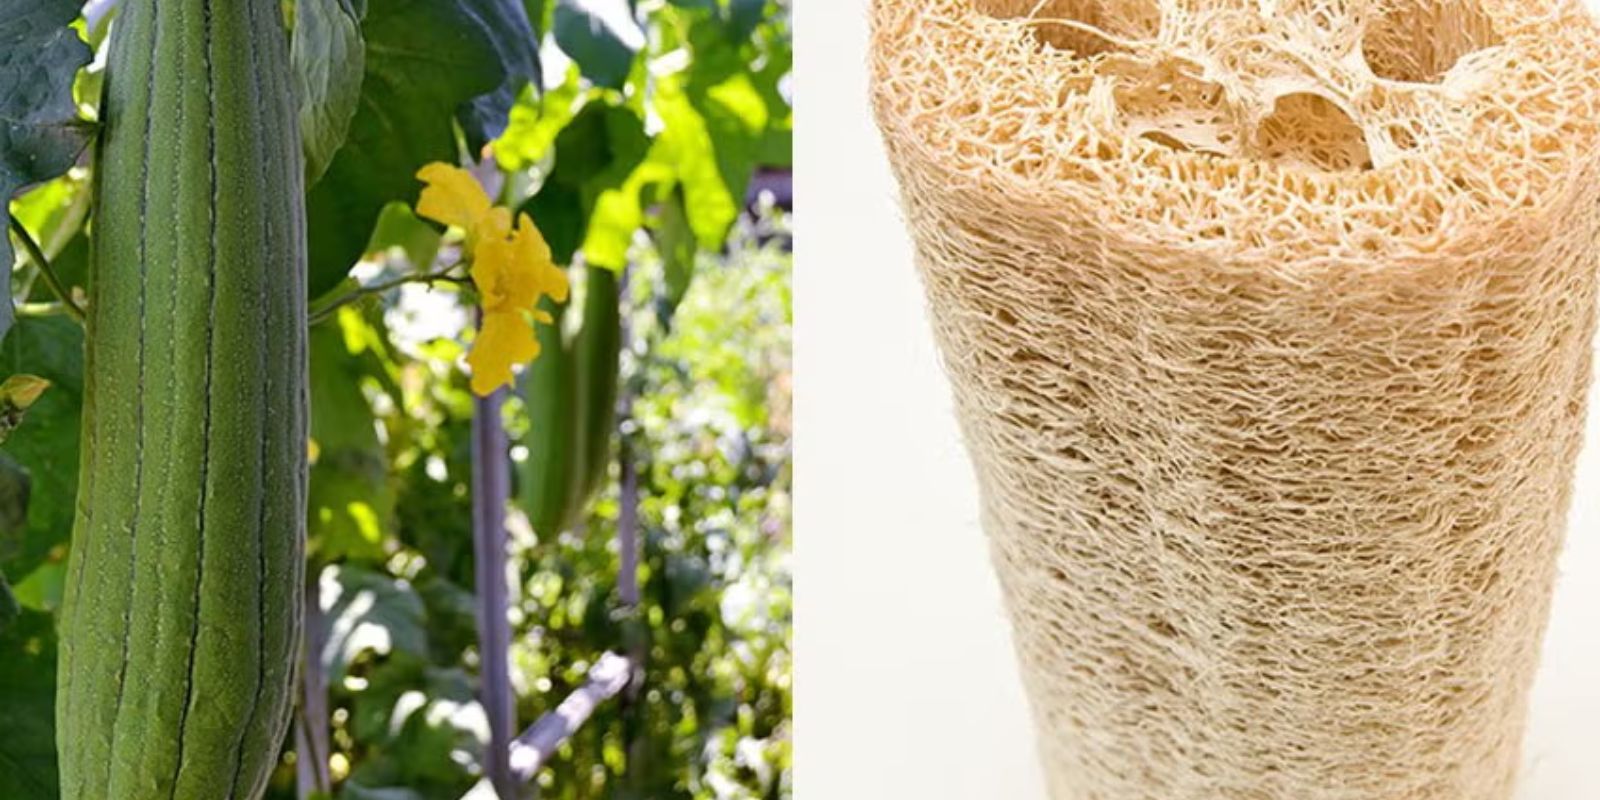
Growing luffa sponges at home is an excellent way to engage in a rewarding gardening project while contributing to a more sustainable lifestyle. Luffa sponges, commonly used for scrubbing and exfoliating, come from the luffa gourd, a member of the cucumber family. This guide will walk you through the process of growing luffa sponges, from planting to harvest, so you can enjoy the satisfaction of using your very own homegrown sponges.
Introduction
Luffa sponges are more than just a practical household item; they are a symbol of a sustainable approach to living. By growing your own luffa, you reduce reliance on synthetic products and gain insight into the lifecycle of this unique plant. Whether you’re an experienced gardener or a beginner, cultivating luffa sponges is a fulfilling endeavor that adds a touch of green to your home and garden.
Step 1: Choose the Right Location
Luffa plants thrive in warm, sunny environments. Select a location in your garden that receives full sun for at least 6-8 hours a day. The soil should be well-draining to prevent waterlogging, which can lead to root rot. If your garden soil is heavy or clayey, consider using raised beds or containers to ensure proper drainage.
Step 2: Prepare the Soil
Luffa plants prefer soil rich in organic matter. Before planting, enrich the soil with compost or well-rotted manure to improve its fertility and texture. Aim for a soil pH of 6.0 to 7.0, which is slightly acidic to neutral. Incorporate organic matter thoroughly into the soil to create a loamy, well-draining environment that will support vigorous growth.
Step 3: Plant the Seeds
Luffa seeds can be started indoors or sown directly into the garden. If starting indoors, plant seeds in seed trays 6-8 weeks before the last frost date. Sow seeds about 1 inch deep and keep them in a warm, sunny location or under grow lights. Transplant the seedlings outdoors once the danger of frost has passed and when they are sturdy enough to handle.
If sowing directly in the garden, wait until after the last frost and the soil temperature has warmed to at least 70°F (21°C). Plant the seeds 1 inch deep, spacing them 12-18 inches apart to allow ample room for the vines to spread.
Step 4: Provide Support
Luffa plants are climbing vines and require support to grow effectively. Install a trellis, arbor, or sturdy stakes to support the plants as they grow. A vertical support system helps keep the gourds off the ground, reducing the risk of rot and making it easier to harvest the mature sponges. Ensure the support is strong enough to handle the weight of the growing vines and fruit.
Step 5: Water Regularly
Consistent moisture is crucial for the healthy growth of luffa plants. Water the plants regularly to keep the soil consistently moist, but avoid overwatering, which can lead to waterlogged conditions. Water at the base of the plants to keep the foliage dry, reducing the risk of fungal diseases. During dry spells or hot weather, you may need to increase the frequency of watering to maintain soil moisture.
Step 6: Fertilize
Feed your luffa plants with a balanced fertilizer every 4-6 weeks to promote robust growth and fruit development. Choose a fertilizer with an equal ratio of nitrogen, phosphorus, and potassium (e.g., 10-10-10) to support overall plant health. Follow the manufacturer’s instructions for application rates and avoid over-fertilizing, which can lead to excessive foliage growth at the expense of fruit production.
Step 7: Pollinate
Luffa plants have separate male and female flowers, and successful fruiting depends on effective pollination. Encourage pollinators such as bees and butterflies by planting flowering companion plants nearby. You can also hand-pollinate by gently transferring pollen from the male flowers to the female flowers using a small brush or cotton swab. Pollination is most effective during warm, sunny weather when flowers are open.
Step 8: Harvest the Luffa
Harvest luffa gourds when they are fully mature and have turned brown. The sponges should feel dry and firm to the touch. Cut the gourds from the vine using sharp scissors or pruning shears. It’s important to wait until the luffa is completely mature to ensure the best quality sponge. If harvested too early, the luffa may not dry properly or develop the desired texture.
Step 9: Cure the Gourds
After harvesting, cure the luffa gourds to remove the outer skin and seeds. Place the gourds in a well-ventilated area, away from direct sunlight, to allow them to dry completely. This curing process can take several weeks. Once the gourds are dry, peel off the outer skin and shake out the seeds. The remaining fibrous material is the luffa sponge.
Step 10: Use Your Luffa Sponges
Your dried luffa sponges are now ready for use. They make excellent natural scrubbers for cleaning dishes, scrubbing surfaces, and exfoliating skin. To prolong their lifespan, rinse and dry the sponges thoroughly after each use. Store them in a dry, well-ventilated place to prevent mold growth.
Conclusion
Growing luffa sponges at home is a gratifying experience that connects you with nature and enhances your garden’s sustainability. By following these steps, you’ll be well on your way to cultivating your own luffa sponges and enjoying the benefits of this versatile plant. Embrace the challenge, and soon you’ll be reaping the rewards of your efforts with homegrown, eco-friendly sponges. Happy gardening! 🌿🧽