
Introduction
Vanilla, a staple in many kitchens for its sweet and aromatic flavor, is often overlooked in home gardening due to its unique growing requirements. Cultivating vanilla beans, while challenging, can be incredibly rewarding. With the right conditions, patience, and care, you can grow your own vanilla beans from planting to harvest. This article will guide you through the essential steps to successfully grow and harvest vanilla beans, providing you with the knowledge to transform your garden into a source of this coveted spice.
1. Understanding Vanilla Beans and Their Needs
Vanilla beans come from the vanilla orchid (Vanilla planifolia), a tropical plant native to Mexico. These orchids are not just ornamental; they are essential for producing vanilla, one of the world’s most popular flavors. The vanilla orchid requires specific conditions to thrive, including warm temperatures, high humidity, and a suitable growing medium.
2. Selecting the Right Location
Vanilla orchids thrive in warm, tropical, or subtropical climates. They need temperatures between 70-85°F (21-29°C) to grow effectively. If you live in a cooler climate, you can grow vanilla in a greenhouse or indoors where you can control the temperature and humidity.
3. Preparing the Soil
Vanilla plants need well-draining soil rich in organic matter. A mixture of potting soil, compost, and perlite or sand works well to ensure good drainage. Vanilla orchids are epiphytes, meaning they grow on other plants in their natural habitat, so they prefer soil that mimics this loose, airy structure. If planting in a container, choose one with good drainage holes.
4. Planting Vanilla Beans
To start growing vanilla, you’ll need a vanilla orchid cutting or a young plant. Plant it in your prepared soil, either in a large container or directly in the ground if your climate allows. Ensure the plant is placed at the same depth it was growing in its nursery container. Water thoroughly after planting and provide immediate support for the climbing vine.
5. Providing Support
Vanilla orchids are climbing plants and need support to grow vertically. Use a trellis, stake, or pole to help the plant climb. As the vine grows, gently tie it to the support structure, ensuring it remains upright and supported.
6. Watering and Humidity
Maintaining the right moisture level and humidity is crucial for vanilla plants. Water the plant regularly to keep the soil moist but not waterlogged. Use a humidity tray or mist the plant frequently to ensure high humidity levels, which are essential for the plant’s health and growth.
7. Fertilizing
Vanilla orchids benefit from regular feeding. Use a balanced, water-soluble fertilizer every 2-4 weeks during the growing season. An organic fertilizer high in nitrogen and potassium is ideal for promoting healthy vine growth and flowering.
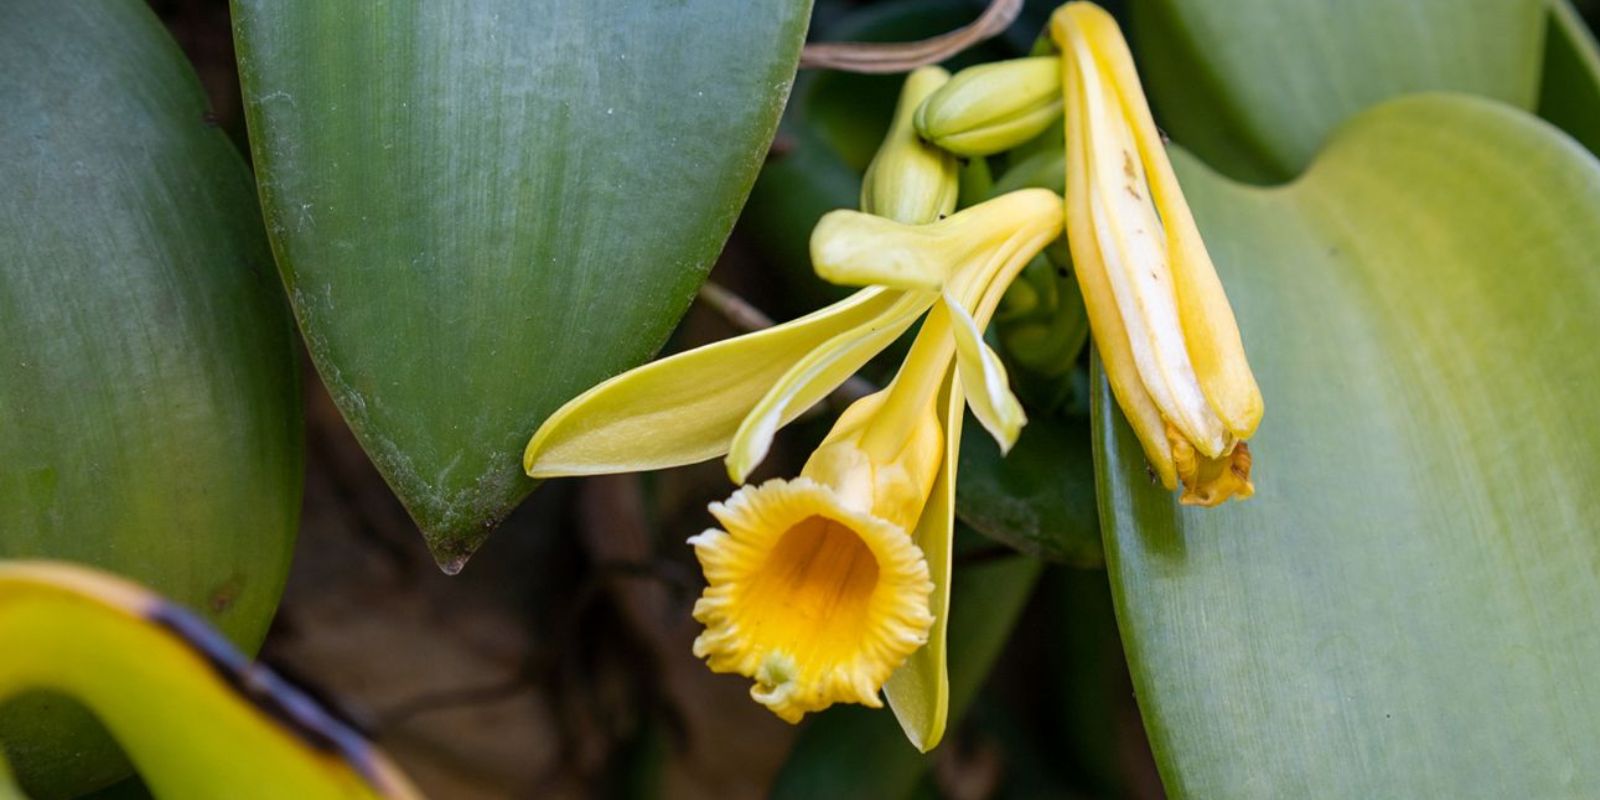
8. Pollination
Vanilla orchids are hermaphroditic, meaning they have both male and female parts, but they often require hand pollination to produce fruit. The flowers are delicate and short-lived, so timing is crucial. Using a small brush or toothpick, gently transfer pollen from the male anther to the female stigma of the flower. This process needs to be done in the morning when the flowers are fresh.
9. Caring for the Plant
Regularly check your vanilla plant for pests and diseases. Common issues include scale insects and fungal infections. Treat any problems promptly with appropriate organic or chemical treatments. Prune the plant as needed to remove dead or diseased growth and encourage a healthy, productive vine.
10. Harvesting Vanilla Beans
Vanilla beans mature slowly, typically taking 8-9 months from pollination to harvest. Beans are ready to harvest when they turn a light brown color and become slightly soft to the touch. Harvest beans by gently twisting them off the vine. Be careful not to damage the plant.
11. Curing Vanilla Beans
After harvesting, vanilla beans must be cured to develop their characteristic flavor and aroma. The curing process involves blanching, sweating, drying, and conditioning the beans:
- Blanching: Immerse beans in hot water (about 140°F or 60°C) for a few minutes to stop the enzymatic process.
- Sweating: Place the beans in a warm, humid environment (about 85°F or 30°C) for 24-48 hours to allow them to sweat and develop flavor.
- Drying: Dry the beans in a well-ventilated area away from direct sunlight until they are flexible and dark brown.
- Conditioning: Store the dried beans in airtight containers for several months to allow the flavors to develop fully.
12. Using Your Homegrown Vanilla Beans
Once cured, your vanilla beans are ready to use! They can be used to infuse flavor into recipes, make vanilla extract, or be used in baking. The beans should be stored in a cool, dark place to maintain their freshness and potency.
Conclusion
Growing vanilla beans is a rewarding endeavor that requires attention to detail, patience, and care. By understanding the plant’s specific needs, providing the right environment, and following the necessary steps from planting to harvest, you can enjoy the satisfaction of producing your own vanilla. This journey not only adds a unique flavor to your culinary creations but also enhances your gardening experience. With dedication and the right techniques, you’ll be well on your way to growing and harvesting your very own vanilla beans. Happy gardening! 🌱🍦