
Introduction
Growing roses from the calyx of a rose is a fascinating and rewarding horticultural endeavor. Unlike traditional methods of propagation, this technique allows you to reproduce your favorite rose varieties from just a small part of the flower. With a bit of patience and attention to detail, you can cultivate beautiful rose bushes in your garden. This guide will take you through the process, providing tips and insights along the way.
Understanding the Rose Calyx
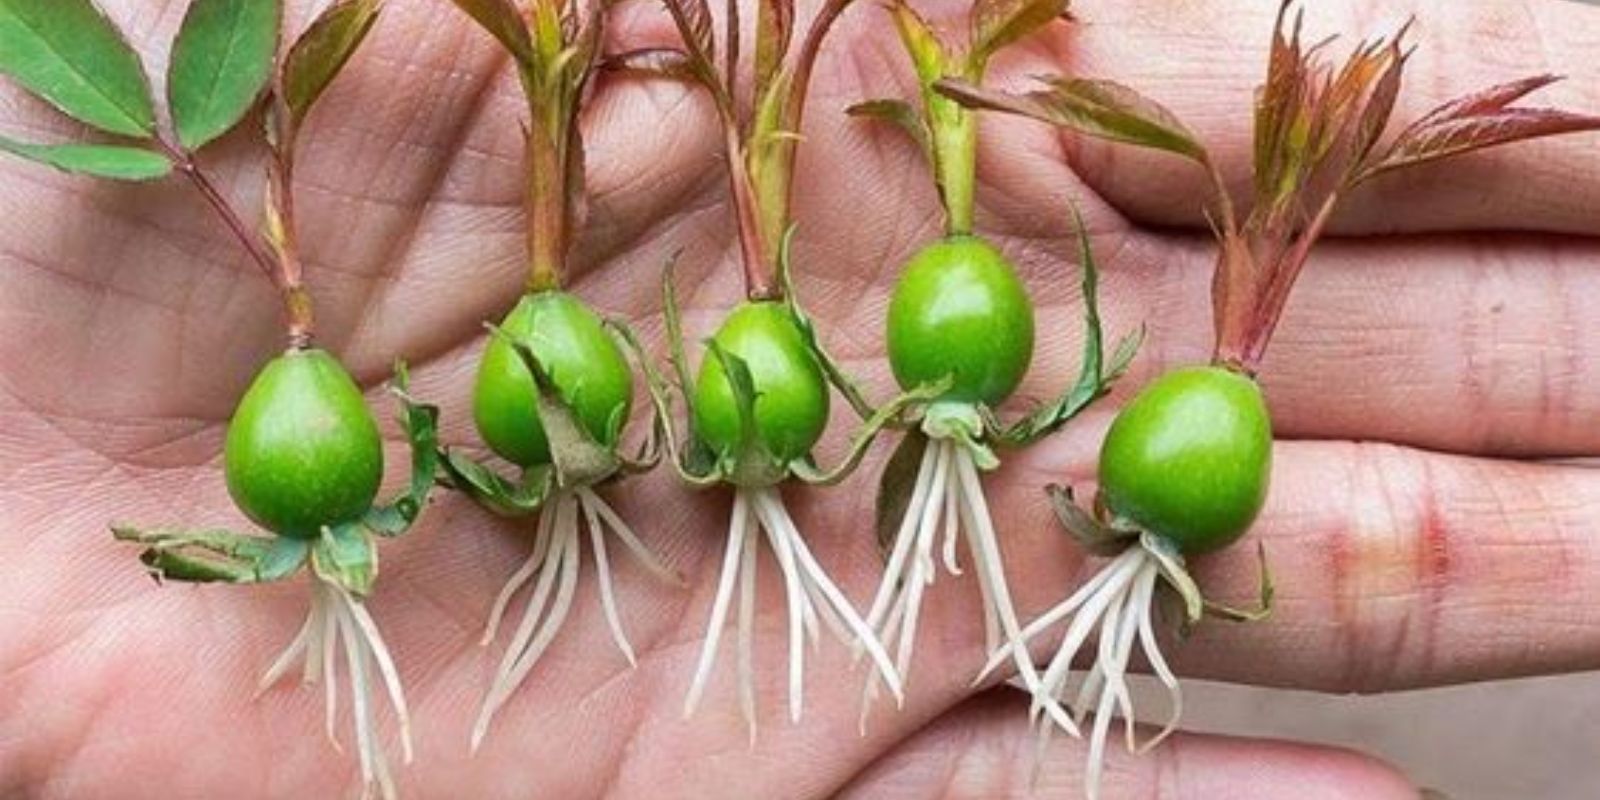
The calyx is the green, outermost part of the flower that encloses the developing bud. It consists of sepals, which protect the flower as it forms. In the context of rose propagation, the calyx can be used to grow new plants through a method similar to stem cuttings. This technique leverages the plant’s natural ability to root from cut sections.
Benefits of Growing Roses from the Calyx
- Preservation of Varieties: This method allows you to preserve and propagate your favorite rose varieties, ensuring their continued presence in your garden.
- Cost-Effective: Growing roses from cuttings is more economical than buying new plants.
- Sense of Accomplishment: Successfully growing a rose bush from a small cutting is highly rewarding and satisfying for any gardener.
Step-by-Step Guide to Growing Roses from the Calyx
Step 1: Select a Healthy Rose
The first step is to choose a healthy and mature rose from which to take your cutting. Look for a rose that is free from diseases and pests. Ideally, the rose should be in full bloom or just past its peak, as this is when the calyx is most suitable for propagation.
Step 2: Cut the Calyx
Using sterilized pruning shears, make a clean cut just below the bud, ensuring you include a section of the stem. Sterilizing your tools is essential to prevent the spread of diseases. You can sterilize the shears by wiping them with rubbing alcohol or a bleach solution.
Step 3: Prepare the Cutting
Remove the lower leaves from the stem to reduce water loss and prevent them from rotting once planted. Cut the stem at a 45-degree angle to increase the surface area for rooting. The cutting should be about 6-8 inches long.
Step 4: Apply Rooting Hormone
Dip the base of the stem into rooting hormone powder or gel. Rooting hormone encourages the development of roots from the cutting and increases the chances of successful propagation. Gently tap off any excess hormone to avoid over-application.
Step 5: Plant the Cutting
Fill a pot with well-drained soil, ideally a mix of peat moss and perlite or sand. Make a hole in the soil with a pencil or your finger and insert the stem, ensuring that the cut end is buried and the calyx is just above the soil surface. Firm the soil around the stem to provide support.
Step 6: Cover and Maintain Humidity
Cover the cutting with a plastic bag or a clear plastic dome to create a mini-greenhouse effect. This helps maintain humidity around the cutting, which is crucial for rooting. Ensure the bag or dome does not touch the leaves by using sticks or wire hoops to keep it elevated.
Step 7: Place in a Bright Location
Place the pot in a location with bright, indirect light. Direct sunlight can be too harsh and may cause the cutting to dry out or overheat. A windowsill with filtered light or a spot under grow lights works well.
Step 8: Water Regularly
Keep the soil consistently moist but not waterlogged. Overwatering can lead to root rot, while underwatering can cause the cutting to dry out and die. Check the soil moisture regularly and adjust watering as needed.
Step 9: Transplanting
After several weeks, you should start to see new growth, indicating that roots have formed. Once the roots are well-established, typically after 6-8 weeks, you can transplant the rose cutting to a larger pot or directly into your garden. Choose a sunny spot with well-drained soil and amend the planting hole with compost to provide nutrients.
Tips for Success
- Timing: The best time to take cuttings is during late spring or early summer when the plant is actively growing.
- Patience: Rooting can take time, so be patient and avoid disturbing the cutting too often.
- Consistency: Maintain consistent moisture and humidity levels for the best results.
- Protection: Protect young cuttings from extreme weather conditions and pests.
Common Challenges and Solutions
Root Rot
Root rot can occur if the soil is too wet. To prevent this, use well-draining soil and ensure the pot has drainage holes. Avoid overwatering and allow the soil surface to dry slightly between waterings.
Wilting
Wilting can be a sign of underwatering or excessive heat. Ensure the cutting is receiving enough moisture and is placed in a location with indirect light. If wilting persists, check for signs of disease or pests.
Slow Growth
If the cutting is slow to root or grow, it may be due to insufficient light or nutrients. Ensure the cutting is in a bright location and consider using a diluted liquid fertilizer to boost growth once roots have formed.
Conclusion
Growing roses from the calyx of a rose is a rewarding and cost-effective way to propagate your favorite varieties. By following the steps outlined in this guide, you can successfully cultivate new rose bushes and enjoy their beauty in your garden. Remember, patience and consistency are key to successful propagation. With a little effort and care, you’ll soon have a flourishing rose garden filled with beautiful, home-grown roses.
Give this method a try and experience the joy of watching your roses grow from a small calyx into a thriving bush. Happy gardening!