
Growing rose plants from cuttings is a rewarding and cost-effective way to expand your garden or share beautiful blooms with friends and family. This method allows you to propagate your favorite rose varieties while ensuring that you maintain their unique characteristics. In this comprehensive guide, we’ll walk you through the process of taking and rooting rose cuttings, along with tips to ensure success.
Understanding Rose Cuttings
Before diving into the propagation process, it’s essential to understand what a cutting is. A cutting is a piece of a plant stem that is removed and then nurtured to grow roots and develop into a new plant. This method is popular for roses because it allows you to clone a plant with desirable traits.
Benefits of Propagating Roses from Cuttings
- Cost-Effective: Buying new rose plants can be expensive. Propagating from cuttings allows you to expand your collection at little to no cost.
- Preservation of Varieties: If you have a favorite rose bush with specific traits, cuttings allow you to reproduce the exact plant without risking the loss of its characteristics.
- Satisfaction: There’s immense satisfaction in nurturing a cutting into a blooming rose bush, making it a rewarding gardening experience.
Choosing the Right Time
Timing is crucial for successful rose propagation. The best time to take cuttings is during late spring to early summer when the plants are actively growing. However, some varieties can also be propagated in late summer or early fall. The key is to ensure that the cuttings are taken from healthy plants and during their active growth phase.
Selecting the Right Cuttings
When selecting cuttings, it’s important to choose healthy, disease-free stems. Here are some tips for selecting the right cuttings:
- Choose the Right Variety: Opt for disease-resistant varieties that are known for their vigor and hardiness.
- Select the Right Stem: Look for stems that are about 6 to 8 inches long, preferably from new growth. The stem should be semi-hardwood (partially matured) rather than too soft or too woody.
- Inspect for Health: Ensure that the parent plant is healthy and free from diseases or pests. Avoid using cuttings from plants that exhibit signs of stress or illness.
Taking Cuttings
Once you’ve selected the right stems, it’s time to take your cuttings. Follow these steps for successful cutting:
Tools You’ll Need
- Sharp Pruning Shears or Scissors: Ensure your cutting tools are clean and sterilized to prevent disease transmission.
- Potting Soil: Use a well-draining potting mix suitable for rooting cuttings.
- Containers: Small pots or trays will work well for planting the cuttings.
- Plastic Bags or Cling Film: To create a humid environment for the cuttings.
- Rooting Hormone (Optional): While not necessary, rooting hormone can increase the chances of successful rooting.
Steps to Take Cuttings
- Prepare the Tools: Clean and sterilize your pruning shears or scissors with rubbing alcohol to prevent infection.
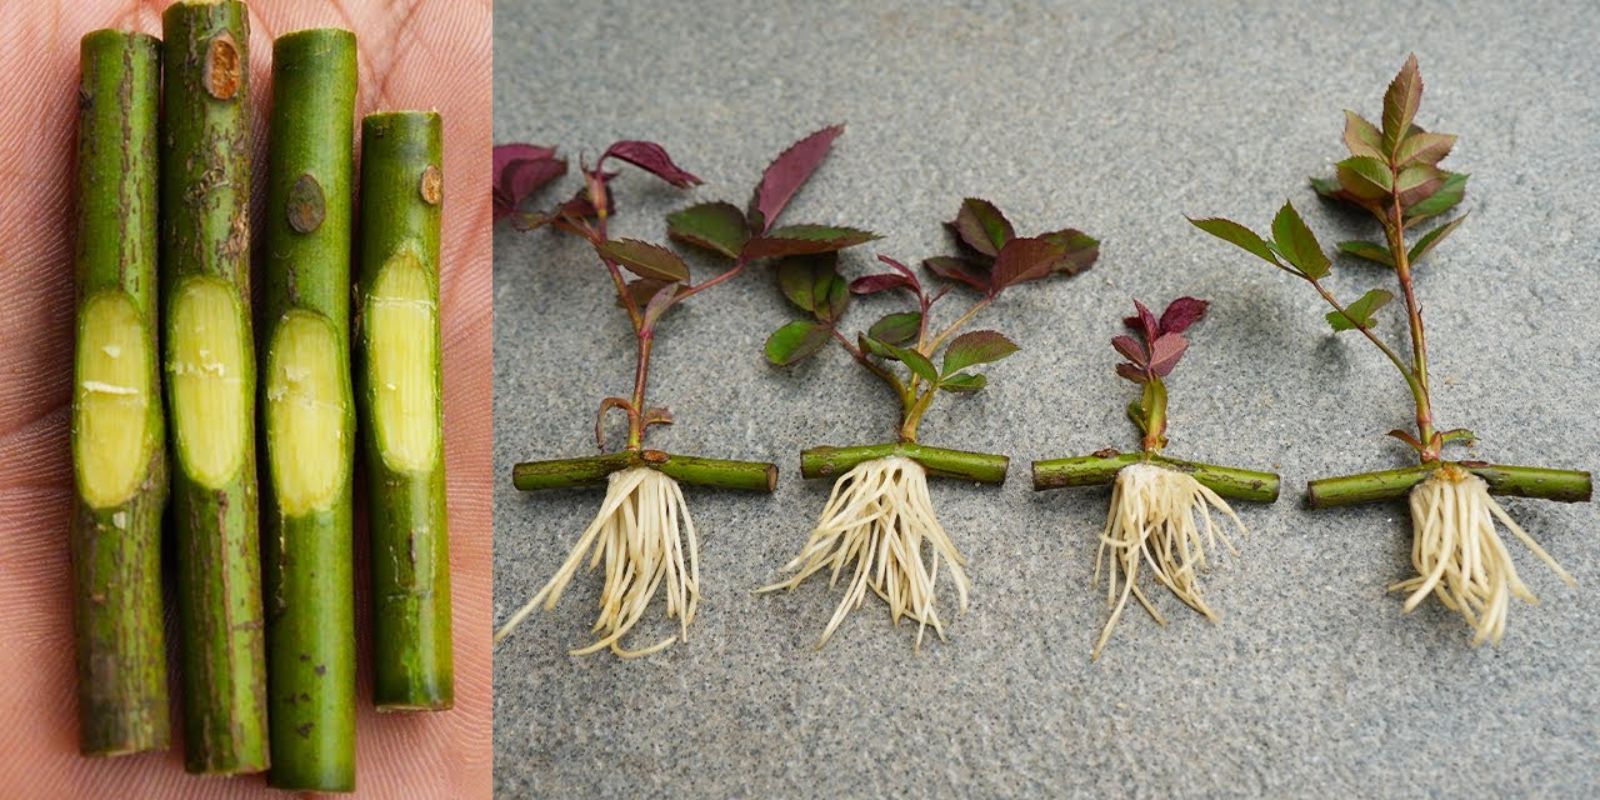
- Cut the Stems: Take your chosen stem and make a clean cut just below a node (the point where leaves attach). Ensure the cut is at a 45-degree angle to increase the surface area for water absorption.
- Remove Leaves: Remove the lower leaves, leaving only two or three at the top. This helps prevent rot and reduces moisture loss.
- Apply Rooting Hormone (Optional): If you’re using rooting hormone, dip the cut end of the stem into the powder, tapping off any excess. This can promote root development.
- Plant the Cuttings: Fill your pots or trays with the potting mix, making holes in the soil with your finger or a pencil. Place the cuttings in the holes, ensuring that at least one node is buried in the soil. Gently press the soil around the cuttings to eliminate air pockets.
- Water: Give the cuttings a gentle watering to moisten the soil, being careful not to saturate it.
Creating a Suitable Environment
Creating the right environment is crucial for the success of your rose cuttings. Here’s how to ensure optimal conditions:
- Humidity: Roses thrive in a humid environment. Cover the pots or trays with plastic bags or cling film to retain moisture. Make sure the plastic does not touch the cuttings by using sticks or skewers to create a tent-like structure.
- Light: Place the cuttings in a bright, indirect light location. Avoid direct sunlight, which can scorch the cuttings. A north or east-facing window is ideal.
- Temperature: Maintain a warm temperature, ideally between 65°F to 75°F (18°C to 24°C). If the environment is too cold, consider using a heat mat to provide consistent warmth.
- Ventilation: While humidity is essential, it’s also important to allow for air circulation. Open the plastic covering occasionally for a few minutes each day to prevent mold and mildew.
Caring for Your Cuttings
Once your cuttings are in place, it’s essential to provide proper care to encourage rooting and growth. Follow these tips:
- Watering: Keep the soil consistently moist but not soggy. Overwatering can lead to rot, while underwatering can dry out the cuttings. Check the moisture level regularly and water as needed.
- Monitoring: Keep an eye on the cuttings for signs of rooting. After about 4 to 6 weeks, gently tug on the cuttings. If you feel resistance, roots are forming.
- Fertilizing: After about a month, you can introduce a diluted liquid fertilizer to encourage growth. Use a balanced fertilizer, applying it sparingly to avoid burning the young roots.
- Removing the Cover: Once the cuttings have developed a good root system (after about 6-8 weeks), gradually remove the plastic covering. Start by exposing them for a few hours a day, increasing the duration over a week until they are fully acclimated to the outside environment.
Transplanting Your Rose Cuttings
After successfully rooting, it’s time to transplant your new rose plants into larger pots or directly into the garden.
- Choose the Right Time: Wait until the danger of frost has passed and the weather is consistently warm before transplanting.
- Prepare the New Pot or Garden Bed: If transplanting to a pot, select one that is at least 8-10 inches in diameter. Fill it with high-quality potting mix enriched with compost. If planting in the garden, choose a well-draining location with plenty of sunlight.
- Transplanting Process: Carefully remove the cuttings from their current pots. Gently separate the roots and ensure not to damage them. Dig a hole in the new pot or garden bed and place the cutting in, covering the roots with soil. Water thoroughly after planting.
- Ongoing Care: Water regularly and continue to provide care as the new plants establish themselves. Mulching around the base can help retain moisture and suppress weeds.
Common Challenges and Solutions
While propagating rose cuttings can be straightforward, challenges may arise. Here are some common issues and how to address them:
- Wilting: If the cuttings wilt, it may indicate that they are not receiving enough moisture. Check the soil moisture and adjust your watering routine accordingly.
- Rotting: Overly wet conditions can lead to rot. Ensure good drainage in your pots and avoid overwatering. Remove any rotting cuttings immediately to prevent spread.
- Mold or Mildew: Excess humidity can lead to fungal issues. Remove the cover periodically to allow for airflow and consider using a fungicide if needed.
- Lack of Growth: If the cuttings are not rooting, check for factors such as inadequate light, humidity, or temperature. Adjust these conditions to encourage growth.
Conclusion
Growing rose plants from cuttings is a fulfilling gardening endeavor that allows you to propagate your favorite varieties while saving money. By following the steps outlined in this guide, you can enjoy the beauty and fragrance of roses in your garden or share them with loved ones. Remember to be patient, as rooting can take time, but the reward of a blooming rose bush will be well worth the effort. Happy gardening! 🌹