
Peanuts, also known as groundnuts, are a delightful and nutritious addition to any garden. Contrary to popular belief, peanuts aren’t nuts—they’re legumes that grow underground. With a little patience and care, you can grow these versatile plants at home, whether you have a spacious garden or just a few pots on your balcony. This guide will take you through the entire process, from planting to harvesting, and provide you with tips to enjoy a fresh, homegrown peanut harvest.
Why Grow Peanuts at Home?
Growing peanuts is not only a fun gardening project but also a rewarding one. They’re relatively low maintenance, enrich the soil by fixing nitrogen, and are a great conversation starter for gardeners and visitors alike. Plus, the satisfaction of harvesting your own peanuts and enjoying them roasted or boiled is unmatched!
Understanding Peanut Plants
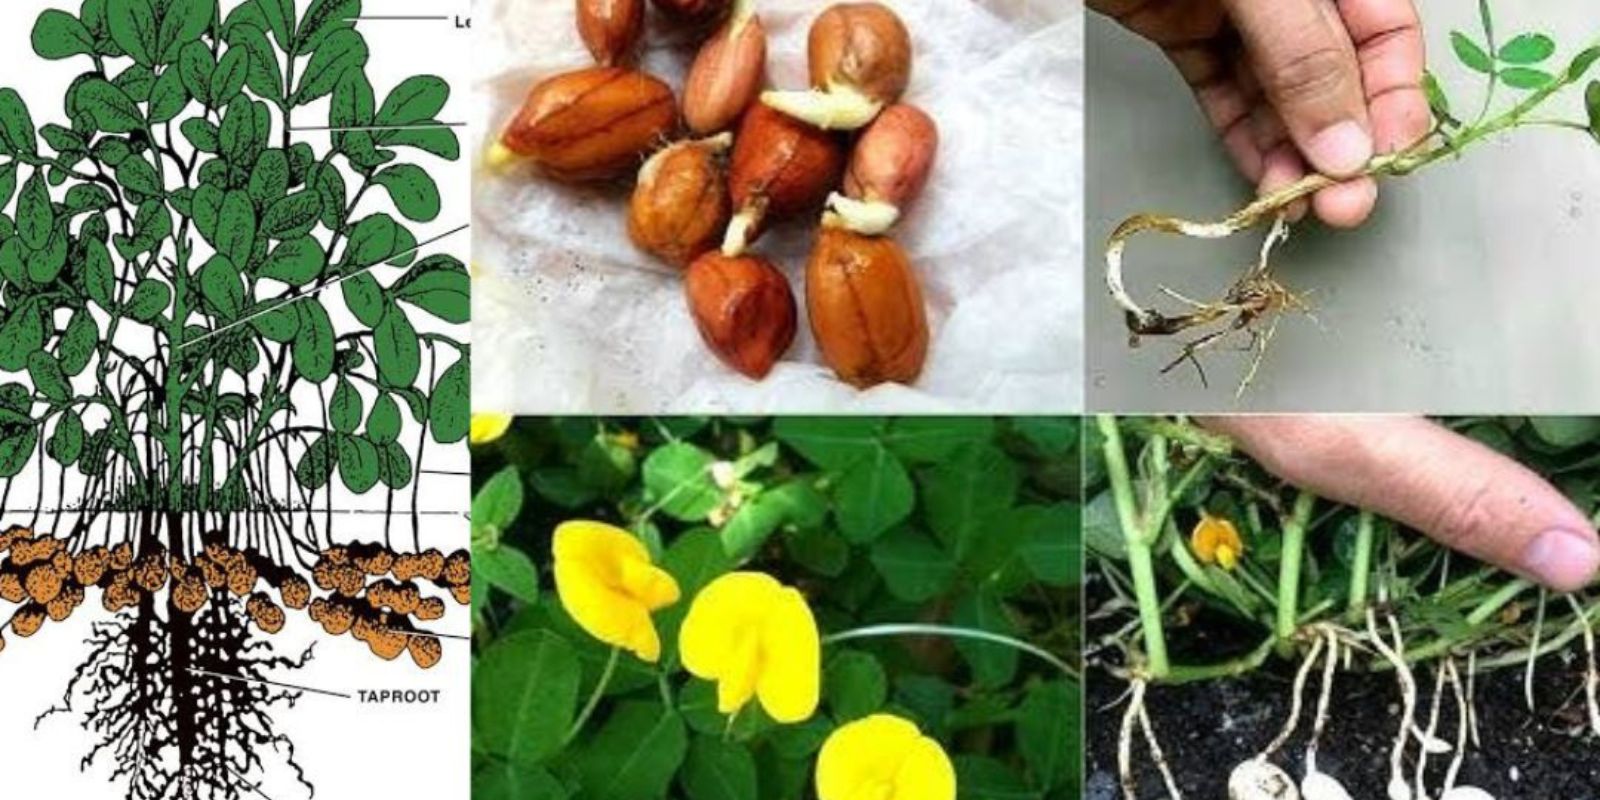
Before we dive into the steps, it’s important to understand the unique growth process of peanuts. The peanut plant starts as a leafy plant above ground, producing small yellow flowers. After pollination, these flowers form pegs, which grow down into the soil where the peanut pods develop. This fascinating growth habit makes peanuts both unique and fun to grow.
Step 1: Choosing the Right Peanut Variety
Peanuts come in several varieties, and the type you choose depends on your climate and preference:
- Runner Peanuts: Perfect for warmer climates and produce a high yield.
- Virginia Peanuts: Known for their large size, ideal for roasting.
- Spanish Peanuts: Smaller but flavorful, often used in snacks and candies.
- Valencia Peanuts: Sweet and easy to grow, making them ideal for home gardeners.
Make sure to purchase raw, unroasted peanuts or certified peanut seeds from a gardening store. Roasted peanuts won’t germinate.
Step 2: Preparing the Soil
Peanuts thrive in sandy, well-draining soil. They dislike heavy, clay soils that retain too much moisture. Here’s how to prepare the soil:
- Test the soil’s pH; peanuts prefer slightly acidic soil with a pH of 5.8–6.2.
- Mix in organic compost or well-rotted manure to provide essential nutrients.
- Loosen the soil to a depth of at least 12 inches to allow the pegs to penetrate and pods to form underground.
If you’re growing peanuts in pots, choose a container at least 12 inches deep with drainage holes. Use a potting mix that contains sand or perlite for improved drainage.
Step 3: Planting the Peanuts
Planting peanuts is straightforward, but timing is crucial. Wait until the soil temperature is consistently above 65°F (18°C) to ensure proper germination.
- Soak the Seeds: Soak raw peanuts (with the shells removed) in water overnight to speed up germination.
- Sow the Seeds: Plant the seeds 2 inches deep, with 6–8 inches of space between them. Rows should be spaced 2–3 feet apart.
- Water Thoroughly: Water the soil immediately after planting, ensuring it’s moist but not soggy.
Step 4: Providing Optimal Growing Conditions
Peanuts need specific care to thrive:
- Sunlight: Ensure the plants receive 6–8 hours of direct sunlight daily.
- Temperature: Peanuts prefer warm weather and grow best in temperatures between 70°F and 85°F (21°C–29°C).
- Watering: Keep the soil evenly moist, especially during flowering and peg formation. Reduce watering as the pods mature to prevent rot.
Step 5: Supporting the Growth Process
As the plants grow, you’ll notice yellow flowers forming. These flowers will bend and send pegs into the soil, where the peanuts will develop. Here’s how to support this process:
- Mulching: Add a layer of straw or dry grass around the plants to retain soil moisture and suppress weeds.
- Hilling: When the pegs start to grow, gently mound soil around the base of the plant to encourage pod formation.
Step 6: Pest and Disease Management
Peanuts are generally hardy, but they can be affected by pests and diseases:
- Common Pests: Aphids, thrips, and cutworms may attack peanut plants. Use neem oil or insecticidal soap to control infestations.
- Diseases: Fungal diseases like leaf spot or rust can occur in humid conditions. Ensure proper spacing and good air circulation to prevent this.
Step 7: Harvesting the Peanuts
Peanuts are ready for harvest 4–5 months after planting, typically when the leaves turn yellow and begin to wilt. Here’s how to harvest them:
- Loosen the Soil: Use a garden fork to gently loosen the soil around the plant.
- Pull Up the Plant: Carefully pull up the entire plant to avoid breaking the pods.
- Cure the Peanuts: Shake off excess soil and let the plants dry in a warm, airy spot for 1–2 weeks. Once the pods are dry, remove them from the plant.
Step 8: Storing and Enjoying Your Harvest
- Roasting: Roast the peanuts in their shells for a delicious snack.
- Boiling: Boil fresh peanuts in salted water for a traditional treat.
- Storage: Store raw peanuts in an airtight container in a cool, dry place to keep them fresh.
Pro Tips for Growing Peanuts
- Rotate crops to prevent soil depletion and reduce the risk of pests and diseases.
- Plant peanuts as a companion crop to enrich the soil with nitrogen.
- Experiment with different peanut varieties to find your favorite!
Why Growing Peanuts Is Worth It
Growing peanuts at home is a satisfying experience that connects you with nature and provides a fresh, healthy snack. Plus, peanuts are a sustainable crop that improves soil health and reduces the need for chemical fertilizers. Whether you’re an experienced gardener or a beginner, peanuts are a rewarding addition to your garden.
“Try growing your own peanuts today and discover the joy of harvesting your own crunchy, homegrown snack! Share your progress with us using the hashtags below!”